In this article, we will take a look at how you can create your first automation script using webdriverio in
If you are new to Typescript look at the basics here
- Standalone Mode
- Using Typescript
- Using Configuration helpers
If you need to visually see all these ways developed refer to this video below
Also, take a look at the sample script in the github link
 17thSep
/
WebdriverIO_Master
This is the core branch for WebdriverIO by Ap.
WebdriverIO_Master
This is the core branch for WebdriverIO, take a look at each of the folders
1. BasicTypeScript - Only TypeScript
2. Cucumber - WDIO 7 scripts with typescript in Cucumber Framework
3. Mocha - WDIO 7 scripts with typescript in Mocha Framework
4. Docker - Run WDIO 7 script in Docker
5. Networklogs - Capture Network logs
More to follow
Watch WDIO7 videos
Basics of Typescript
Create your first Mocha scripts with TypeScript
Create your Cucumber scripts with TypeScript
Run scripts in Docker (GRID+NODE)
Run scripts in Docker (IMAGES)
Capture Network logs
Watch WDIO 6 videos
Run scripts in Docker (GRID+NODE)
Run scripts in Docker (IMAGES)
Capture Network logs
Alternatively,
Take a look at the WatchVideo.md file inside each folder for the step by step instructions
If you like to support my work, please check out the below
Patreon: https://www.patreon.com/17thsep/membership
Youtube: https://www.youtube.com/channel/UCqaDA1xslraCbam2CxuKhUw
Dev.to: https://dev.to/17thsep1
Standalone Mode
Standalone can be picturized like an engine of the car, you have what you need to run but this will be easier to drive if you have all the necessary parts.
With all those necessary parts put together, we can develop our framework which is the Test Runner Mode.
Standalone Mode needs just one dependency
npm i webdriverio
After you have installed this, you can write the asynchronous way of scripting for your automation scripts.
If you need to write it in a synchronous way that's when you will need @wdio/sync library which the WebdriverIO team has designed.
TypeScript Setup
Test runner mode is the complete product where we can leverage the modules developed for specific purposes rather than developing them all by us.
We need 4 main steps to do this
1 - Install all the dependencies
2 - Create a WDIO config file
3 - Develop Automation scripts
4 - Tsconfig.json {Only needed if you choose typescript}
Dependencies
"@wdio/cli": "^7.0.8",

"@wdio/dot-reporter": "^7.0.7",

"@wdio/local-runner": "^7.0.8",

"@wdio/mocha-framework": "^7.0.7",

"@wdio/sync": "^7.0.8",

"chromedriver": "^88.0.0",

"ts-node": "^9.1.1", {Only for typescript}

"typescript": "^4.2.2",{Only for typescript}

"wdio-chromedriver-service": "^7.0.0"
WDIO Config file
A basic config file will have these elements below.
Note:
autoCompileOpts shown below is necessary for typescript to work seamlessly
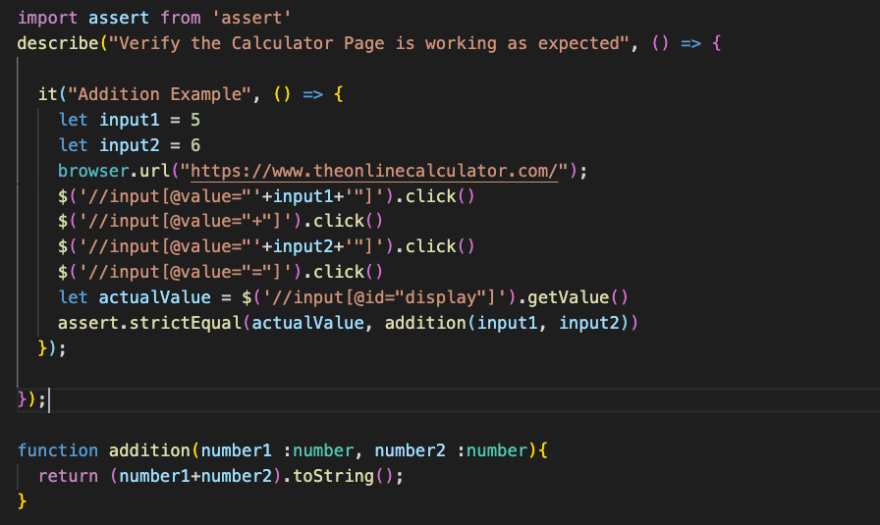
Sample Script
Once we have it all done we have our automation scripts ready.
Tsconfig.json
The one main difference to creating scripts with Typescript is that
you need to create a tsconfig.json which serves as the controller for how you want typescript to behave. A sample tsconfig file will have the below
I will talk about 2 main sections here
types
Whatever library which you include here, typescript will let you verify your scripting is as per the definitions inside these libraries. For e.g. if you have not included "@wdio/mocha-framework" in here, when you write scripts in the files in the include section below Typescript will warn you for definition not found error.
include
This is a list of file for which we need typescript to do a type check
WDIO Configuration Helper
If you find doing this tough, that's when the WDIO Configuration helper comes in
You can access that after installing @wdio/cli by typing in
npx wdio config - if you want to choose the options
npx wdio config -y - if you want to get some basic automation script running
Cheers
Ap.


Top comments (1)
Nice way of breaking down the initial setup up! Keep it up!!!