Building on my previous K3s posts, this one will cover deploying Jenkins and a private Docker registry, as well as configuring the Jenkins Kubernetes plugin.
The overall setup looks like the following:
Private Registry Setup
For the private registry, I primarily followed this article: Installing Docker Registry on K3s.
My version of the configuration can be found here: ks-config/docker-registry.
In order for K3s to pull images from the private registry, the containerd daemon on each node needs to access the registry running within a pod in K3s.
In my configuration, the registry is exposed via ingress with a host of docker.registry.private, so we can edit /etc/hosts on each node to map this hostname to the current node.
An example from the master node would be the following:
192.168.1.244 rpi-1 docker.registry.private
192.168.1.245 rpi-2
192.168.1.246 rpi-3
This mapping needs to be done on each node since a pod may be deployed to any node in the cluster.
Next we need to configure K3s to know about the private registry. This is done by creating the file /etc/rancher/k3s/registries.yaml on each node:
mirrors:
  docker.registry.private:
    endpoint:
      - "https://docker.registry.private"
configs:
  "docker.registry.private":
    auth:
      username: registry
      password: <replace-with-your-password>
    tls:
      insecure_skip_verify: true
The initial K3s Ansible setup placed everything on the worker nodes under /etc/rancher/node, but registries.yaml is only recognized from /etc/rancher/k3s, so you will need to create this directory first.
I wasn’t sure of the best way to configure the tls section to trust the self-signed certificate presented by registry’s ingress, so specifying insecure_skip_verify: true disables certificate verification for now.
After getting this file in place on each node, you can adjust the permissions and restart K3s.
# Master node
sudo chmod go-r /etc/rancher/k3s/registries.yaml
sudo systemctl restart k3s

# Worker nodes
sudo chmod go-r /etc/rancher/k3s/registries.yaml
sudo systemctl restart k3s-node
At this point, we should be able to deploy a pod that references an image from docker.registry.private. Assuming we pushed the image arm32v7/nginx to our registry, we can deploy the following pod:
apiVersion: v1
kind: Pod
metadata:
  name: docker-registry-test
spec:
  containers:
  - name: nginx
    image: docker.registry.private/arm32v7/nginx
If everything is working correctly, the pod should deploy and end up in the running state.
Jenkins Setup
For deploying Jenkins, I primarily followed these two articles:
My configuration can be found here: ks-config/jenkins
Unfortunately the standard Jenkins image doesn’t support arm64, but the images under jenkins4eval do, so using jenkins4eval/jenkins:latest ended up working.
In my configuration, I created an ingress with the host jenkins.private and then mapped this hostname to the master node in /etc/hosts on my laptop. This follows the same approach for how I’m accessing other services from my laptop, such as Longhorn UI and the private registry.
The first time accessing https://jenkins.private, you will be prompted to unlock Jenkins. The password is printed to the log of the Jenkins pod during start up. The above articles cover this in more detail.
Assuming you are successfully logged in to Jenkins, the next thing to do is install the Kubernetes plugin.
Jenkins Kubernetes Plugin
The Jenkins Kubernetes Plugin launches worker agents as Kubernetes pods, which means we get a fresh build environment for each job based on a pod specification.
From the left hand menu, select “Manage Jenkins” and then “Manage Plugins”. Search for the Kubernetes Plugin and select “Install without Restart”. I already have it installed, but the plugins page looks like this:
After the install completes, restart Jenkins by using the URL https://jenkins.private/safeRestart.
Once Jenkins has restarted, navigate to “Manage Jenkins” -> “Manage Nodes and Clouds” -> “Configure Clouds”, and add a cloud of type Kubernetes.
We need to enter the namespace where Jenkins is deployed, and then we can click Test Connection to verify that Jenkins can communicated with Kubernetes.
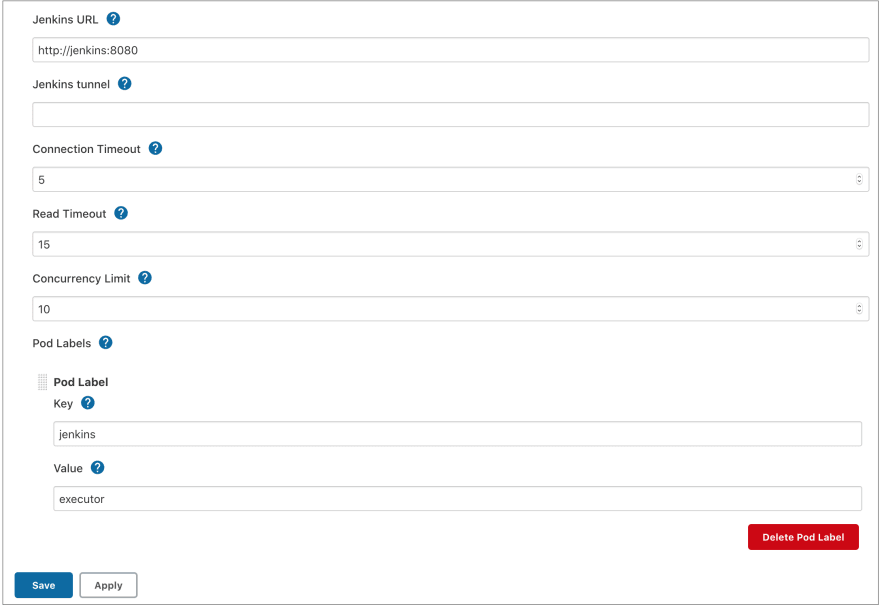
In the next section, we need to enter a value for the Jenkins URL field. This is the URL used by the Jenkins worker pod to communicate back to the main Jenkins server. This URL should use the ClusterIP service that we created as part of deploying Jenkins, so the URL should be http://jenkins:8080.
Under the Advanced section, set the Defaults Provider Template Name to default-agent. This is the name of a pod template we are going to create to provide default values for all worker pods. The main reason we are defining a pod template is to override the default jnlp container to a specific one that supports arm64.
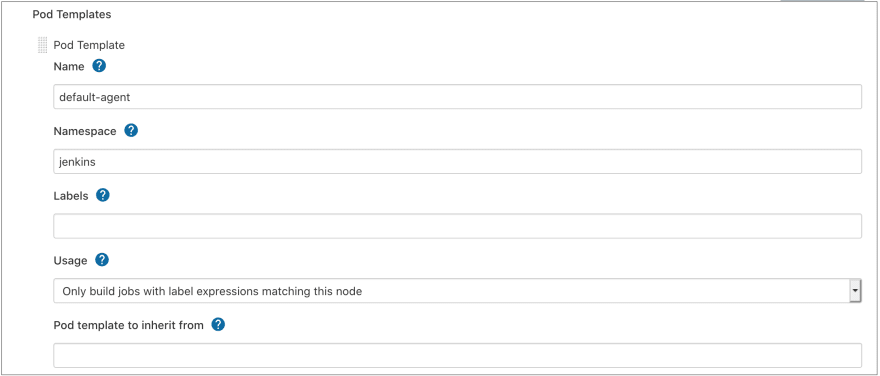
Under Pod Templates, click Add Pod Template, enter the name as default-agent and the namespace as jenkins:
Under the Containers section, click Add Container, enter a name of jnlp and specify the image as pi4k8s/inbound-agent:4.3:
We should now have the minimum working configuration for executing a pipeline.
Test Pipeline
From the main Jenkins page, click New Item and add a pipeline named k3s-test-pipleine. Under the Pipeline Definition, select Pipeline Script and enter the following script:
pipeline {
    agent {
        kubernetes {
            defaultContainer 'jnlp'
        }
    }
    stages {
        stage('Hello') {
            steps {
                echo 'Hello everyone! This is now running on a Kubernetes executor!'
            }
        }
    }
}
Click Build Now and we should get a successful execution. The output of the job should print the YAML definition used for the worker pod, which should show the customizations we made:
In the next post I’ll cover how to setup a pipeline that builds an image for a Spring Boot application and publishes to our private registry.


Top comments (0)