Swift packages are bundles of source files, binaries, and resources that you can reuse in your projects. They can also be seen as a tool, similar to CocoaPods and Carthage, for controlling the distribution of Swift code. It is integrated with Swift's build system to automatically download, compile, and link dependencies.
In this tutorial, we are going to learn:
- how we can use the Nimble Code Editor to create swift packages
- manage projects and dependencies
- how to read and change the
Package.swiftfiles. - how can we link the created SPM to an existing SCADE project.
Definition of some Key Terminologies Used
- Packages: Packages are basically repositories that house several executables and libraries. A package essentially includes source files and a manifest file.
-
Manifest File: The manifest file, also known as the
Package.swiftfile, defines the package name and its contents using thePackageDescription module. It is also concerned with managing dependencies, and every package has itsPackage.swiftmanifest to handle any dependencies that it may have. - Targets: A package may have one or many targets. Each target identifies a product and has the option to declare one or more dependencies.
- README: This file enables you to describe how other developers can use your library.
- Source Folder: Location of our swift development files
- Tests Folder: Unit tests directory.
Getting Started
This first section of this tutorial explains how to use the Nimble Code Editor to create a swift package that alphabetically returns all the European nations together with their respective capitals. The tutorial's second part focuses on discovering how to link the Swift package we built with our ListControl project:
Section 1 - Using Nimble to Create a New Swift Package
Step One: Create a new Swift Package with Nimble
To begin, launch the Nimble app and click File > New > New Project... from the top-left menu bar. On the following pop-up screen, select the Swift Package template.
As an alternative, you can accomplish the aforementioned using the keyboard shortcut Shift + Command + N.
Type your package name, select your project folder location, then press the Create button to create the swift package folder - you are expected to do all of this after selecting the Next button of the Swift Package template screen.
Step Two: Writing Source Code in the Package
Next is to write/add the source code in our Swift package. Copy all the source files into the Sources\EuropeanCountries folder. If you'd like, you may delete the default Sources/EuropeanCountries.swift template file and replace it with our Country.swift file:
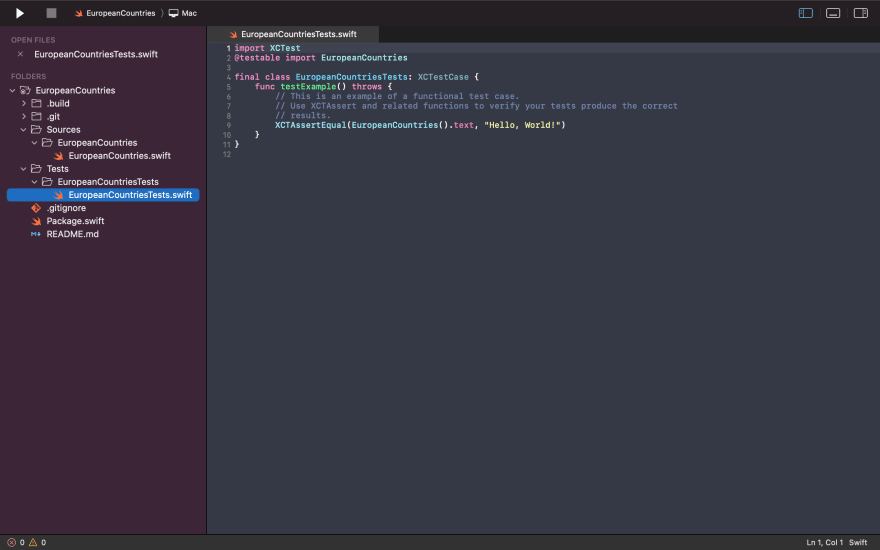
Copy all of your unit test files into the TestsEuropeanCountriesTests folder if you have any.
We completely deleted the Tests folder because we won't need unit tests for this tutorial. Recall that you must remove the .testTarget syntax from your package targets if you wish to delete your swift package Tests folder along with us.
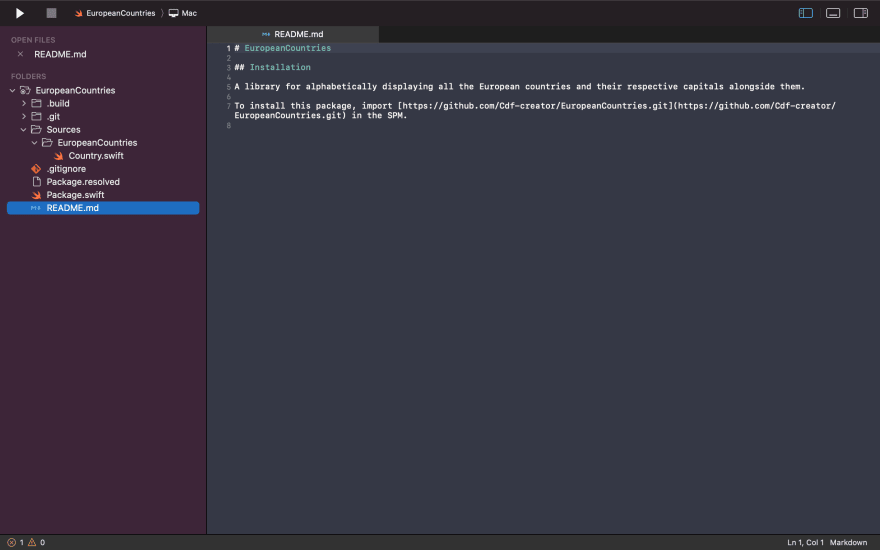
It's also advised that you keep your README.md file meaningfully updated. This makes it easier for other developers to use your Swift package:
Step Three: Edit the Default Manifest (Package.swift) File
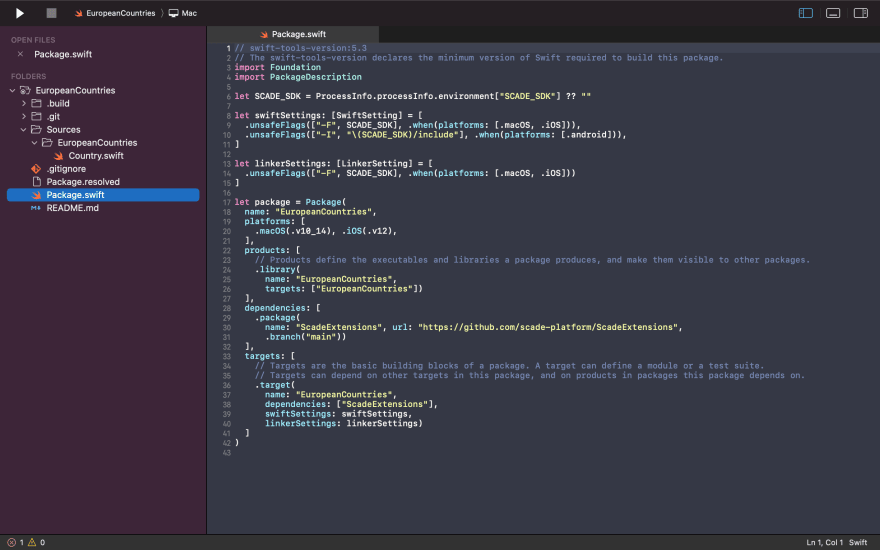
You’ll find an array of dependencies in your swift package’s manifest file. There is one example dependency there, but it is commented out because it is solely for reference. If you have dependencies for your Swift package, you can define them under the dependencies tag. Add all the dependencies in your target too.
Most importantly, you need at least the URL info and the name of a library to add it as a dependency in your manifest file.
We implemented inheritance from EObject in this tutorial so that the Country class could be used as a binding in the ScadeKit widget. We also needed the ScadeExtensions library as a dependency using ScadeKit.
Note: If you also require the ScadeExtensions library as a dependency, you must add the ScadeKit information provided below to your SPM package manifest file.
This tutorial Manifest file together with its minimum iOS Version and Dependency looks like this:
Step Four: Publishing Your Swift Package
There is now just a step left before we can distribute our swift library. Just use the Terminal application to upload your SPM code to your GitHub repository. Developers will be able to access your library when they enter your SPM link.
Section 2 - Using a Package in a SCADE Project
Swift packages can be used in SCADE in two different ways. The SPM package we just created can be used locally in a project or uploaded to a personal Git repository. Both methods will be demonstrated for you in this tutorial section:
1. How to use Swift Package Locally
Open the Package.swift file of your SCADE project, under dependencies, add the path to where your SPM package is located locally in your machine via the .package(path: “/path/to/package”) syntax. Not only that, but you also need to list the name of your package among the targets. Once all of these are done, you have successfully added your package to your project, and can be imported and used!
2. How to add Swift Package to your SCADE Project via Git Repository URL
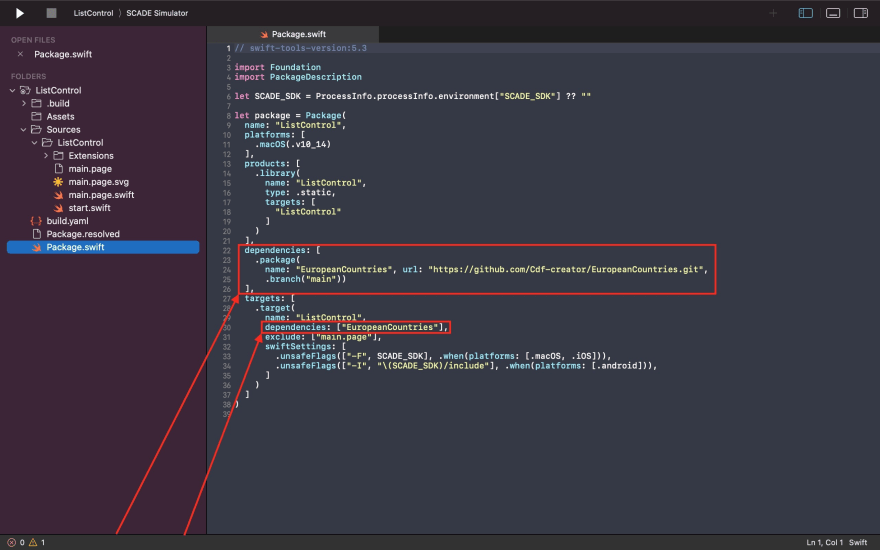
Similar to the manual way described above, open the manifest file of your SCADE project and paste the GitHub repository URL for your SPM package under dependencies along with the package and branch name using the appropriate syntax. You must also put your package name as a reference under the target panel.
This goes for both methods explained above - import your package's product as a Swift module to utilize its functionality in your SCADE project.
Both classes (Country and Countries) in the following code snippet import the EuropeanCountries module of our Swift package and make use of its features:
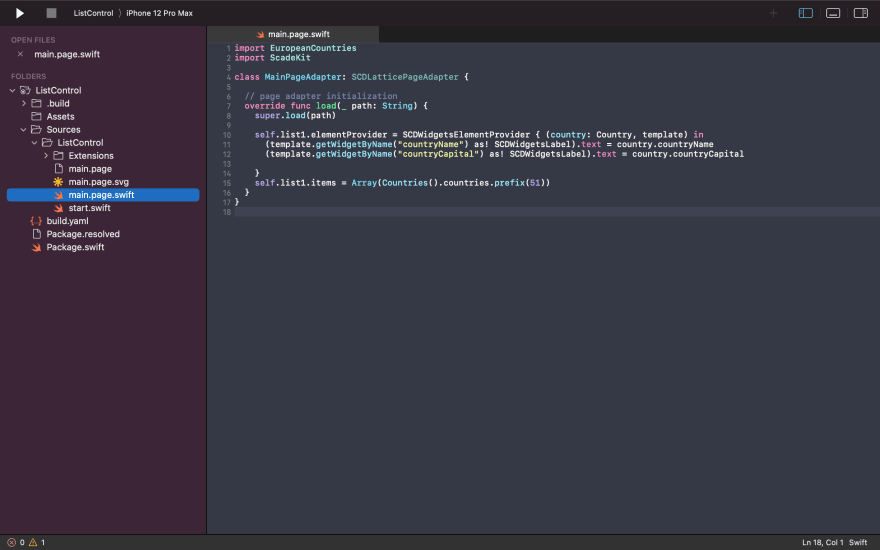
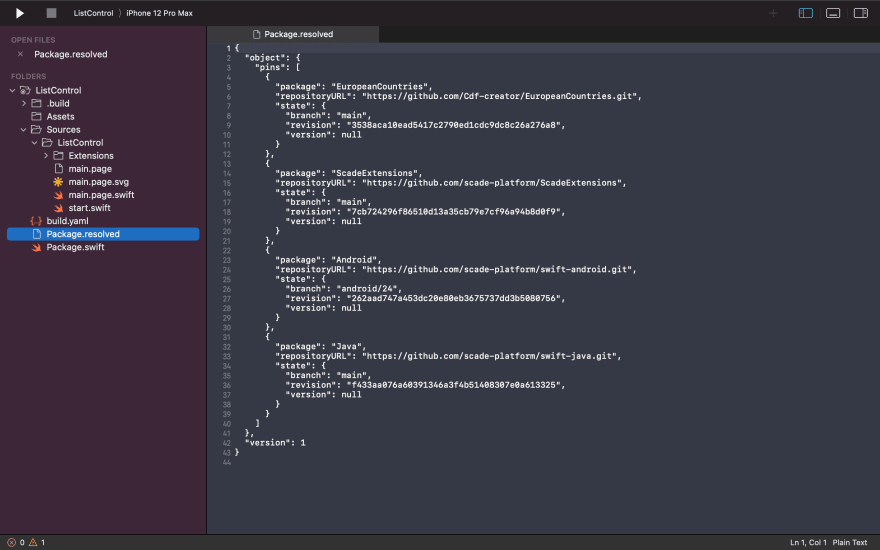
SCADE generates the Package.resolved file whenever you include a package dependency in your project. The checksum of each binary dependency is listed along with the exact Git commits that each package dependency corresponds to.
The Package.resolved file is located in your project directory as a standalone file.
Conclusion
This tutorial has taught us how to create SPM packages using the Nimble Code Editor and how to use such packages for cross-platform native app projects. If you have any questions, kindly remark below. Thanks for reading!






Top comments (0)