
Welcome back to our Dusty Trails tutorial series! If you missed the previous part, you can find the links to it at the end of this tutorial.
We no...
For further actions, you may consider blocking this person and/or reporting abuse

Great tutorial! :)
It seems really easy to do it
Thank you! I hope you found it helpful 😊
For sure!
Hey Christine While Drawing the map , I observed that only my water tilemap was showing in the main scene. I used z indexing to get around that?. Was that okay or will there be some issue with this?
Hey Nayan, can you attach an image of your scene tree in the comments so I can have a look? If you can run around then it should be fine.
Hey Christine I had a doubt. I would really like my godot to look as clean as yours when I am drying a map. How do i change it from it being always showing grid?
Hey Nayan! I'm sorry you're having issues. If you look next to your Layers property in your panel below, you will see the option to turn off your Grid (it's the icon that looks like a block with a bunch of squares).
You can press that to toggle your grid view on and off. This should fix your problem!
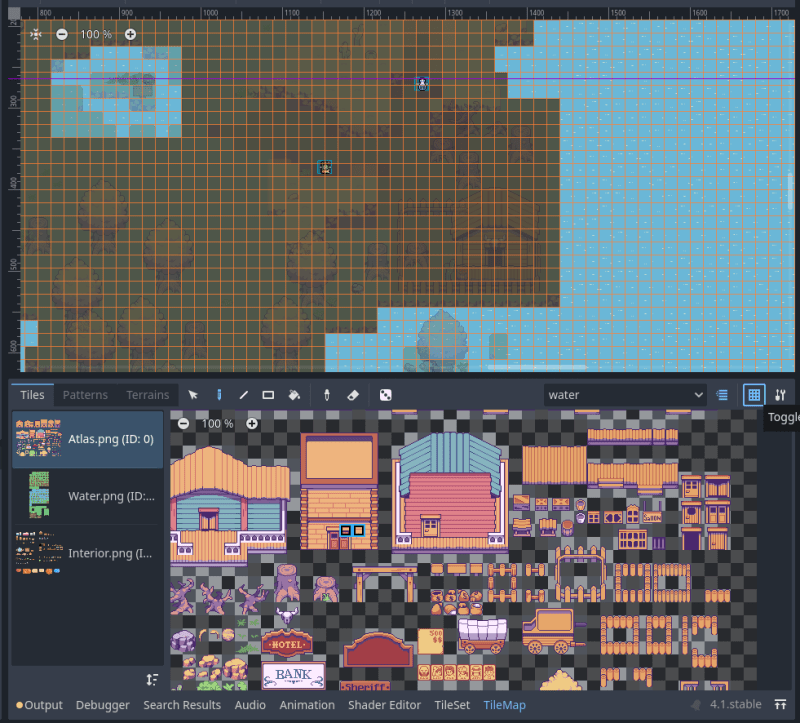

Furthermore, if you were referring to the way your nodes snap on the grid, then you can also toggle your Smart Snapping off. This is the magnet icon with small grids above. This allows you to move nodes around more freely.
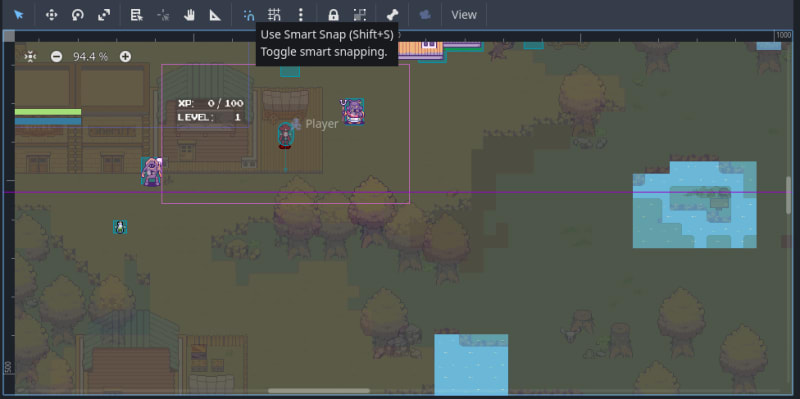
You can also toggle your entire scene's grid on and off via the Grid Snap menu. This is the magnet icon with large grids above. This is just used for guidelines when working with your scene.

Let me know if this helped, or if you need further assistance!😊
Regarding: "That is just to show you that you can have multiple sands in one terrain element set."
Is this just a logical grouping, so that you can keep all sands in the terrain set organized? Or is there some practical reason to group it that way that the engine recognizes?
I should have said "functional" rather than "practical".
Please disregard. I understand now.****
I know this tutorial uses 4.1.1, but not knowing how different they were, I started with my version of Godot 4.3, and I'm at the part where you create the TileMap Layers. It's different now, with Godot recommending using TileMapLayer instead; I attempted to look up the differences, but I'm not sure where I should be creating those layers, or if I should make a layer for each terrain set (but then, how would I link it all to the Main Map)? Do you have any advice for this? I was really looking forward to learning Godot with this project
EDIT: I wound up creating a 2D node, labeled "Map" and put in the TileMapLayers underneath it. the Interior has the "Exterior (ID: 0)" tileset and so on. The Exterior has 2 terrain sets, Sand and Grass; the Water has the water terrain.
I've no idea if this is the right way to do things for this project. But looking up tutorials seemed to have the different layers simply be different TileMapLayers?
Hi Christine! This step "A popup will arise asking you if you want the engine to create automatic tiles." did not happen when I dragged the tilesets over.
After playing around with it a bit more, researching bugs, etc...I discovered that it was because I dragged all three PNGs at the same time. I did not realize that they had to be dragged over one at a time. Perhaps the instructions can be modified to highlight this?