This tutorial shows how to use 9VAe : Free SVG/GIF Animation editor for beginners.
User Interface
Here is an overview of the 9VAe interface.
| Item | Explanation |
|---|---|
| 1. Tool Box | Select, Left side is filled shape, Right side is unfilled shape, Text |
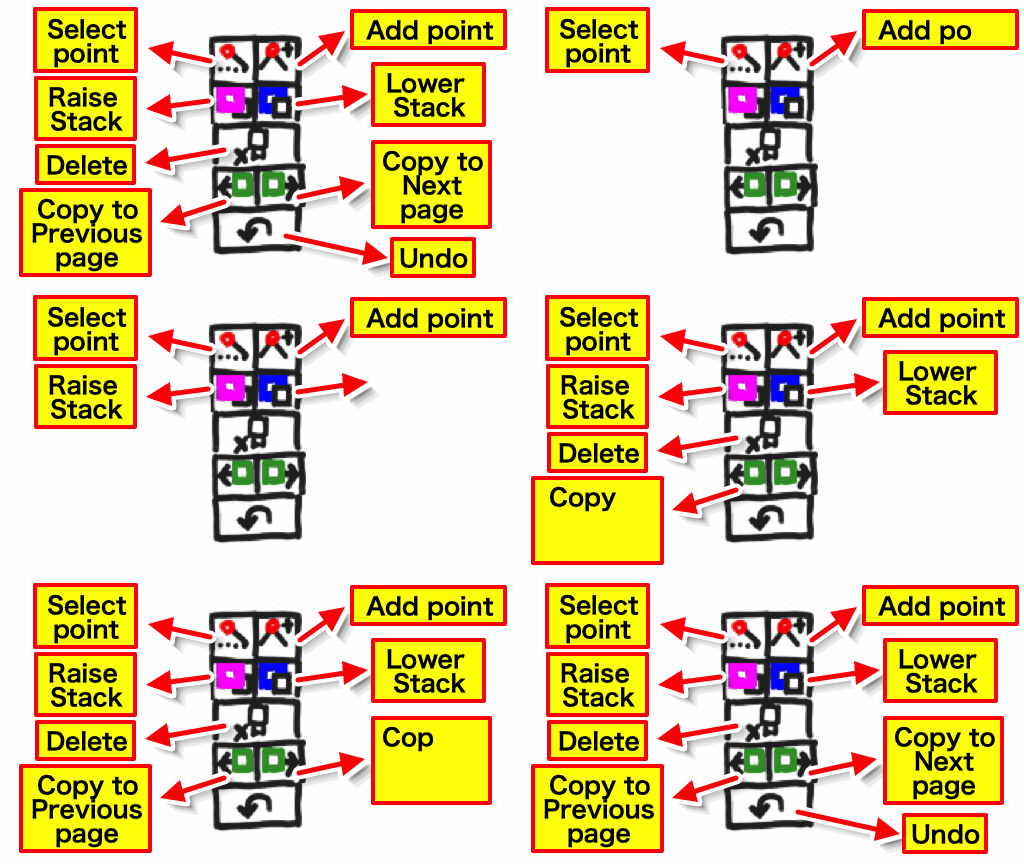
| 2. Editing Tool | Point selection, Stacking order, Delete, Copy to previous / next page, Undo |
| 3. Play / Stop | Play / Stop |
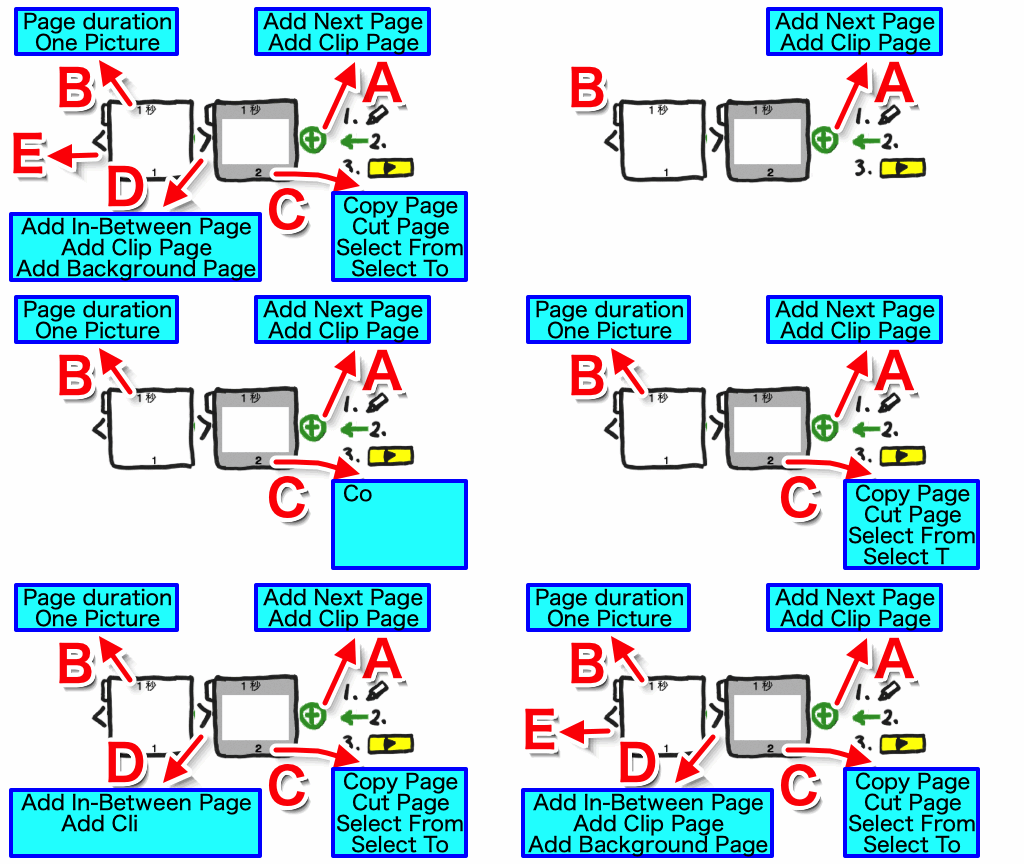
| 4. Page Bar | Add a next page. Interpolate between pages |
| 5. Palette | 1. Fill Color, Line Color, Width, Line types..., 2. Text Color..., 3. Stamp |
| 6. Input button | Animation / Sound / Photo |
| 7. Clip memory | Copy / Cut / Paste / Animecast |
| 8. Time Control / Layer | Register and attach a motion graph. Fix, Hide, Select |
1.Tool Box
- Contains Tools for selecting or drawing objects.
- The buttons on the left side are the buttons to draw shapes with fill.
- The buttons on the right side are the buttons to draw shapes without fill.
- The top large button is the button to select objects.
- 'A' is the button to draw a text.
2. Editing Tool
Here are buttons as follows from top to bottom.
- Edit anchor points of selected shapes (only move / move, add or delete points)
- Change Stacking order of selected objects(Raise / Lower )
- Delete selected objects or selected anchor points
- Copy selected objects to the previous page / copy to the next page
- Undo or Redo (+Shift Key)
3. Play / Stop button
Play animation / Stop animation.
4. Page Bar
- 9VAe's Page is a keyframe of the animation.
- A: The pages can be added by clicking '+' button on the right side of the end page. > Click 'Add Next page' on the menu.
- B: Each page has time duration in seconds. You can change the value by clicking on it.
- C: You can select multiple pages by clicking the page number.
- D: In-Between page,Background page,Blank page and clipped page can be added by clicking between pages.
5. Palette(Color, Width, Line types...)
- A: Click each buttons to set Fill Color,Stroke Color,Stroke Width,Line Type,Arrow Type... You can change objects color after selecting them.
- Click the upper tabs to change the palette to B: Text Color palette and C: Input Figures palette.
6. Input button (Animation / Sound / Photo)
- Input 9VAe animation file. Tne animation will appear on the current page. It is similar to 'movie clip'. The animation object is caled AnimeCast in 9VAe.
- Input Sound, Music file. The sound or the music will start playing on the current page.
- Input Photo image file. Tne image will appear on the current page.
7. Clip memory (Copy / Cut / Paste / Animecast)
- Copy selected objects.
- Cut selected objects.
- Paste the clipped objects. Use Paste to the Stage normally. Use Duplicate, if you want to make multiple objects.
- Make AnimeCast from clipped objects.
- The objects in multiple pages can be clipped.
8. Time Control Panel (Time curve, Layer)
- Click '+' to register selected objects to the box in the Time Control Panel.
- Time curve can be added to the registered objects by clicking them.
- Registered objects can be set as visible/hidden or selectable/unselectable by clicking them.
- The right bottom 'Circle button' can reset the visible and selectable setting.
9. Select frame handle menu
- A: Click the corner handle of the selection frame (A in the above figure) to resize or rotate objects.
- B: Click the handle on the side of the selection frame (B in the above figure), you can bend, transform the perspective, invert, etc.
- C: Click the center handle "+" of the selection frame. Various menu for each object will appear.
Final Words
This article explained overview of 9VAe. The interface is very simple because 9VAe doesn't have Timeline.
The next article '9VAe Beginner Tutorial 1' shows how to create a quick example animation.
Related article
9VAe Introduction
- 9VAe Free SVG/GIF Animation editor: Introduction
- 9VAe Download and Install
- 9VAe's Frequently Asked Questions


Top comments (0)