
Upgrade your automations with AI without spending much, integrate DeepSeek with n8n in your solution!
What is n8n?
n8n is a low-code/no-code automation platform that lets you connect apps, services, and APIs in a visual way. With it, you can create complex workflows without coding, integrating tools like WhatsApp, Google Sheets, and AI models. It's like a digital LEGO® for automations, offering flexibility and scalability.
Meet DeepSeek
DeepSeek is an open-source AI model that stands out for offering performance comparable to GPT-4 and Claude 3.5 Sonnet, but at significantly lower costs.
DeepSeek Models:
-
DeepSeek V3 (Chat):
- Focus: Simple tasks like chatbots and virtual assistants.
- Performance: Quick responses, ideal for agile interactions.
-
DeepSeek R1 (Reasoning):
- Focus: Complex tasks requiring advanced reasoning.
- Performance: More elaborate responses but with longer response times (up to 50 seconds).
Price Comparison
To better understand the cost-benefit of DeepSeek...
Comparison table (per million tokens):
| Model | Input Tokens | Output Tokens |
|---|---|---|
| DeepSeek V3 (Chat) | $0.01 | $0.28 |
| DeepSeek R1 (Reasoning) | $0.14 | $2.19 |
| OpenAI GPT-4 | $2.50 | $10.00 |
| Claude 3.5 Sonnet | $3.00 | $15.00 |
The above values are approximate and based on information available until February 1, 2025.
How to Integrate DeepSeek with n8n?
First, you'll need to have n8n installed; follow the official documentation for installation.
Integration Steps:
-
Install the n8n-nodes-deepseek Node:
- In n8n, go to Settings > Community Nodes > Install a community node.
- In npm Package Name, type "n8n-nodes-deepseek", select the checkbox "I understand the risks of installing unverified code from a public source" and click the "Install" button.

-
Create the Credentials:
-
Configure the Credentials:
- Create a workflow by clicking "New Workflow" on the Overview tab;

- Click on "Add first step" in the center of the workflow and add a Trigger manually to start the flow;

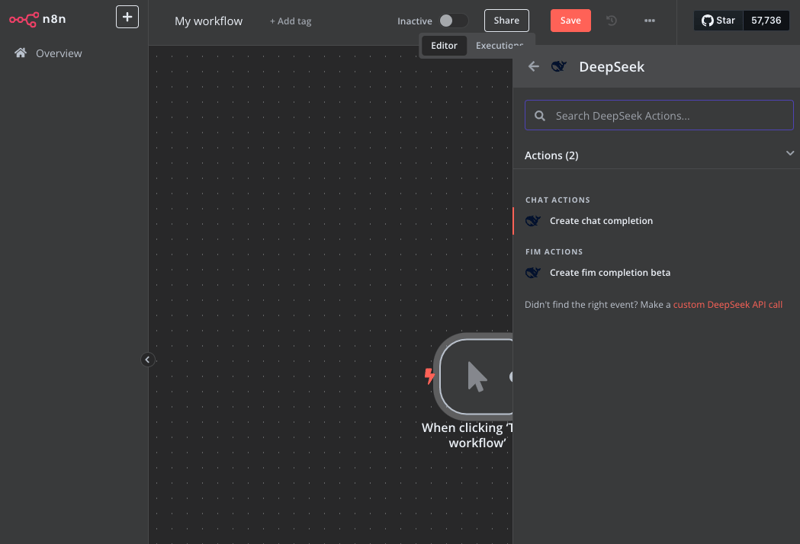
- Click the "+" to add a service to the flow and type "deepseek" in the search and click on the node we installed;

- Click on "Create chat completion" to open the configuration screen;
- In Select Credential input, click the arrow to open the menu and click + Create a new credential;

- Paste your API Key and click the "Save" button;

-
Configure the desired model (V3 or R1) in "Model" and set the messages in "Prompt":
- System Message: type: "You are a helpful assistant";
- Click "Add Message";
- User Message: type: "Who are you?".

-
Test the call:
- Click the "Test step" button, it will process and respond to the test request.
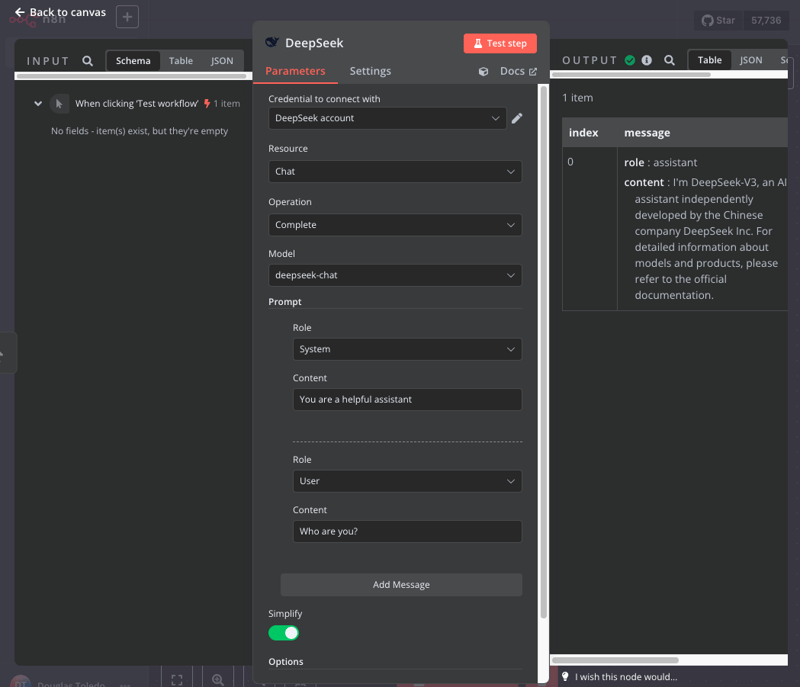
Note: The V3 will provide a quick return, the R1 is ideal for detailed responses, but the processing time may not be suitable for real-time applications.
-
You did it, congratulations!
- Was it difficult? Leave a comment below.
When to Use Each Model?
-
DeepSeek V3:
- Ideal for: Chatbots, quick responses, and real-time interactions.
- Advantages: Low cost and high speed.
-
DeepSeek R1:
- Ideal for: Tasks requiring complex reasoning and detailed responses.
- Advantages: In-depth analysis, though with longer response times.
Conclusion
Integrating DeepSeek with n8n is an effective and economical way to implement AI in your automations. With significantly lower costs compared to other models, you can expand your projects without breaking the bank.


Top comments (0)