Authored by our newest team mate Daniel, who you can find on Github as @dholms
Here at Fission, we've been hard at working cooking up cool new experiments with IPFS. IPFS's content-based addressing which gives us a flat, universal namespace to store files and other data prompts us to think differently about how we build and deploy software. This leads us to build prototypes and experiments, which help us:
- Ideate projects that either we or another team can expand upon
- Test and calibrate the tools we build for real world hands-on usage
- Prompt the creation of new libraries/technologies
Our most recent application came from a simple question that we asked: if my preferences are generally the same across apps, why do I need to fill out that same information in every app?
Introducing IPFS Portable User Settings — a completely client side application that allows you to update your preferences over IPFS and take them with you wherever you go.
Play around with the live demo
Background
While the emerging decentralized web and the web of yesteryear differ in many ways, one way to think about it is as a difference in user model. The web2.0 user data model is company (or platform)-centric. This involves locking your data in monolithic company-owned databases, with the end result being that your identity is fragmented and duplicated across a variety of corporate silos. Web3 brings with it a new way of conceptualizing data: a user-centric data model. In this model, a user owns their data and that data can only be read/edited by them and trusted people and apps. Apps take on a different function: they exist as "windows" that a user grants permissions to view or make edits to certain attributes of their data.
Often, the benefits of web3 technology are put in reactionary terms. That is, it's reacting to the overreaches/missteps of the current corporate stewards of the internet: censorship, sloppy or malicious use of user data, temporality (will I be able to see my photos on Facebook in 25 years? my archived emails on Gmail?), and so on.
One thing that we aim to do at Fission is not only address the failings of web2, but also create positive reasons to make the jump to web3.
Decentralized apps should be fun and easy for developers to create, and exciting for users to adopt because they offer features not possible in the old web. This was our motivation when developing our Portable User Settings. We wanted to give the intuition behind some of what's possible with web3 and a technical demo that a more robust version could be based on.
We also wanted to make this app completely p2p. No HTTP gateways required here! If your browser is IPFS-enabled and you're running a local daemon, the app connects to that daemon. If not, it gracefully sets up an in-browser instance of js-ipfs.
There are lots of directions this could go. Maybe we want to enable universal dark mode so that all the websites you browse respect your global dark mode setting? Leave a comment on what portable user setting you'd like to see in the world.
Technical Results
This project yielded not only a pretty neat demo, but also some useful technical offshoots:
get-ipfs
One of the biggest issues that developers can face when trying to make use of the decentralized web is the high barrier to entry. We wrapped our IPFS fallback functionality into it's own package: get-ipfs. This is your new one-stop shop for loading an IPFS instance into a webpage. It's as simple as const ipfs = await getIpfs() and you can make direct P2P use of the decentralized web in your webapp. Give it a go and let us know how it works for you!
Fission JavaScript Client
This app was also our first time using the Fission JavaScript client in the wild. While adding/getting is done P2P, requests to pin must be sent over HTTP. The library, however, has all the functionality you need to make IPFS-enabled apps over HTTP. Check out the library and see what cool uses you can come up with!
Hosted IPFS Node
While we were already hosting an IPFS node, our hosted node is now much more robust. It's capable of handling secure websocket connects (so it can talk to in-browser js-ipfs nodes!) and stores data in S3. Check out the walkthrough we posted for setting up your own IPFS node on AWS!
Again, checkout the demo here, or keep reading to find out how to build and host your own!
Run/Deploy your own app
Fork the repo
Note: This is only necessary if you are planning on deploying your own user settings app. If you just want to play around locally, you can simply clone the repository.
Click "Fork" in the upper-right corner of the repository.
Clone the repo locally
In your terminal, clone the ipfs-user-settings repo:
git clone https://github.com/$YOUR_USERNAME/ipfs-user-settings.git
cd ipfs-user-settings
Setup environment
The environment variables are optional, but will need to be setup for the best user experience.
First, create a .env file in the root of the repository:
touch .env
Your .env will end up looking something like this:
REACT_APP_DEFAULT_CID = QmUWWqCNSdZmus7mc52um5cpqUi1CaE97AzBTY7iWfBXV9
REACT_APP_BOOTSTRAP_NODE = /dns4/ipfs.runfission.com/tcp/4003/wss/ipfs/QmVLEz2SxoNiFnuyLpbXsH6SvjPTrHNMU88vCQZyhgBzgw
REACT_APP_INTERPLANETARY_FISSION_URL = https://runfission.com
REACT_APP_INTERPLANETARY_FISSION_USERNAME = ADD_USERNAME_HERE
REACT_APP_INTERPLANETARY_FISSION_PASSWORD = ADD_PASSWORD_HERE
Let's walk through what each of those variables will do.
REACT_APP_DEFAULT_CID: the cid that contains the default settings that you want a new user to see. You can set it to the above value for our recommended defaults (or leave it blank and it will default to that).
REACT_APP_BOOTSTRAP_NODE: the multiaddr of the ipfs node that you would like the user's node to connect to. You can set it to the above value to connect to the IPFS node that Fission hosts (or leave it blank and it will default to that).
Note: if you use a custom node, it must be interoperable with js-ipfs. This means that it either needs to connect via WebRTC or Secured Websockets (note the wss in the above multiaddr).
REACT_APP_INTERPLANETARY_FISSION_...: the last three variables are your provisioned account information for using the Fission web-api. These are used for pinning content to the Fission IPFS node so that content will stay online even after a user goes offline. If you leave them blank, the webapp will not pin user content. At the moment, these can be obtained by joining the Fission Heroku add-on alpha. If you've tried out our earlier photo gallery demo, you can use the same credentials here, otherwise follow that tutorial to provision a username and password
Run the app locally
First install dependencies:
npm install
Then run the app:
npm run start
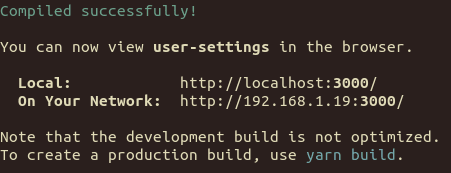
This will open up a page in your browser at http://localhost:3000!
Play around a bit! Try changing your settings, saving it, and loading past CIDs.
Build app
In order for your app to build with the correct internal links, you'll need to change the homepage:
Open package.json and change the homepage to the url where this site will be hosted ($YOUR_USERNAME.github.io/ipfs-user-settings).
Build the app:
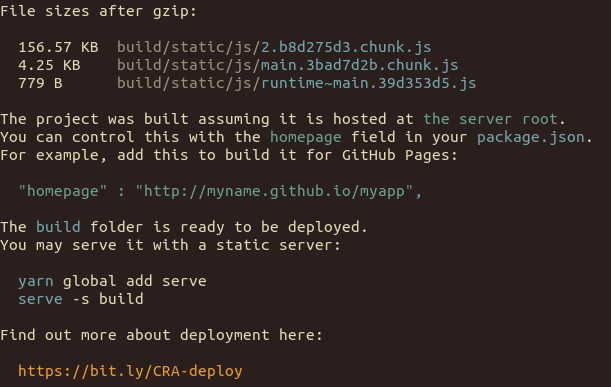
npm run build
Deploy app
Deploy with your favorite tool: Heroku, GitHub pages, etc. Or if you're reading this a month from now, use the new "Fission Live" tool 😉
We've included a deployment command for GitHub pages.
First, make sure that your repository is set as the git remote.
This won't work if it's still set to fission-suite.
Run: git remote -v and ensure that that the url next to remote is https://github.com/$YOUR_USERNAME/ipfs-user-settings.git
If you forked the repo earlier, this should be fine. If you do need to change your remote, just run
git remote set origin https://github.com/$YOUR_USERNAME/ipfs-user-settings.git
Deploy the app:
npm run deploy
Now open your browser to $YOUR_USERNAME.github.io/ipfs-user-settings to see your site up and running!
Let us know how it goes! We're always eager to hear any feedback so come join the conversation on our forum, Discord, or GitHub.


Top comments (0)