Note: This article is part of the course Introduction to iOS using UIKit I've given many times in the past. The course was originally in Spanish, and I decided to release it in English so more people can read it and hopefully it will help them.
What is a Storyboard?
A Storyboard is one way of using Interface Builder for designing and developing views in iOS. Each Storyboard described one or many screens. Each screen in a Storyboard is linked to a UIViewController.
We can navigate between the screens that are designed using Storyboards using Segues.
In theory, it isn't required for us to instantiate view controllers manually if we decide to use Storyboards, because the navigation between them and the data that we need to pass between a screen to the next one, is all handled using segues.
In practice, this pattern can result not as intuitive as we want.
What is a XIB?
A Xib is another way of using Interface Builder for designing and developing view in iOS. Each Xib describes a single screen. As in Storyboards, each screen in a Xib is linked to a UIViewController.
Navigation between screens are defined outside of the Xib file, by manually instantiating controllers using their init method, as we've seen during the second lesson about Swift.
Which one are we going to use?
During this course, we'll use Xibs, because of a couple of reasons:
- It's the most widely used way to develop views in the industry right now.
- A Xib file loads quicker than a Storyboard in Xcode, because Xib files are much smaller. In a bigger project, with bigger Storyboards, this is even more important.
- A Xib is commonly placed alongside its Swift counterpart. In a Storyboard, if we're looking for a specific view, this is slightly more inconvenient.
- Instantiating a controller in code is more intuitive and it's more consistent with other patterns in iOS.
Base App
When we create a project in Xcode, it's created using Storyboards. Adapting it to use Xibs instead of Storyboards is a boring task that doesn't teach us much.
In order to avoid doing that, you can download this template from my Github.
Important: When you've downloaded it, open TutorialApp.xcworkspace.
In order to create a screen:
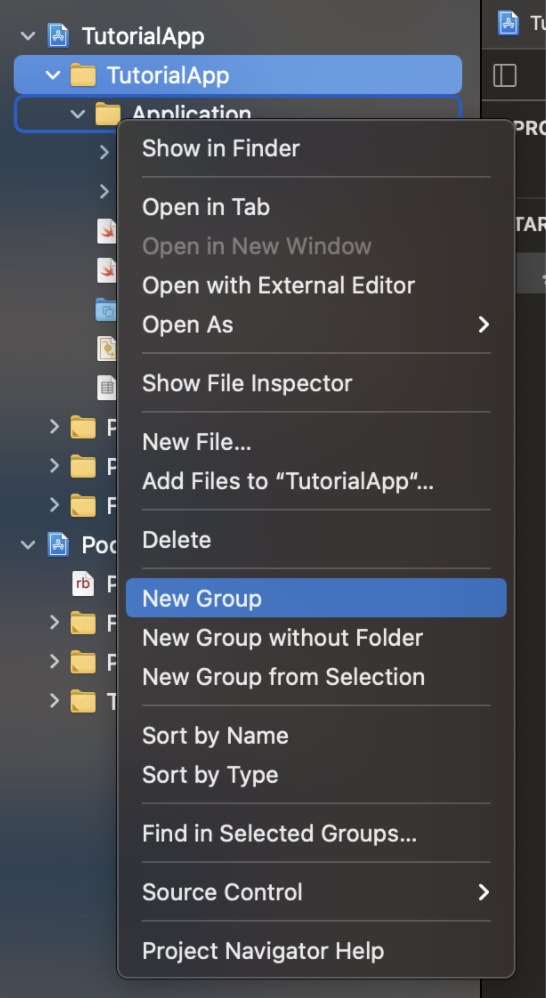
- Create a folder (group), by right-clicking the group Application and selecting the option New Group.
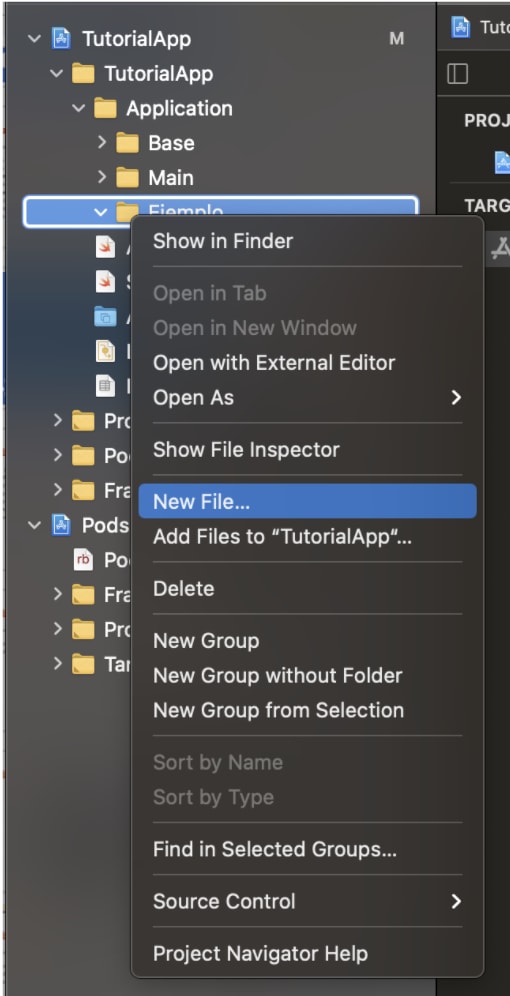
- Inside the new group, right-click and choose New File...
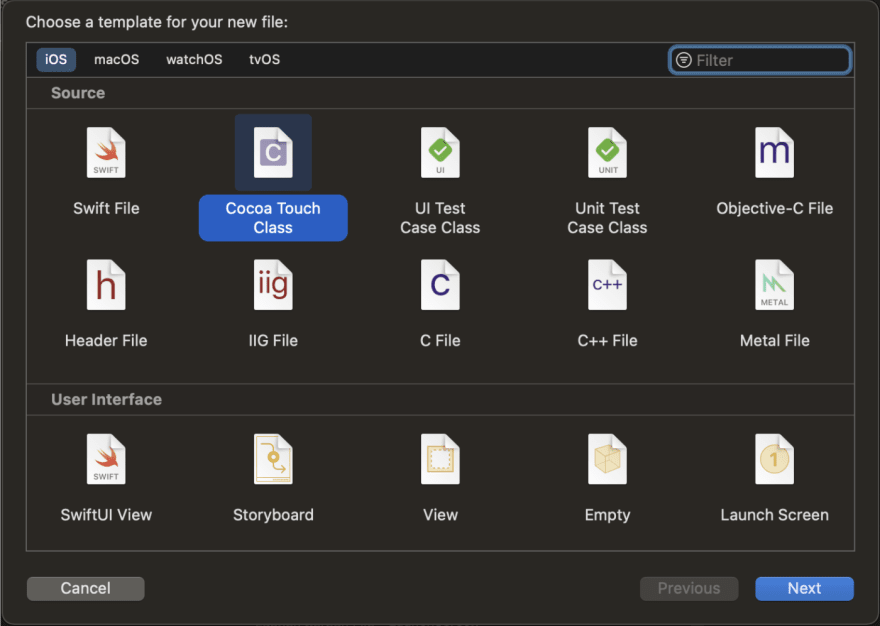
- Choose iOS > Cocoa Touch Class.
- Enter a name for the new screen, taking care that it's finished with ViewController, and that's a Subclass of: UIViewController, and also that the option Also create XIB file is checked (and that the language is Swift).
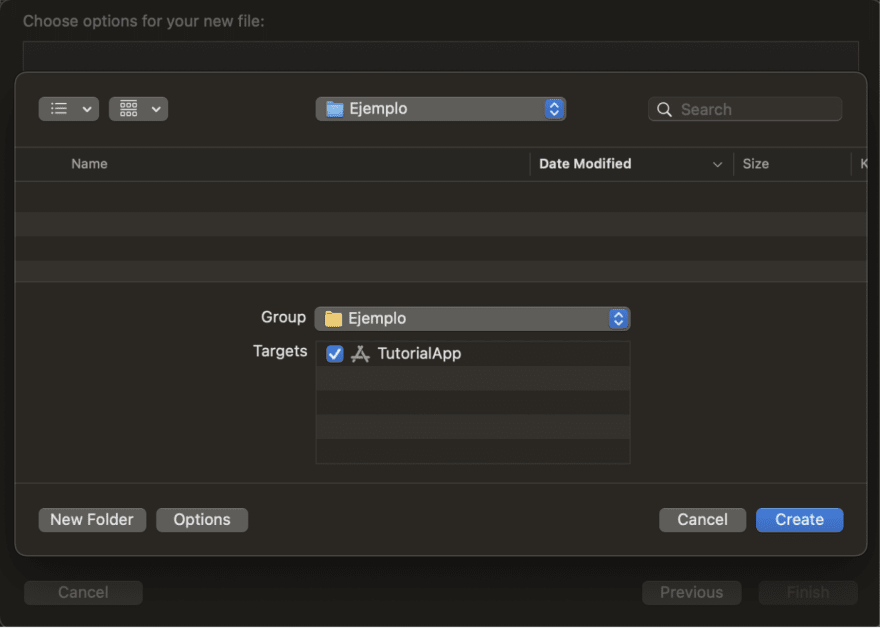
- Save it in the default location.
And that's it. We've created our first screen using Xibs instead of Storyboards. In the next tutorials, we'll continue doing this process to create other screens and navigating between them.


Top comments (0)