
Hi everyone!👋
It's been a while since my last post, but I have a good reason: I was on vacations! Yeah! 😁☀️🏖
And now it is time for a new Mint/Crystal recipe: we are going to build a Client/Server application using Mint for the frontend (this post) and Crystal for the backend (the next post)!
So let's start ... but first:
may I have a Crystal Mint Lemonade? ☝️🍹🍃
The Application
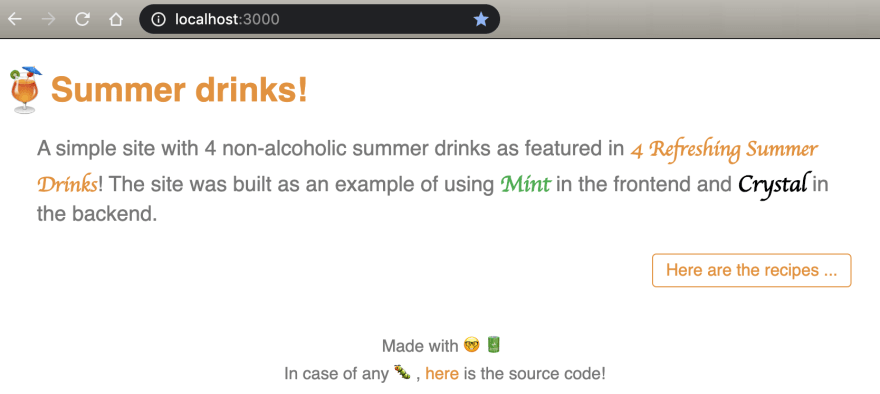
We are going to build an application that will list four (not 3, nor 5 but 4!) non-alcoholic summer drinks (as shown in the post 4 Refreshing Summer Drinks)
The Frontend
In this post we are going to build the frontend of our application ... uh oh! wait! We don't have a name for our application ... mmm let me think ... it will be called: Summer drinks! 🍹
And as we already mention, we are going to build the frontend using Mint!
We won't be doing a step-by-step tutorial but instead we are going to show the highlights of the source code.
The Structure
The project's structure is inspired by Mint Realworld and is the following:
mint-front
  |
  |- public
  |- source
  |   |- components
  |   |- entities
  |   |- pages
  |   |- stores
  |   |- Main.mint
  |   |- Routes.mint
  |
  |- mint.json
Routing
Routing in Mint is really simple. For our application we need 3 routes:
mint-front/source/Routes.mint
routes {
  / {
    Application.navigateTo(Page::Home)
  }

  /drinks {
    parallel {
      Application.navigateTo(Page::Drinks)
      Stores.Drinks.load()
    }
  }

  * {
    Application.navigateTo(Page::NotFound)
  }
}
What's important here is that when navigating to /drinks:
- we start loading the drinks
- and in parallel we start rendering the view.
In the Application store we are going to save the current page:
mint-front/source/stores/Application.mint
store Application {
  state page : Page = Page::Home

  fun navigateTo (page : Page) : Promise(Never, Void) {
    sequence {
      next { page = page}
      Http.abortAll()
    }
  }
}
And the Main component will be responsible for rendering the correct view given the current page:
mint-front/source/Main.mint
component Main {
  connect Application exposing { page }

  fun render : Html {
    <Layout>
      case (page) {
        Page::Home =>
          <Pages.Home/>

        Page::Drinks =>
          <Pages.Drinks/>

        Page::NotFound =>
          <div>"Where am I?!"</div>
      }
    </Layout>
  }
}
Entities
We will be working with just one entity: the Drink itself! Here's the definition and the way to create an empty one:
mint-front/source/entities/Drink.mint
record Drink {
  id : Number,
  icon : String,
  name : String,
  url : String
}

module Drink {
  fun empty : Drink {
    {
      id = 0,
      icon = "",
      name = "",
      url = ""
    }
  }
}
Requesting the drinks
Here's an excerpt of the function #Stores.Drinks.load() showing the request we send to the server:
mint-front/source/stores/Drinks.mint
  fun load() : Promise(Never, Void) {
    sequence {
      next { status = Stores.Status::Loading }

      response = "https://demo5780178.mockable.io/drinks"
                |> Http.get()
                |> Http.header("Content-Type", "application/json")
                |> Http.send()

      newStatus = case (response.status) {
                    404 => Stores.Status::Error("Not Found")
                        =>  try {
                              /* parse JSON */
                              object = Json.parse(response.body)
                                      |> Maybe.toResult("")

                              /* JSON to Drinks */
                              drinks = decode object as Stores.Status.Drinks

                              Stores.Status::Ok(drinks)

                            } catch Object.Error => error {
                              Stores.Status::Error("Could not decode the response.")
                            } catch String => error {
                              Stores.Status::Error("Could not parse the response.")
                            }
                  }

      next { status = newStatus }

...
In sequence, we will:
- update the
statustoloading. - send the
request(waiting for the response). - define the
new statusgiven the response. If the response was successful then we try to parse thedrinksin the response. - and finally, we change the
status.
Another important element here is how we implement the different status. We use enums like this:
enum Stores.Status(a) {
  Initial
  Loading
  Error(String)
  Ok(a)
}
Notice how easy is to send the request and handle the response (parse and decode the JSON data)! 🤓
Listing the drinks (the Drinks component)
This component will be responsible of showing the list of drinks. So first it needs to connect to the store:
mint-front/source/components/Drinks.mint
component Drinks {
  connect Stores.Drinks exposing { status }

  ...
}
Then the rendering depends on the current status (here we only show the cases Loading and Ok):
component Drinks {
  connect Stores.Drinks exposing { status }

  ...

  fun render : Html {
    case (status) {
      ...

      Stores.Status::Loading =>
        <div::base>
          <div::message>
            "Loading drinks..."
          </div>
        </div>

      ...

      Stores.Status::Ok =>
        <div>
          <{ drinksItems }>
        </div>
    }
  }
}
drinkItems and drinks are computed properties that extract the data from the status:
  get drinks : Array(Drink) {
    case (status) {
      Stores.Status::Ok data => data.drinks
      => []
    }
  }

  get drinksItems : Array(Html) {
    drinks
    |> Array.map((drink : Drink) : Html { <Drinks.Item drink={drink}/> })
    |> intersperse(<div::divider/>)
  }
Notice that each drink is rendered by the component Drinks.Item.
The Full Client Application 🤓🍹
Here is the source code of the recipe! And remember that we run the application using: 🚀
$ mint-lang start
Mint - Running the development server
━━━━━━━━━━━━━━━━━━━━━━━━━━━━━━━━━━━━━━━━━━━━━━━━━━━━━━━━━━━━━━━━━━━
⚙ Ensuring dependencies... 279μs
⚙ Parsing files... 19.301ms
⚙ Development server started on http://127.0.0.1:3000/
Mocking the Backend
We still have not implemented the backend but we may use Mockable.io to mock it. Here is the response we need:
{
 "drinks": [{
    "id": 1,
    "icon": "🍓",
    "name": "Strawberry Limeade",
    "url": "https://www.youtube.com/watch?v=SqSZ8po1tmU"
 }, {
    "id": 2,
    "icon": "⛱",
    "name": "Melon Sorbet Float",
    "url": "https://www.youtube.com/watch?v=hcqMtASkn8U"
 }, {
    "id": 3,
    "icon": "🍨",
    "name": "Raspberry Vanilla Soda",
    "url": "https://www.youtube.com/watch?v=DkARNOFDnwA"
 }, {
    "id": 4,
    "icon": "🌴",
    "name": "Cantaloupe Mint Agua Fresca",
    "url": "https://www.youtube.com/watch?v=Zxz-DYSKcIk"
 }]
}
Also notice that the request URL is hardcoded in mint-front/source/stores/Drinks.mint 🙈
Farewell and see you later. Summing up.
We've reached the end of the recipe!👨🍳 We have implemented our second application in Mint🍃:
- using
storesfor saving the state of our application (current pageanddrinks) - using
enumsto implement the differentstatus. - using
componentswith conditional rendering (given thecurrent status)
And remember that, in the next recipe, we will implement the server in Crystal! 💪🤓
Hope you enjoyed it! Until next recipe!👨🍳🍹
Photo by Jamie Street on Unsplash


Top comments (1)
Very nice post! I'm always psyched to see posts about Mint 🍃