Have you heard any news about WordPress yet? From 10/24/2020, WordPress users can't embed links from Facebook and Instagram into their websites by copying and pasting the links as usual. That's because WordPress decided to remove the link embedding feature from these two social networks.
This change causes a lot of trouble for WordPress users because the existing content in all the Facebook and Instagram embedded links don't show up anymore. Searching for, deleting, and fixing all these links are extremely time-consuming. But don't worry because there's always a way, and it's right in this article!
First, let's find out the reason for all these troubles!
Facebook and Instagram Stop Supporting WordPress oEmbed
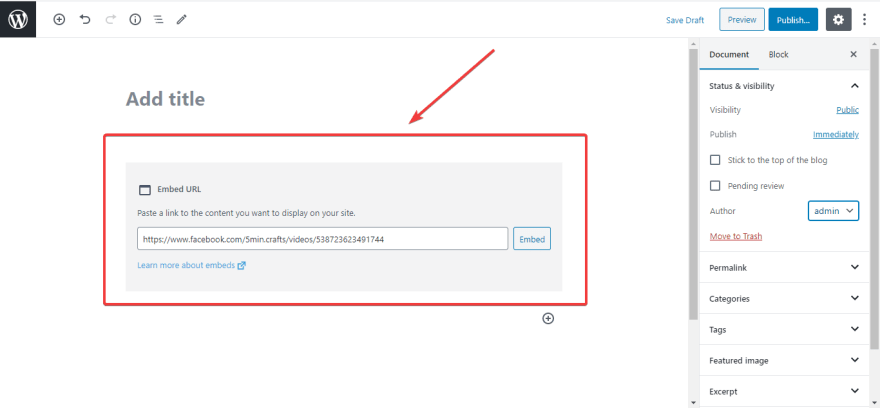
Normally, when you paste a Facebook or Instagram link into a post / page, it will be automatically converted to embedded content, also known as oEmbed (embedded link).
However, Facebook and Instagram changed their API policy and dropped unauthenticated oEmbed support. From 10/24/2020, to embed links from Facebook and Instagram, users have to create a developer account, sign up for an app, and get a client token.
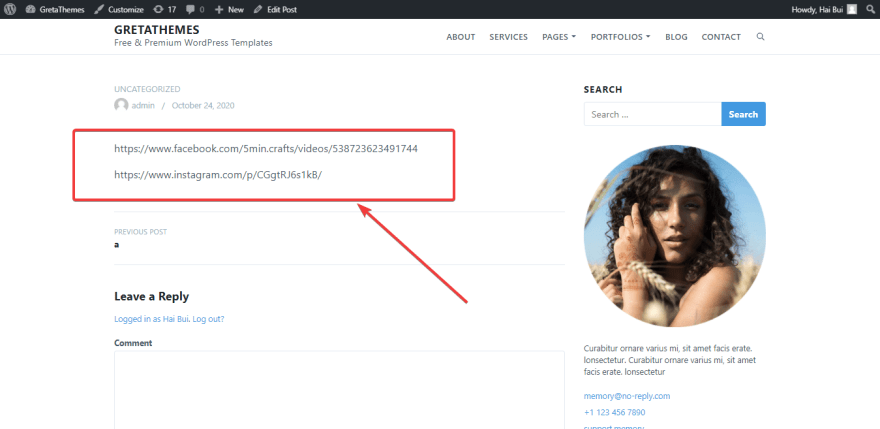
These changes caused a lot of difficulties for the WordPress team to deploy new projects. Therefore, WordPress decided to remove the link embedding feature from Facebook and Instagram. It means that all links embedded into WordPress websites from these two social networks will be turned into normal URLs (without displaying the content of the URLs).
This doesn't sound good, especially for webmasters and web-owners. Imagine that on a beautiful day, you wake up, open your website, and then you're immediately stunned with tons of ugly links instead of beautiful images or posts from Facebook and Instagram, it's really a disaster, right? If you want to fix this issue in a blink of an eye, follow the below tutorial.
How to Fix Facebook and Instagram Embed Links Using Plugin
To meet the demands of users, some plugins have just been released or updated with new features to fix this oEmbed issue such as Jetpack, Smash Balloon Social Photo Feed (for Instagram), Smash Balloon Social Post Feed (for Facebook), and oEmbed Plus.
Using Jetpack plugin to fix this problem is very easy. Just install the plugin and then the shortcode oEmbed module will be automatically activated, and you don't need to do anything else. If this is your first time using Jetpack, refer to this article on how to set up and use it.
If you don't want to use Jetpack, try other plugins that I mentioned.
Smash Balloon Social Photo Feed, Smash Balloon Social Post Feed, and oEmbed Plus plugins are free and available on wordpress.org, you just need to install and activate them right on the Admin Dashboard as usual. After installing and customizing the plugins as below, the Facebook and Instagram oEmbed issue on your WordPress website will be fixed, and you can embed the links by copying and pasting them as usual. The following are the specific instructions for each plugin:
Fix Facebook Embeds Using Smash Balloon Social Post Feed Plugin
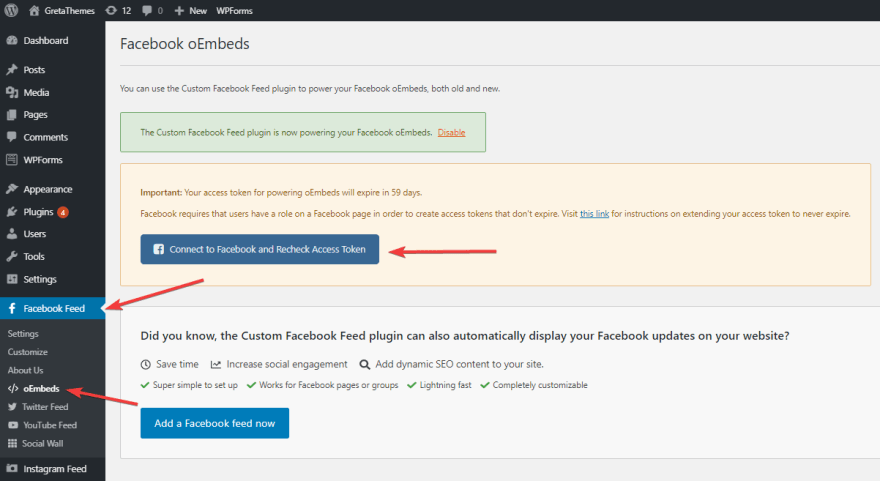
If you use Smash Balloon Social Post Feed plugin, go to Facebook Feed > oEmbeds and click Connect to Facebook and Enable oEmbeds to connect to your Facebook account and get the access token (client token).
Note that if you connect to a personal Facebook account, the access token will be valid for 60 days only. After 60 days, go to Facebook Feed > oEmbeds and click Connect to Facebook and Recheck Access Token. However, that procedure is quite complicated. To save your time, you can connect to the Admin account of a group / page to get the access token that never expires.
Fix Instagram Embeds Using Smash Balloon Social Photo Feed Plugin
As for Smash Balloon Social Photo Feed plugin, do the same as above. Go to Instagram Feed > oEmbeds and click Enable Instagram oEmbeds to fix the issue. However, Instagram doesn't require you to recheck the access token.
Fix Facebook and Instagram Embeds Using oEmbed Plus
The three plugins above have many other features that aren't related to oEmbed fixing. If you don't need these irrelevant features, try another dedicated plugin - oEmbed Plus.
To use the oEmbed Plus plugin, you need to register for a Facebook app and activate the oEmbed feature as follows:
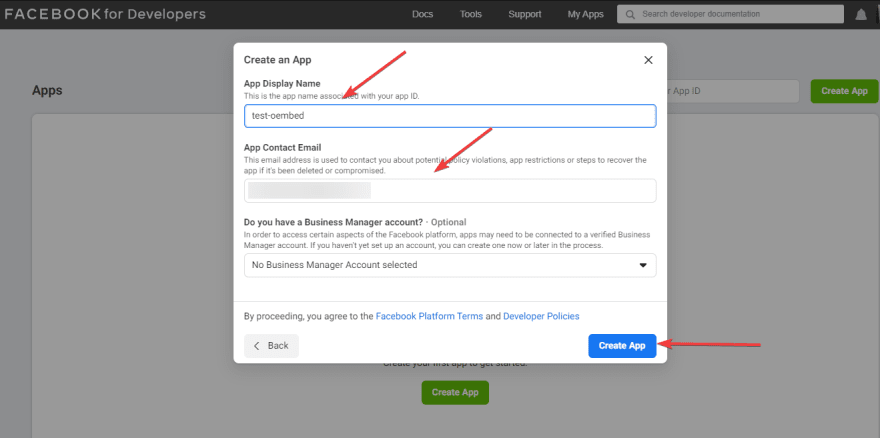
Step 1: Go to developer.facebook.com, connect to a Facebook account. After that, go to My Apps section and click Create App.
In the Create an App dialog, enter the name of the app (whatever name you want) and your email, then click Create App.
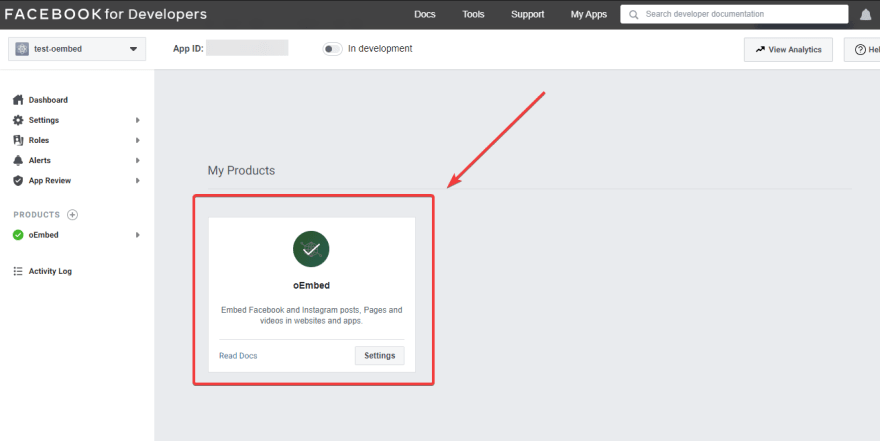
Step 2: After creating the app, the oEmbed feature will be activated by default. It's located in the My Products section.
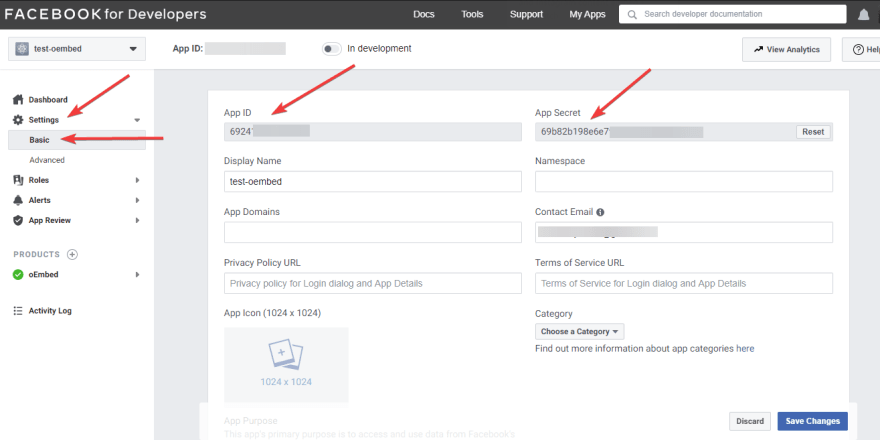
Next, go to Settings > Basic to get the App ID and App Secret.
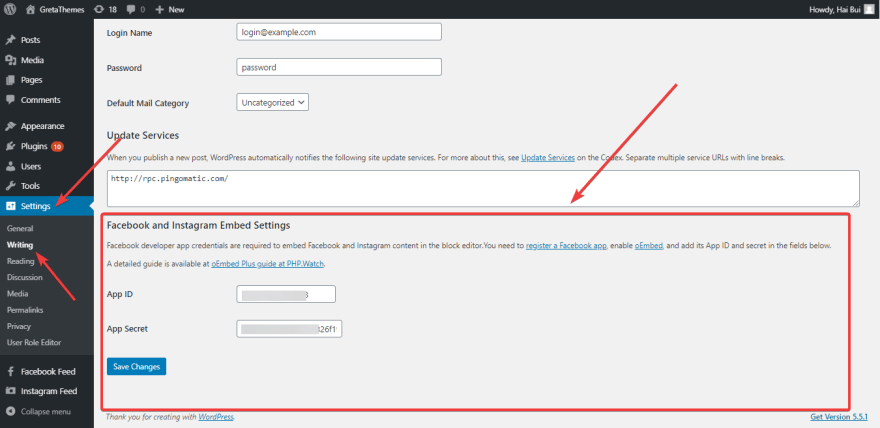
Step 3: Turn back your WordPress website, on the Admin Dashboard, go to Settings > Writing > Facebook and Instagram Embed Settings. Then, copy and paste the App ID and App Secret into this section, and click Save Changes.
After following all the above steps, the oEmbed feature on your WordPress site will be restored. Now you can embed Facebook and Instagram links as usual.
For example, here are Facebook and Instagram links embedded into my WordPress website before I use plugins to fix the issue:
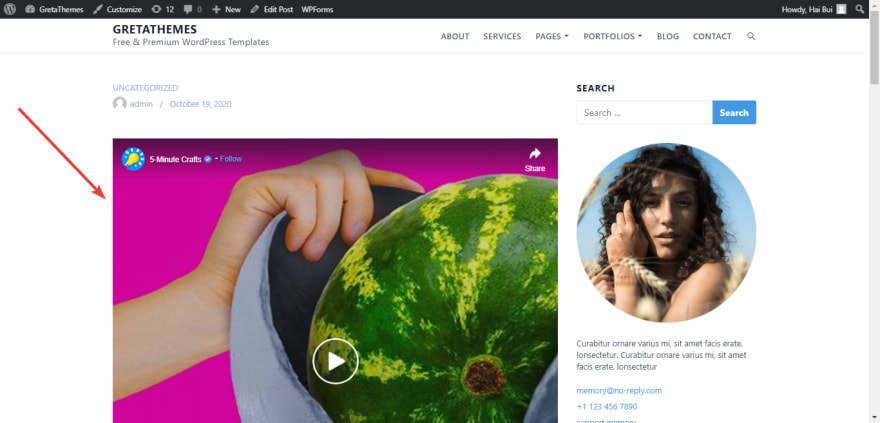
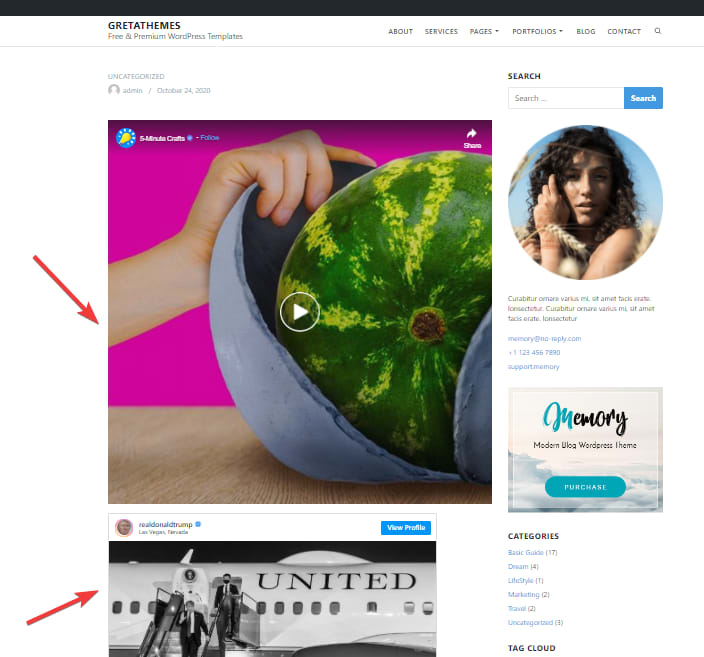
And here is the result after fixing the issue:
As you can see, the links are fixed and the content is displayed.
Last Words
In conclusion, Jetpack is the easiest way to fix the oEmbed issue, but it's a multipurpose plugin that comes with many other features and you may not want to use them. Smash Balloon Social Photo Feed and Smash Balloon Social Post Feed plugins are quite easy to set up and use, but they're two separate plugins. Meanwhile, oEmbed Plus plugin takes a bit of time to set up, but it can fix both Facebook and Instagram embedded links. Just choose a plugin that is suitable for your website and your needs.
As you can see, fixing the oEmbed issue is not difficult at all. However, not every website owner knows about this issue to act promptly, especially for those who don't regularly update news. So, don't forget to share this information with other website owners!
In addition, you may like our article on how to fix post display on Facebook using Facebook Debugger.







Top comments (0)