This article was originally posted on Hackmamba
Jenkins is a popular continuous integration and delivery (CI/CD) tool. Jenkins is open source and has a great developer community that maintains its existing software and builds plugins to increase its functionality.
Though with excellent community support, while using Jenkins, you may suffer from issues like configuration files clashes which you can resolve by running Jenkins in a container technology like Docker. However, running Jenkins in Docker brings a new challenge if you plan to dockerize applications with Jenkins.
This article will guide you on setting up Jenkins in Docker and enabling the Jenkins container to allow running of Docker (specifically: build, run, and push images). At the end, you will test the setup by automating the building and pushing of the Docker image - a NodeJS app on GitHub, to Docker Hub.
GitHub Repository
To view the source code and Dockerfile of the NodeJS application on GitHub, click here.
Prerequisites
To follow along with this article, you must have:
- Working knowledge of Docker and the terminal.
- A Docker Hub account — create a free one here.
Knowing Jenkins isn’t a strict requirement, but it’ll be nice to have.
Setting up Jenkins in Docker to run Docker
To set up Jenkins in Docker to be able to run Docker (specifically: build, run, and push an image), there are at least two options:
- Docker-in-Docker, and
- Create a custom Jenkins Docker image and bind-mount the container to the host system daemon
Though you will be using the latter option in this article, first, you will learn about Docker-in-Docker.
Docker-in-Docker
The primary purpose of Docker-in-Docker is to help the Docker core team work faster on Docker development. And at that time (2013-2015), the only way to run Docker-in-Docker, was to use the *-privileged* **flag in the run command.
Though it works, using the -privileged flag introduces other issues, such as data corruption when multiple containers share /var/lib/docker. Only the Docker daemon should have access to /var/lib/docker by design.
Today, things are very different. Docker-in-Docker has a more secure and safe approach with rootless containers and freemium tools like sysbox. Tools like sysbox let you run Docker-in-Docker without the -privileged flag and optimizes specific scenarios, like running multiple nodes of a Kubernetes cluster as ordinary containers.
Creating a custom Jenkins image
To start, in any directory, create a Dockerfile and add:
FROM jenkins/jenkins:lts
USER root
RUN apt-get update -qq \
    && apt-get install -qqy apt-transport-https ca-certificates curl gnupg2 software-properties-common
RUN curl -fsSL https://download.docker.com/linux/debian/gpg | apt-key add -
RUN add-apt-repository \
   "deb [arch=amd64] https://download.docker.com/linux/debian \
   $(lsb_release -cs) \
   stable"
RUN apt-get update  -qq \
   && apt-get -y install docker-ce
RUN usermod -aG docker jenkins
The Dockerfile contains all the commands to create the custom Jenkins image.
- The
FROMcommand tells Docker the base image (jenkins/jenkins:lts) from which to build the custom image. - The first
RUNcommand updates all essential packages usingapt-get update. Then installs the new ones needed for the custom Jenkins image usingapt-get install. - The following
RUNcommand downloads the Docker Linux Debian distribution CLI. Then the next one adds it to the repository. - And the last
RUNcommand adds Jenkins user to the Docker group.
To build the custom Jenkins image, run:
$ docker image build -t custom-jenkins-docker .
You can run the image now to configure Jenkins, but if you do that, you will not be able to:
- Store Jenkins configurations and data when the container is stopped, restarted or deleted,
- Dockerize an application (goal of the article) with the Jenkins container because of the absence of Docker daemon (required to build and push images) in the custom Jenkins image YOU.
Store Jenkins data
To store Jenkins, you need to create an explicit volume for Jenkins on your host machine. To do that, add this argument -v jenkins_home:/var/jenkins_home when running the custom Jenkins image.
Enabling use of Docker daemon in the Jenkins container
To do this, connect the Docker CLI in the Jenkins container to the Docker daemon on the host machine by bind mounting the daemon’s socket into the container with the -v flag. When running the image add this argument: /var/run/docker.sock:/var/run/docker.sock.
Now, putting all the arguments together, you can run the custom Jenkins image with the following command:
$ docker run -it -p 8080:8080 -p 50000:50000 -v /var/run/docker.sock:/var/run/docker.sock -v jenkins_home:/var/jenkins_home custom-jenkins-docker
After you've run the command above, visit localhost localhost:8080 to configure your Jenkins environment.
Configuring your Jenkins environment
When you go to localhost:8080, you should see a web page similar to the image below:
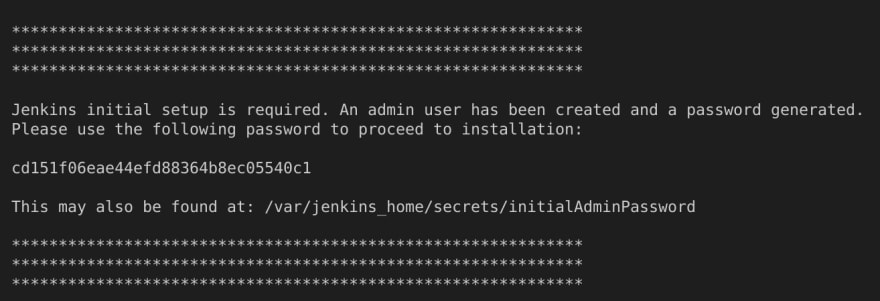
You can quickly get the admin password from the log returned.
See what it looks like below:
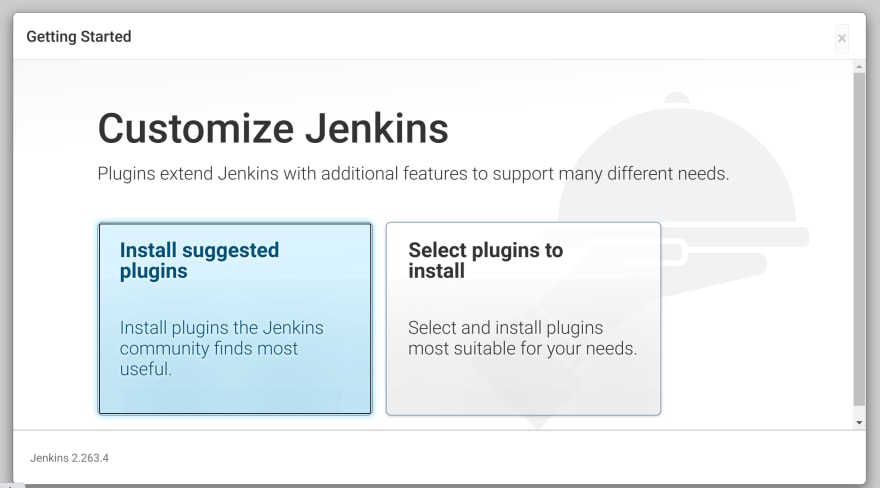
In the following prompt, select Install suggested plugins. Jenkins will automatically install all plugins the Jenkins community finds most useful.
After the installation, create a first admin user and finish the configuration.
So far, you’ve created a custom Jenkins image and set it up to be able to run Docker. Next, you will test the entire setup by automating Jenkins to build (Docker image) of the GitHub repo and publish it on Docker Hub.
Dockerizing a NodeJS application with Jenkins in Docker
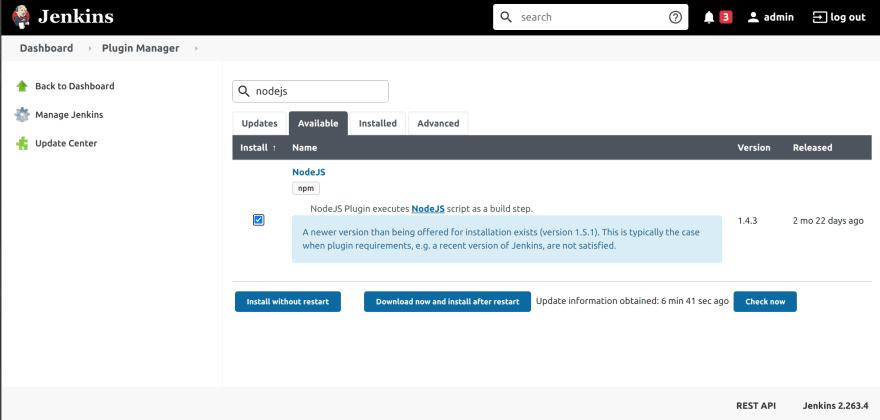
Before you can Dockerize a NodeJS application in your Jenkins environment, you will need to install the following plugins:
- NodeJS Plugin: To execute NodeJS scripts as a build step
-
CloudBees Docker Build and Publish plugin: To enable the building of
Dockerfilebased projects and publish the built images to Docker Hub.
To install the above plugins, on the Jenkins dashboard, go to Manage Jenkins, under System Configurations, select Manage Plugins. After that, click on the Available tab on the plugins manager and search for the respective plugins and install them.
NodeJs Plugin
In Manage Jenkins, still under System Configurations, select Global Tool Configuration, then add a NodeJS installation similar to the image below:
*****Creating a build job to dockerize the application*
To start, on the Jenkins dashboard, click on New Item, select Freestyle project and name it. Then click OK:
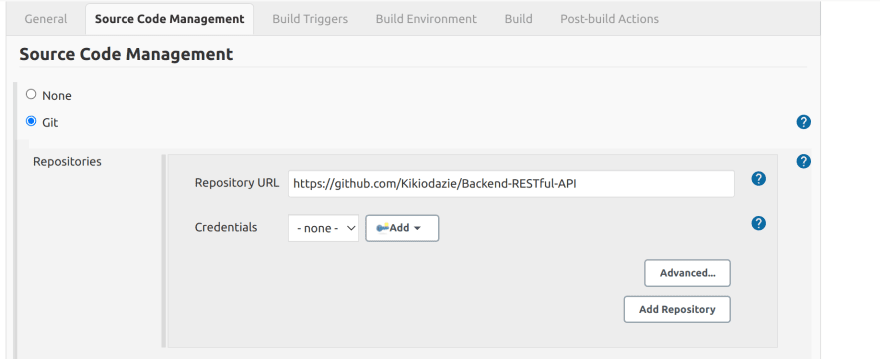
On the following webpage, click on the Source Code Management tab, select Git, and add the URL of the GitHub repository: https://github.com/Kikiodazie/Backend-RESTful-API.git.
Leave the Credentials field blank as the repository is public.
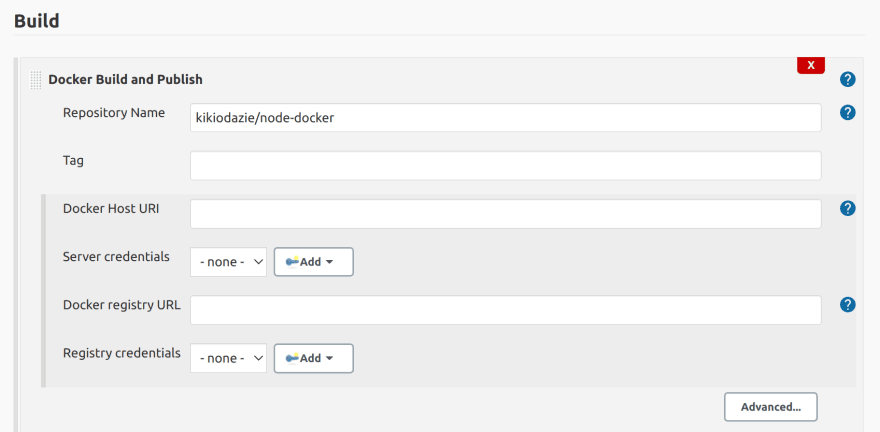
Then click on the Build tab to add the build step for building and publishing the NodeJS application image using the CloudBees Docker Build and Publish plugin.
After selecting the Docker Build and Publish build step, fill in the Repository name with your_Dockerhub_id/desired_name_of_the_repo example kikiodazie/node-docker.
Leave the remaining fields blank because even if you add your Docker Hub Registry credentials, Jenkins in Docker will not validate it.
To solve the empty Registry credentials, you will need to give Jenkins access by login into your Docker Hub account inside the Jenkins container through the command line.
To get the bash of the container run:
$ docker exec -it <container_name/container_id> /bin/bash
Then inside the container, run:
$ docker login
To complete this process, input your Docker Hub credentials:
Go back to Jenkins, click on Build Now, and the NodeJS application image will be built and published to your Docker Hub account.
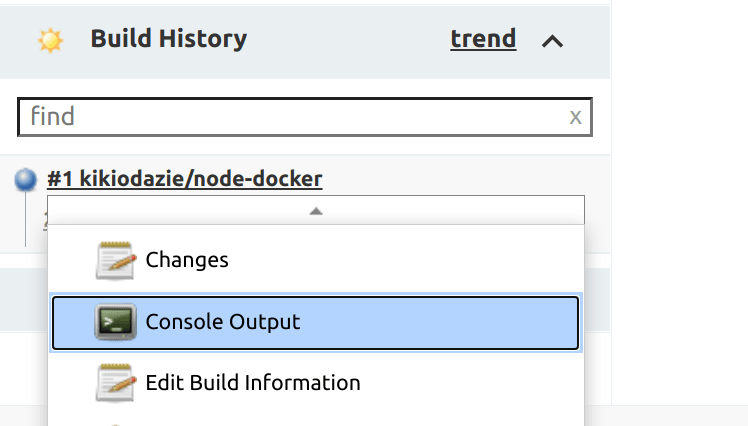
You can view the console output in the Build History:
The output should look similar to the one in the image below:
The above image shows that Jenkins in Docker successfully builds the image and publishes it to Docker Hub.
Conclusion
This article guided you on setting up Jenkins in Docker to run Docker and test it by building and publishing the Docker image of a remote GitHub repository to Docker Hub.
Resources
To learn more about Jenkins in Docker, check out the following resources:









Top comments (0)