Overview
NFT marketplaces are online platforms that allow creators to mint and sell their NFTs to buyers who can purchase them using cryptocurrency. These marketplaces typically provide a user-friendly interface for creating and managing NFTs, including the ability to set prices, royalties, and other terms and conditions. In this article, we will explore how to create an NFT marketplace smart contract on Algorand.
Prerequisites
Before diving into the development process, ensure you have the following tools set up:
- Docker desktop
- Python and pipx
- Visual Studio Code
- Chrome browser
Setup Project
Install Algokit
Algokit simplifies Algorand development. Install it using pipx:
pipx install algokit
Start Localnet
Launch the local Algorand network:
algokit localnet start

Init Project
Create a new project with Algokit:
algokit init
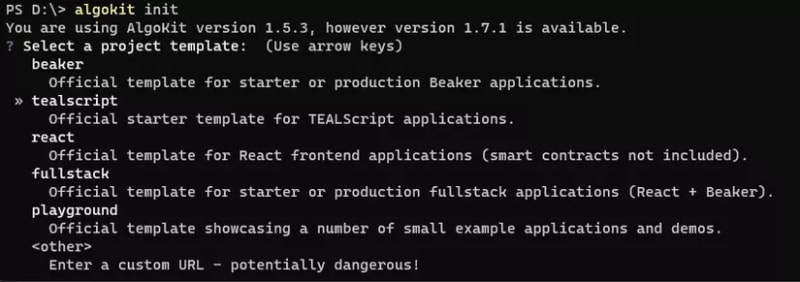
Choose TypeScript as the preferred language.
Marketplace Smart Contract
Step 1: Defining Struct
Structs organize and store essential data within the smart contract. Start by defining the collection struct to contain pertinent collection information:
type collectionData = {
  name: string;
  owner: Address;
};
Similarly, define the nftData struct to link NFTs with their respective collections:
type nftData = {
  collectionId: number,
  nftAsset: Asset,
};
Lastly, create the orderData type to manage order details within the marketplace:
type orderData = {
  owner: Address,
  price: uint64,
  nft: Asset,
  status: uint64; // 0 false 1 true
};
These structured definitions lay the foundation for organizing collection, NFT, and order-related information within the Algorand smart contract.
Step 2: Create Collection Function
Initialization:
-
collectionIndexis a global state key that maintains the index for collections. -
collectionis a box map that stores collection data based on their respective indexes.
collectionIndex = GlobalStateKey<uint64>();
collection = BoxMap<uint64, collectionData>({});
Create Collection Function:
- This function creates a new collection within the smart contract.
- It takes the name of the collection as a parameter and assigns the creator's address as the owner.
createCollection(name: string): void {
    const temp: collectionData = {
      name: name,
      owner: this.txn.sender,
    };

    this.collection(this.collectionIndex.value).value = temp;
    this.collectionIndex.value = this.collectionIndex.value + 1;
  }
-
tempstores the data for the new collection, including itsnameandowner(the address of the sender). - The new collection is added to the
collectionbox map at the index specified bycollectionIndex. - Increment
collectionIndexto prepare for the next collection.
Step 3: Mint NFT Function
Initialization:
-
nftis a global state key that represents the NFT asset.
nft = GlobalStateKey<Asset>();
Mint NFT Function:
- This function facilitates the creation of a new NFT.
- It takes the name and URL of the NFT as parameters and returns the minted NFT asset.
mintNFT(name: string, url: string): Asset {
    const nftTicket = sendAssetCreation({
      configAssetTotal: 1,
      configAssetName: name,
      configAssetURL: url,
    });
    return nftTicket;
  }
-
nftTicketholds the newly minted NFT asset. - The
sendAssetCreationfunction creates an NFT with the specifiednameandurl. - It configures the NFT asset with a total supply of 1 and associates the provided metadata (name and URL) with the NFT.
- Finally, the minted NFT asset is returned.
Step 4: Mapping NFT Data
Initialization:
-
nftIndexis a global state key used to maintain the index for NFTs. -
nftDataMapis a box map that stores NFT data mapped to their respective indexes.
nftIndex  =  GlobalStateKey<uint64>();
nftDataMap  =  BoxMap<uint64, nftData>({ prefix:  'n' });
Map NFT data function:
- This function maps an NFT to its associated collection.
- It takes the NFT asset and the ID of the collection as parameters.
mapNFTdata(nft: Asset, collectionId: uint64): void {
    const temp: nftData = {
      collectionId: collectionId,
      nftAsset: nft,
    };

    this.nftDataMap(this.nftIndex.value).value = temp;
    this.nftIndex.value = this.nftIndex.value + 1;
  }
-
tempholds the data associating the NFT with its collection ID. - The
nftDataMapbox map stores this data at the index specified bynftIndex. -
nftIndexis incremented to prepare for the next NFT mapping.
Step 5: Listing NFT to Marketplace
Initialization:
-
orderIndexis a global state key that maintains the index for orders in the marketplace. -
orderis a box map that stores order data, representing the listing details of NFTs.
orderIndex  =  GlobalStateKey<uint64>();
order  =  BoxMap<uint64, orderData>({ prefix:  'o' });
Listing NFT Function:
- This function enables the listing of an NFT for sale in the marketplace.
- It takes the NFT asset, sale price, and the transaction details as parameters.
listingNFT(nft: Asset, price: number, axfer: AssetTransferTxn): void {
    // verfiy Txn
    verifyTxn(axfer, { assetReceiver: this.app.address });

    // create order
    const temp: orderData = {
      owner: this.txn.sender,
      price: price,
      nft: nft,
      status: 0,
    };

    this.order(this.orderIndex.value).value = temp;
    this.orderIndex.value = this.orderIndex.value + 1;
  }
- Verification is performed to ensure that the transfer transaction involves the marketplace contract as the receiver, securing the listing process.
- The function creates an order for the listed NFT, capturing details such as the owner's address (
this.txn.sender), the saleprice, thenftbeing listed, and its status set as0indicating it's listed for sale.
Step 6: Unlisting NFT from Marketplace*
- This function facilitates the removal of a listed NFT from the marketplace.
- It takes the
orderIdof the listing and the NFT asset as parameters.
unListingNFT(orderId: number, nft: Asset): void {
    // verify owner
    assert(this.txn.sender === this.order(orderId).value.owner);

    // check Status of NFT
    assert(this.order(orderId).value.status === 1);

    this.order(orderId).value.status = 1;

    // Transfer NFT to owner
    sendAssetTransfer({
      xferAsset: nft,
      assetReceiver: this.txn.sender,
      assetAmount: 1,
    });
  }
- The function ensures that only the owner of the NFT can unlist it from the marketplace (
assert(this.txn.sender === this.order(orderId).value.owner)). - It verifies that the NFT is currently listed for sale (
this.order(orderId).value.status === 0) before proceeding with unlisting. - If conditions are met, the status of the NFT listing is updated to indicate it's no longer available (
this.order(orderId).value.status = 1). - Additionally, the function transfers the NFT asset back to its owner.
Step 7: Buy NFT Function
- This function enables the purchase of an NFT listed in the marketplace.
- It takes the
orderIdof the listing, payment transaction details (payment), and the NFT asset as parameters.
buyNFTFromMarketplace(orderId: number, payment: PayTxn, nft: Asset): void {
    // Check order status
    assert(this.order(orderId).value.status === 0);
    // Check enough money to buy
    verifyTxn(payment, {
      sender: this.txn.sender,
      amount: { greaterThan: this.order(orderId).value.price },
      receiver: this.order(orderId).value.owner,
    });

    // Transfer Asset
    sendAssetTransfer({
      xferAsset: nft,
      assetReceiver: this.txn.sender,
      assetAmount: 1,
    });
  }
- The function verifies that the NFT is listed and available for purchase (
assert(this.order(orderId).value.status === 0)). - It verifies the buyer's payment transaction details, ensuring the correct payment amount and receiver (
verifyTxn(payment, {...})). - Upon successful verification, the NFT is transferred to the buyer's address (
sendAssetTransfer) and the order status is updated to indicate it's sold.
Step 8: Write some Get Function
  getCollectionName(eventId: number): string {
    return this.collection(eventId).value.name;
  }

  getCollectionByNFT(nftIndex: number): number {
    return this.nftDataMap(nftIndex).value.collectionId;
  }

  getNFTAsset(nftIndex: number): Asset {
    return this.nftDataMap(nftIndex).value.nftAsset;
  }

  getOrderOwner(orderId: number): Address {
    return this.order(orderId).value.owner;
  }

  getOrderNFT(orderId: number): Asset {
    return this.order(orderId).value.nft;
  }

  getOrderPrice(orderId: number): number {
    return this.order(orderId).value.price;
  }

  getOrderStatus(orderId: number): number {
    return this.order(orderId).value.status;
  }
These functions retrieve specific details:
-
getCollectionName: Retrieves the name of a collection based on its ID. -
getCollectionByNFT: Retrieves the ID of the collection associated with an NFT. -
getNFTAsset: Retrieves the NFT asset based on its index. -
getOrderOwner: Retrieves the owner's address of a specific order. -
getOrderNFT: Retrieves the NFT asset associated with an order. -
getOrderPrice: Retrieves the price of an NFT listed in an order. -
getOrderStatus: Retrieves the status (listed or sold) of an order.
Conclusion
In this guide, we've detailed the step-by-step process of creating an NFT marketplace smart contract on Algorand. From defining data structures to implementing essential functionalities, such as minting NFTs, listing them for sale, and enabling purchases, we've laid the groundwork for a functional NFT marketplace within the Algorand blockchain ecosystem.
Explore the entire codebase at https://github.com/cuongpo/Algorand-NFT-Marketplace for a deeper dive into the implementation details.
In the next article, we'll delve into the crucial aspect of testing this smart contract. Thank you for taking the time to read!


Top comments (0)