In this article and its part II we explore the technologies available to build a cross-platform experience including voice assistants. Assuming we want to build a small and simple to-do list app for Android, iOS, web and the Google Assistant, how can we provide the best experience for each platform while making sure our app can scale?
Native vs hybrid vs cross-platform
It’s been discussed already, a million times, and will be discussed over and over again. Should you build two dedicated native apps or a hybrid solution? What are the differences? Let’s try to summarise the different approaches we can take.
Going fully native while targeting Android and iOS means developing two separate apps. Two different codebases, in two different programming languages (Java/Kotlin vs Swift/Objective C). In exchange, this approach offers best-in-class performance, a consistent look and feel and better access to low level platform specific features.
A hybrid app is developed using standard web technologies (HTML, CSS and JavaScript) and runs as a web-view inside a native app. This means we can reuse the same codebase and target both Android and iOS. Although we can still access some platform specific functionality, the performance is compromised when compared to a native experience. This is the approach frameworks like Ionic and Cordova use.
Using frameworks like React Native or NativeScript, it’s possible to use JavaScript to build truly native apps. Both frameworks also provide mechanisms to access native APIs to take full advantage of the platforms. Going with one or the other will depend on many variables but, mainly, the JavaScript flavour you want to taste: React (React Native) or Angular/Vue/TypeScript (NativeScript).
Other cross-platform solutions that allow developers to create native apps reusing the same language and codebase are Flutter (Dart) and Xamarin (.NET/C#).
An additional solution to consider would be building a Progressive Web App. PWAs provide an installable, app-like experience on desktop and mobile that is built and delivered directly via the web. Since we’re exploring purely native solutions here (let’s put the web experience aside for now as we will come back to it in the next section) I’ll leave PWAs out of the scope of this article.
Which of these approaches is best for your app? Well, there’s no easy answer to this question. A number of factors need to be taken into account here: budget, deadlines, language of preference, performance, etc.
Since we’re aiming for a cross-platform experience and want to set ourselves up to be able to scale in complexity, to avoid exponentially increasing costs and timelines, it’s desirable to be able to reuse as much code as possible. Therefore we’re going to continue exploring the cross-platform path using JavaScript to compile to native code (React Native/NativeScript).
From web to mobile and back again
Since we’ll be building our app using web technologies, do we expect our code to render in a browser? Well… no. At least not directly.
React Native components compile to native Android and iOS components, not to DOM elements. But worry not, someone thought about this already. React Native for Web unifies both worlds, bringing web rendering to React Native components.
Now we can reuse our UI for mobile and web. However, this might not be what we are trying to achieve. After all, mobile and web are different platforms and often we want to take advantage of this to offer different user experiences. React Native for web doesn’t allow us to do this.
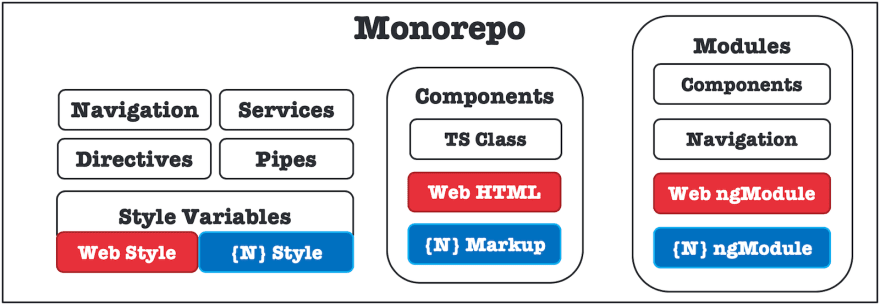
NativeScript and Angular make it possible to use the same codebase to build both web and mobile apps, reusing the core business logic, while being flexible enough to include platform-specific code where necessary, by using a simple file name convention.

Code sharing with NativeScript
Going “serverless”
So far we’ve discussed the technology stack for our app from the client(s) perspective. What about the backend? Again, it depends on what you’re building. You might already have a backend with an API deployed somewhere or you might need to build it from scratch.
The example to-do app we aim to build will require a database and user authentication (plus hosting for the web version). Let’s assume we want to continue using JavaScript. One of the options would be building a backend based on Node.js®. But we might not need a fully fledged backend.
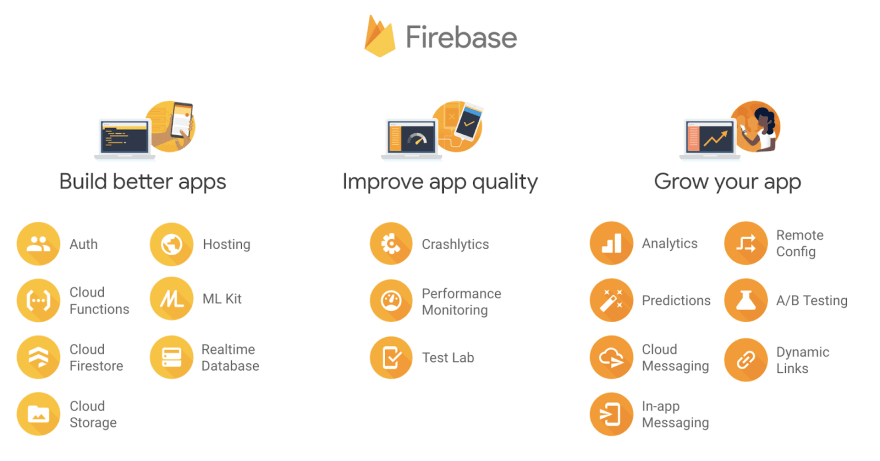
An alternative would be using a platform that provides us with the services we need, like Firebase. Using Firebase makes it easy for our app(s) to benefit from a scalable infrastructure and cloud services like:
- Firestore: cloud-hosted NoSQL database with live synchronization and offline support.
- Authentication: multiple methods including email and password, third-party providers, etc.
- Hosting: for web assets including global CDN and free SSL certificate.
- Cloud Functions: custom backend code without needing to manage and scale your own servers.
- And lots more…
Firebase seems to offer all we need for our to-do list app but, again, it might not be the right option for your app. The aim of these types of “serverless” cloud platforms (they actually run on servers, by the way) is accelerating apps and web development by removing the need to write backend code (most of the time) or manage server infrastructure.
Cloud Firestore, for example, is a cloud-hosted NoSQL database that can be accessed directly via native client SDKs. This raises, at least, an immediate concern. If the client can access the data directly, does this mean access control is non-existent? Not exactly. Firebase offers Security Rules based on user identity to secure the data for mobile/web development. These rules might not be sufficient for your use case but this doesn’t stop you from accessing the Firestore from a server (e.g. through a Cloud Function) using the Admin SDK. This way you could even build your own API on top.
The rise of voice assistants
Smart speakers and voice assistants have become ubiquitous and your app could benefit from them. If you think this is the case and some of your app features could be triggered by voice commands, then you should consider one of these assistants as an additional client. But, which one?
Amazon Alexa and Google Assistant are the two most popular options here and their functionality can be extended via Alexa Skills and Google Actions, respectively. Both assistants are now built-in in an increasing number of first and third-party smart speakers, and are available as Android and iOS apps. Although Alexa is ahead in number of skills, some people would argue that the Google Assistant is more accurate, feels more fluid and natural in conversation and provides a better integration with the host platform.
Assuming we want to integrate our app with the Google Assistant, we would need three things:
- An Actions on Google project: This will allow you to access the developer console to manage and distribute your Action.
- A Dialogflow Agent: This will contain all the Intents that define your Action. Intents are used to categorise a user’s intentions. They have Training Phrases, which are examples of what a user might say to your agent. For instance: “Read my to-do list” or “Add ‘Buy broccoli’ to my to-do list”.
- A Fulfillment: This will receive requests from the Assistant, process the request and respond.
The fulfillment can be implemented using the Actions SDK with the Node.js® or the Java/Kotlin client library. If we use Node.js®, the fulfillment can then be deployed to a Cloud Function using Cloud Functions for Firebase. In order to integrate our Google Action with the rest of our ecosystem we will need this function to access our Firestore. This is possible thanks to the Firebase Admin SDK, as explained in the previous section.
In the second part of this article we will use the technology stack described here to build a simple proof of concept cross platform to-do list app, integrated with the Google Assistant.


Top comments (0)