Overview
Deploying a Web Application using AWS can seem overwhelming, but with the right setup, it becomes much easier. This guide walks you through setting up a Web app using AWS services and VsCode, covering everything from prerequisites to common challenges and solutions.
In this project, I'll be launching an EC2 instance on AWS, setting up a secure remote SSH connection using VsCode, and configuring the necessary development environment. This includes installing Maven and Java, which are essential for building and managing Java-based applications
Key concepts I learned:
- Creating an EC2 instance: Setting up a virtual machine in AWS, choosing an appropriate AMI (Amazon Machine Image), instance type, and configuring security groups.
- Connecting to an EC2 instance via SSH: Using a private key to establish a secure connection between my local machine and the cloud instance.
- Using SSH in VsCode: Configuring VsCode to work with remote SSH connections, allowing direct development on the EC2 instance without needing to switch terminals.
- Installing and Configuring Java & Maven: Setting up the necessary environment for building and running Java-based applications on AWS.
Key tools and concepts
For this project, I used the following services and tools:
EC2 Instance
A virtual computer/Server in the cloud that you can use to run programs, store files, and host websites without needing a physical machine.
Key Pair
A security system that lets you connect to your EC2 instance safely. It has two parts public Key (to be stored on the cloud computer) and private Key (strictly be saved on your own computer). You use the private key to log in securely instead of using a password.
VsCode
A code editor that makes it easy to work on your cloud computer remotely. It allows you to edit files and run commands on your EC2 instance without switching to a separate terminal.
SSH (Secure Shell)
A safe way to connect to your cloud computer over the internet/remotely. It lets you control your EC2 instance, run commands, and transfer files while keeping your connection secure.
.pem file
This file is a private key file used for secure SSH authentication. It is part of a key pair that AWS provides when you create an EC2 instance.
Steps
Step 1: Launching an EC2 instance
I started this project by launching an EC2 instance because the web app will be entirely created and run on the cloud. I selected Amazon Linux as my AMI since it’s lightweight, secure, and comes with pre-installed packages that are useful for development. And I chose the t2.micro instance, which is part of the AWS Free Tier, making it cost-effective while providing sufficient resources for this project.

I created a new key pair to securely connect to my instance and downloaded the .pem file, which is required for authentication when using SSH.

I opened port 22 (SSH) to allow remote access and restricted SSH access to my IP address instead of allowing access from anywhere (0.0.0.0/0), thereby enhancing security.
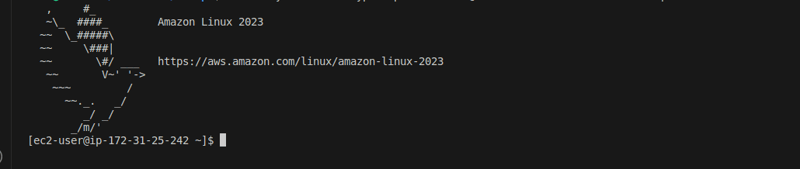
After verifying the configurations, I launched the instance. Once it was up and running, I noted the public DNS for connecting via SSH.

Step 2: Connecting to the Instance using VsCode
I used VsCode to connect to my EC2 instance via SSH.

I opened the terminal and entered into the directory where the .pem file was to change the permissions in order to restrict access to the file (.pem), making it readable only by me.
I used the command below to change the file permissions of the private key (.pem file) to make it more secure.
chmod 400 my-nextwork-keypair.pem

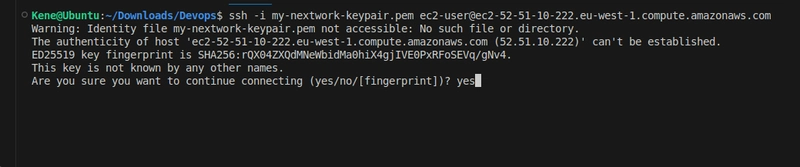
- I connected to the instance throught my Vscode terminal and typed yes since the system does not recognize the EC2 instance as a trusted host yet.
Tying yes allows SSH to save the server's fingerprint in the ~/.ssh/known_hosts file.
Step 3: Installion of Maven & Java
- In this step i installed Maven and Java. Maven is required in this project because it automates the process of Compiling (a process of converting written code into machine code), Linking (compiling machine code with other dependencies), Packaging (assembling Files) and Testing of software and Java is required in this project because I'll be using Amazon Corretto 8, which is free, reliable, and provided by Amazon.


- I verified the installion by using mvn -v for mava and java -version for java

Step 4: Creating the application
- I generated a Java web app using the command:
mvn archetype:generate
\ -DgroupId=com.nextwork.app
\ -DartifactId=nextwork-web-project \ -
DarchetypeArtifactId=maven-archetype-webapp
\ -DinteractiveMode=false

I installed "Remote - SSH", which is a VsCode's extension that allows you to connect to remote machines or servers using the SSH protocol and work on them as if they were local.

I set up the configuration details required to establish a remote connection include the Host(matching your EC2 instance's IPv4 DNS), the IdentityFile (pointing to the .pem key location on your local machine), and the User

Using VsCode's file explorer, I navigated the directory structure and files on my remote EC2 server through the "Remote - SSH" extension. This feature allowed me to view and manage project files just as if they were on my local machine.
To generate the project, I used Maven, a build automation tool that creates a structured template for Java applications. When the project was set up, Maven automatically generated key folders, including:src Folder – Contains the application's source code, where all Java classes and logic are written.
webapp Folder – Holds web-related and configuration files for building and running the web application.

Step 5: Using Remote SSH
- Index.jsp is a Java Server Pages (JSP) file that serves as the default landing page for a web application. It typically contains HTML mixed with Java code to dynamically generate content. I edited the index.js code by updating the HTML code to say my name.

Conclusion
This project marks Phase 1 of the Seven Days DevOps Challenge by setting up an EC2 instance and connecting via SSH using VsCode is a fundamental step in cloud-based development. By configuring security settings, managing key pairs, and establishing a remote connection, I have successfully laid the groundwork for deploying and managing the application on AWS.
See you in phase two !!🚀


Top comments (0)