Dynamic websites have become prevalent in today’s digital world. They introduce many challenges related to digital experiences, such as the dynamic loading of pages and WebElements. The dynamic loading of web pages and elements has become a significant concern.
These elements load asynchronously and at differing rates, often posing formidable challenges for automation engineers. The complexity of managing these slow-loading elements can turn into a recurring issue. The intermittently slow loading times can lead to test case failures, rendering automation scripts unreliable and flaky.
*Optimize your data management workflow with our SQL to YAML Converter. Convert SQL queries to YAML files and easily manage and share data configurations. *
One of the top contributors to these failures is the NoSuchElementException. This exception is raised when an element cannot be found in the DOM while working with Selenium for writing automation for lazy loading websites on which all the elements are not loaded instantly. Dealing with NoSuchElementException is challenging as it’s an Unchecked Exception, necessitating graceful in-code handling due to its inability to be declared in a method’s throws clause.
In this blog, we will dive deep into the NoSuchElementException in Selenium and understand the reasons for its occurrence. By the end of this blog, you will have a better understanding of how to handle *NoSuchElementException *in Selenium Java and improve the reliability of automated test cases on dynamic websites.
What is a NoSuchElementException?
NoSuchElementException is one of the most common exceptions in Selenium, which occurs when an element is not found on the page. It indicates that the code could not locate and interact with a particular element on the page.
In Selenium automation tests, NoSuchElementException is thrown by WebDriver.findElement() and WebDriver.findElements() methods. It is derived from NotFoundException. You can learn more about it through this blog on *findElement() and findElements() *methods in Selenium.
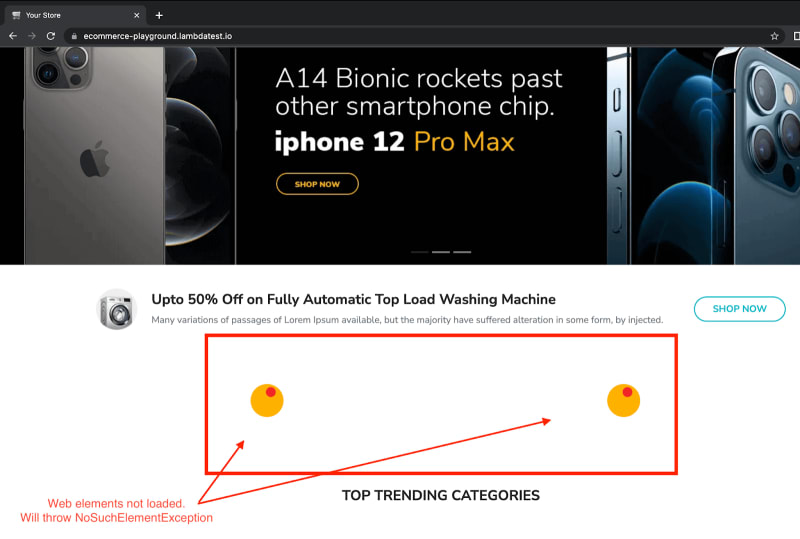
For example, if you navigate to the LambdaTest eCommerce Playground, you can notice that a few elements are loaded dynamically, and the page looks like this.
At this point, if WebDriver in the Selenium automation code tries to interact with one of the dynamic elements, it throws a NoSuchElementException. So, we should wait for these slow-loading elements to be available first and then proceed further.
Reasons for NoSuchElementException in Selenium
A NoSuchElementException can occur due to failure in locating or interacting with a WebElement on a web page while working with Selenium automation scripts due to the reasons listed below:
*Online CSS to STYLUS converter to convert CSS string to Styl. Get clean, readable code instantly. Start converting today! *
Invalid WebElement Locators
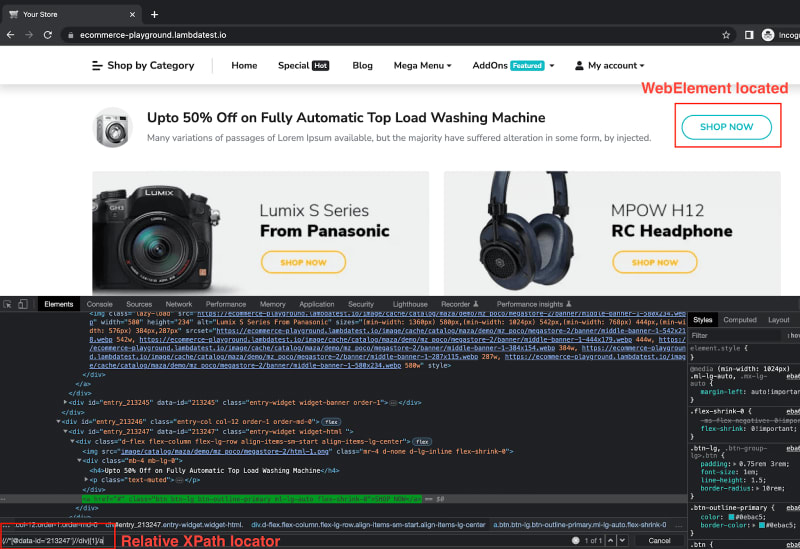
Incorrect or wrongly written WebElement *locators make for the most number of *NoSuchElementException(s). The *WebElement *locator given could be wrong or, at times, too broad that it references multiple elements.
In the screenshot above, the locator is correct, but it references 57 WebElements on the page, which could lead to *NoSuchElementException *when executing the tests.
Slow Loading WebElements
Selenium tests are considerably faster when executed in good network conditions. This causes elements to be absent when the automation script tries to act on them.
This can be resolved using waits such as Implicit waits and Explicit waits. We will be covering the same in the subsequent sections of the blog.
iFrame Issues
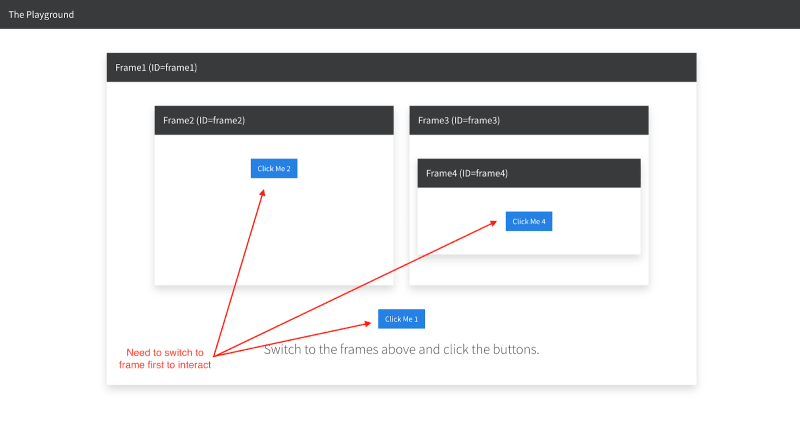
Many times, the WebElement is present inside another Frame (or iFrame). Selenium script needs to switch to the frame to interact with the WebElement; otherwise, it will result in NoSuchElementException.
Design changes on the web page
Website designs tend to be revamped regularly after the releases. This is mostly done to add new features and improve user experience and accessibility. Due to this HTML, the structure is impacted the most, and many WebElements could get a new reference path on the webpage or become obsolete in some cases. This leads to *NoSuchElementException *when the automation script still references the WebElement with old locators.
*Need realistic sample data? Use our free online easy-to-use Random XML Generator to create custom XML data for testing and prototyping. No sign-up required. *
Best Practices to fix NoSuchElementException in Selenium
Handling *NoSuchElementException *is important because it helps to make the test scripts more reliable and robust and also prevents them from failing intermittently due to the unavailability of the WebElement.
Check if the element exists and is displayed
Before directly interacting with the element, always make sure it is present on the page and is displayed. For this use, findElementBy() and isDisplayed() functions are provided by Selenium WebDriver.
findElementBy() returns the object of the first matching WebElement of the given element locator on the webpage.
isDisplayed() method of Selenium returns true if a certain WebElement is present and displayed on the webpage. If not, it returns false.
Use waits
Using waits is one of the most commonly used ways to prevent *NoSuchElementException *from occurring in case of slow-loading WebElements and pages. Waits help to make WebDriver wait for the presence of the element or for the page to be loaded before interacting with the element.
Selenium WebDriver provides support for Implicit and Explicit waits. Implicit waits means to set a wait time for an element to be loaded and is implemented to all the elements in the automation script. Explicit waits, the recommended approach, allow waiting for a specific element to prevent unnecessary execution time and NoSuchElementException. *WebDriverWait *has been used in the demonstration section to showcase this better.
Use more robust locators
Always use relative XPath locators compared to absolute ones. This is because relative XPaths are less susceptible to changes when page structure gets modified and thus reduces the chances of exception.
In addition, you must try and use unique locators like ID or Name or a combination of both. These tend to remain the same for the WebElements. This prevents rework in case of cosmetic changes to handle the NoSuchElementException.
If these approaches are not suitable and your page content is highly dynamic, try to use a dynamic locator like xpath[contains(text(),’text’)] to locate the element using text reference, which won’t change.
*Need YAML data for testing? No need to stress about YAML data — Try our Random YAML Generator for a quick and effortless way to generate YAML data in seconds. *
Use try..catch blocks
Wrap your code inside a try-catch block. This helps to catch the *NoSuchElementException *if it occurs and lets the code continue without making it stop abruptly. For this, add the automation code to fetch the WebElement and perform an action on it inside the try block. Then, add a catch block to catch the exception if it occurs and perform any required actions. This helps the code to gracefully handle an exception and prevent it from behaving abruptly.
Switch to Frames and iFrames
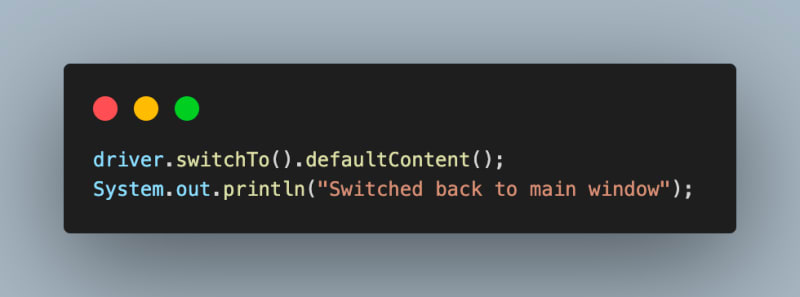
Always check if the element is present inside a frame. If yes, use the driver method switchTo() to change driver control to the required frame first and then interact with the WebElement. Once the action is completed, remember to switch the driver back to the main window or the parent frame using driver.switchTo().defaultContent(). You can learn more about it through this blog on iFrames in Selenium.
Demonstration: How to fix NoSuchElementException in Selenium?
To demonstrate the possible ways to fix and handle *NoSuchElementException *in Selenium, we will create a Java project with Maven and TestNG.
In this blog, Eclipse IDE has been used for demonstration purposes. You can choose any IDE of your choice. The implementation remains the same on all of them till a Maven project is created.
As we are working with the Selenium web automation script, we need to add Selenium dependency along with TestNG, which will be used for test execution to the pom.xml of the project.
Once the project is created and dependencies are added, the final pom.xml will be like the one below.
<project xmlns="http://maven.apache.org/POM/4.0.0"
   xmlns:xsi="http://www.w3.org/2001/XMLSchema-instance"
   xsi:schemaLocation="http://maven.apache.org/POM/4.0.0 https://maven.apache.org/xsd/maven-4.0.0.xsd">
   <modelVersion>4.0.0</modelVersion>
   <groupId>NoSuchElementException</groupId>
   <artifactId>NoSuchElementException</artifactId>
   <version>0.0.1-SNAPSHOT</version>
   <build>
       <sourceDirectory>src</sourceDirectory>
       <plugins>
           <plugin>
               <artifactId>maven-compiler-plugin</artifactId>
               <version>3.8.1</version>
               <configuration>
                   <release>19</release>
               </configuration>
           </plugin>
       </plugins>
   </build>
   <dependencies>
       <dependency>
           <groupId>org.seleniumhq.selenium</groupId>
           <artifactId>selenium-java</artifactId>
           <version>4.8.0</version>
       </dependency>
       <dependency>
           <groupId>org.testng</groupId>
           <artifactId>testng</artifactId>
           <version>7.7.1</version>
           <scope>test</scope>
       </dependency>
   </dependencies>
</project>
Next add a new Java test file TestSeleniumNoSuchElementException.java. We will add our test cases to this to see how to fix *NoSuchElementException *in Selenium.
To handle *NoSuchElementException *in Selenium, we will use a cloud Selenium Grid like LambdaTest for Selenium Java testing.
*Need decimal fractions for your project or testing? Use our free and fast online Random decimal Fraction Generator to generate random decimal fractions in seconds! *
LambdaTest is an AI-powered test orchestration and execution platform to run manual and automated tests at scale. The platform allows you to perform real-time and automation testing across 3000+ environments and real mobile devices. With parallel testing in Java automation testing on LambdaTest, you can significantly reduce the time it takes to run your tests, especially if you have a large number of tests or need to test your application across a wide range of environments.
After adding all the WebDriver configurations and test case examples to demonstrate the fix for NoSuchElementException, the completed file should look like this:
package test;


import java.net.*;
import java.time.Duration;
import java.util.HashMap;


import org.openqa.selenium.remote.RemoteWebDriver;
import org.testng.annotations.*;
import org.openqa.selenium.By;
import org.openqa.selenium.NoSuchElementException;
import org.openqa.selenium.chrome.ChromeOptions;
import org.openqa.selenium.support.ui.*;


public class TestSeleniumNoSuchElementException {


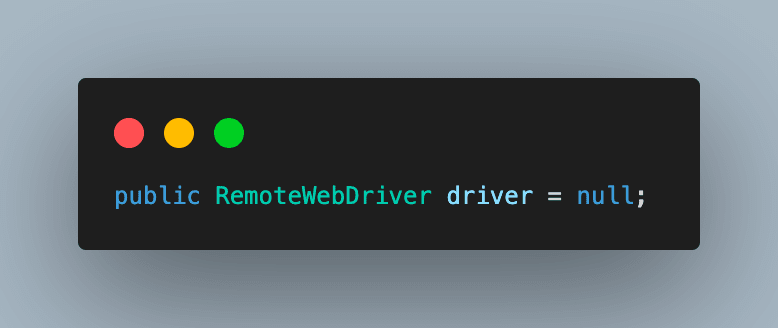
   public RemoteWebDriver driver = null;


   String username = System.getenv("LT_USERNAME") == null ? "<lambdatest_username>" : System.getenv("LT_USERNAME");
   String accessKey = System.getenv("LT_ACCESS_KEY") == null ? "<lambdatest_accesskey>"
           : System.getenv("LT_ACCESS_KEY");


   @BeforeTest
   public void setup() {
       try {
           ChromeOptions chromeOptions = new ChromeOptions();
           chromeOptions.setPlatformName("Windows 10");
           chromeOptions.setBrowserVersion("110.0");


           HashMap<String, Object> ltOptions = new HashMap<String, Object>();
           ltOptions.put("build", "NoSuchElementException in Selenium");
           chromeOptions.setCapability("LT:Options", ltOptions);


           driver = new RemoteWebDriver(
                   new URL("https://" + username + ":" + accessKey + "@hub.lambdatest.com/wd/hub"), chromeOptions);
       } catch (MalformedURLException e) {
           e.printStackTrace();
       }


   }


   @AfterTest
   public void tearDown() {
       driver.quit();
   }


   @Test
   public void testNoSuchElmentException() {
       driver.get("https://ecommerce-playground.lambdatest.io/");
       driver.findElement(By.id("entry_213244")).click();
   }


   @Test
   public void testNoSuchElmentException_fix_tryCatch() {
       driver.get("https://ecommerce-playground.lambdatest.io/");
       try {
           driver.findElement(By.id("entry_213244")).click();
       } catch (NoSuchElementException ex) {
           System.out.println("We are inside catch block");
           System.out.println("NoSuchElementException has been handled.");
       }
   }


   @Test
   public void testNoSuchElmentException_fix_wait() {
       driver.get("https://ecommerce-playground.lambdatest.io/");


       WebDriverWait wait = new WebDriverWait(driver, Duration.ofSeconds(5));
       wait.until(ExpectedConditions.presenceOfElementLocated(By.id("entry_213244")));


       driver.findElement(By.id("entry_213244")).click();
       System.out.println("Web element located and clicked successfully.");
   }


   @Test
   public void testNoSuchElmentException_iframe() {
       driver.get("https://play1.automationcamp.ir/frames.html");
       driver.findElement(By.id("click_me_1")).click();
   }


   @Test
   public void testNoSuchElmentException_iframe_fix() {
       driver.get("https://play1.automationcamp.ir/frames.html");


       driver.switchTo().frame("frame1");
       System.out.println("Switched to frame 1");


       driver.findElement(By.id("click_me_1")).click();
       System.out.println("Web element located and clicked successfully.");


       driver.switchTo().defaultContent();
       System.out.println("Switched back to main window");
   }
}

       driver.findElement(By.id("click_me_1")).click();
       System.out.println("Web element located and clicked successfully.");


       driver.switchTo().defaultContent();
       System.out.println("Switched back to main window");
   }
}
Code Walkthrough
Step 1. We create an instance of RemoteWebDriver as we execute the code on the Selenium cloud Grid.
*Looking for an easy way to generate random octal numbers? Use our online Random Octal Generator tool to generate random numbers in octal format. Try it now for free. *
Step 2. Navigate to the LambdaTest Profile section once you create your account to fetch the username and access key. These will be used to make a connection to their cloud grid.
You can also configure the username and access key as environment variables using the following commands and directly fetch them in code.
For MacOS and Linux:
export LT_USERNAME=LT_USERNAME
export LT_ACCESS_KEY=LT_ACCESS_KEY
For Windows:
set LT_USERNAME=LT_USERNAME
set LT_ACCESS_KEY=LT_ACCESS_KEY
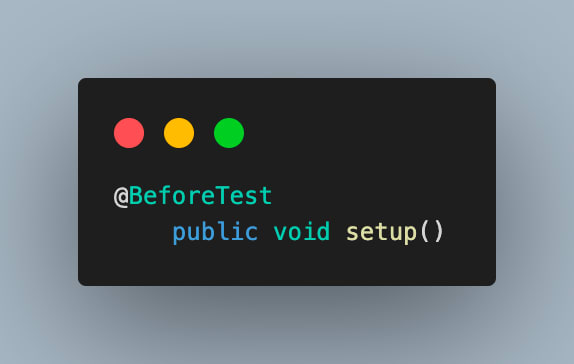
Step 3. Create a base method, name it setup(), and annotate with @BeforeTest annotation in TestNG. This method will be used for driver setup and opening the webpage before each test.
In this blog on Selenium Java, we have used Selenium 4, which supports the ChromeOptions class. In this function, an object of the same is created to define browser properties like browser version, OS version, etc. It also accepts the variables required for LambdaTest execution as a capability. These variables are used to set values like build, name, or any other browser property, which will help to identify the run on the LambdaTest Dashboard or modify behavior.
Step 4. Finally, an instance of RemoteWebDriver is created to connect to the LambdaTest cloud grid using the *chromeOptions *and your LambdaTest username and the access key.
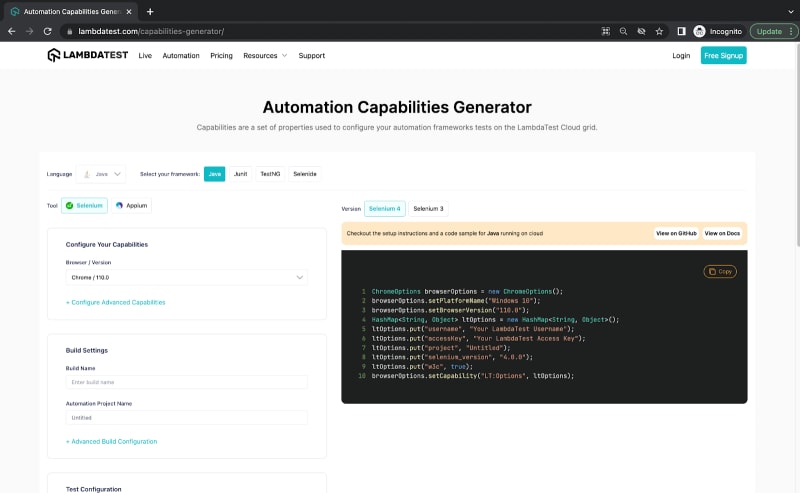
Step 5. The LambdaTest platform also contributes by offering ready-to-use code for various OS and browser combinations and numerous browser configurations. To get an instantly valid code for your automation script, go to their Automation Capabilities Generator and make the necessary setup selections.
*Want to decode a messy URL? Unleash the full potential of your website with our online URL Parse tool. Optimize your website’s URLs to improve your site’s visibility. *
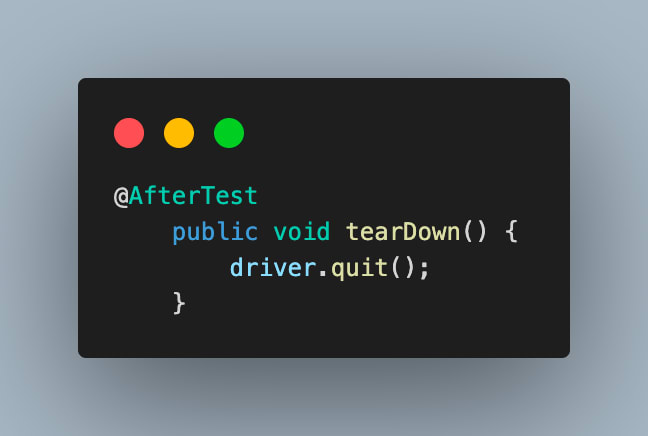
Step 6. Add a method as tearDown() and annotate it with @AfterTest annotation. This will be used to close the session after each test case.
Example: NoSuchElementException in Selenium
Add the first test case and name it testNoSuchElmentException().
In this test, we navigate to a website with a few slow loading elements. Then, we try to click on one such element and observe the results.
On executing this, you can observe that the test case fails with *NoSuchElementException *as the element is not yet available to be clicked as it is not loaded yet, and hence the element is unavailable.
Another reason could be that the passed WebElement locator is incorrect, and no element is present with that reference.
Need to extract text from HTML code? Our free online tool makes it easy and fast. Save time by extracting only the text you need from HTML code in no time.
In the next examples, we see how to fix this *NoSuchElementException *in Selenium.
Fixing NoSuchElementException in Selenium using try-catch
As mentioned in earlier sections, one of the most popular ways to handle *NoSuchElementException *in Selenium is using the try-catch block.
You can enclose the WebElement interaction code within a try block and subsequently include a catch block to address any potential *NoSuchElementException *occurrences. Within the catch block, you can execute additional functions in alignment with your automation script’s needs.
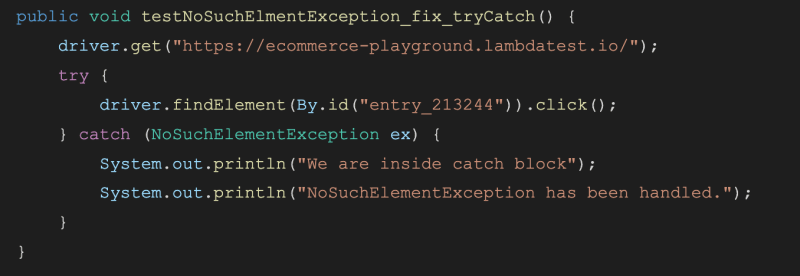
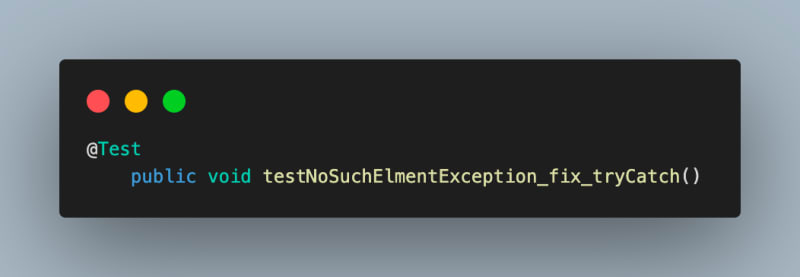
For this, add a new test case named testNoSuchElmentException_fix_tryCatch().
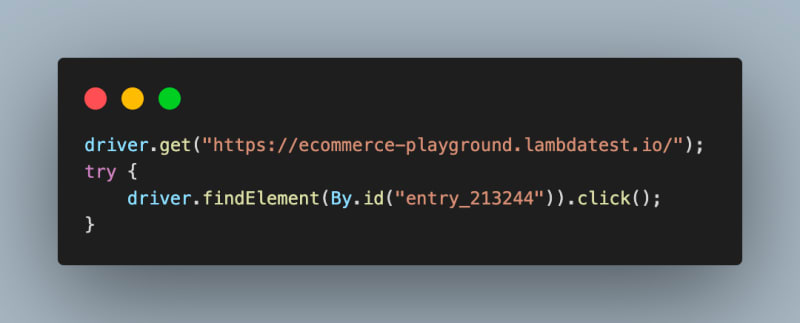
In this, we use the same code as the previous example, which raised an exception, but place that inside the try block.
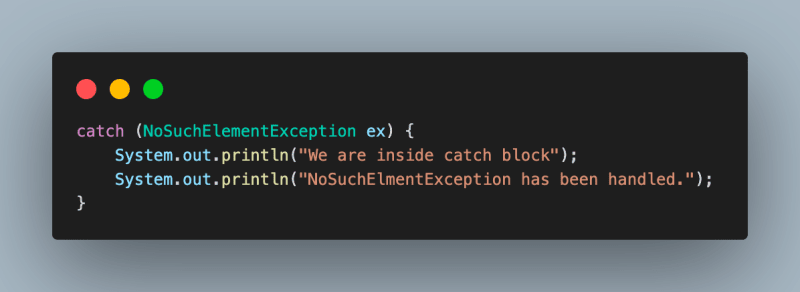
Add a catch block following this try block to catch the *NoSuchElementException *if it occurs and to continue the execution.
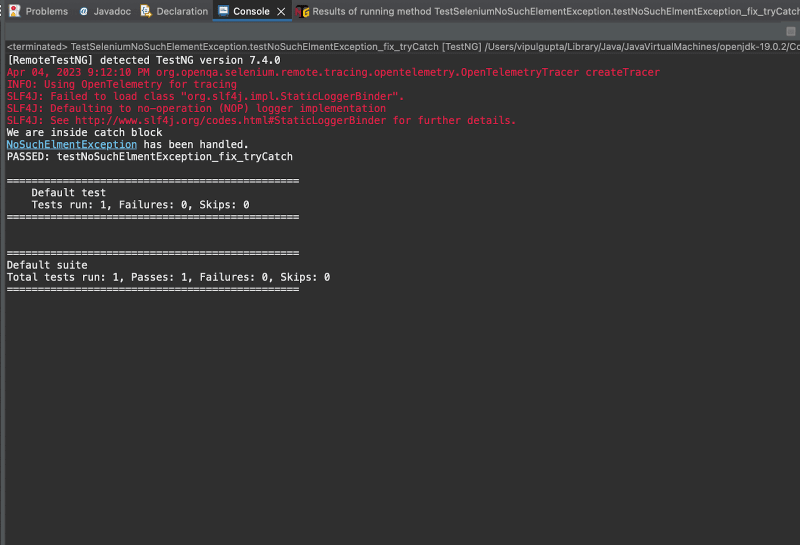
Let’s try to execute the code and see the output.
Fixing NoSuchElementException in Selenium using WebDriverWait
Another popular way to fix NoSuchElementException *in your code is to use *WebDriverWait. This should be used in case of slow loading elements on a webpage. These can also be helpful when we run automation code by throttling the network speeds to simulate different conditions and check the behavior. It allows the automation script to wait for a given amount of time for a WebElement to be visible and then proceed with the interaction instead of directly throwing the NoSuchElementException.
Using waits is very helpful when the automation script is running on slow internet networks. In such situations, we can analyze how long a certain WebElement takes to be present on the web page. This data can then be used to define wait duration in automation scripts for different WebElements.
**Extract text from JSON data with our powerful and easy-to-use online free tool. Get the data you need quickly and efficiently, no technical skills required. **
WebDriverWait *is a class provided as a part of Selenium dependency using an object to which we can add an *ExpectedCondition on the WebElement before proceeding.
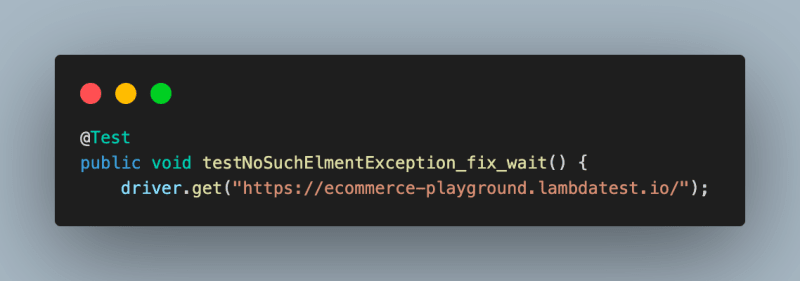
For this, add another test case and navigate to the target website URL.
Create an object of the *WebDriverWait *class and pass the driver object and the duration we want to wait for the element.
Using this object with the until() function, we add an *ExpectedConditions *suggesting to wait for the presence of a given element by specifying the locator.
Since we have configured *WebDriverWait *time to be 5 seconds, this will make the WebDriver wait for a maximum of 5 seconds before throwing an exception if WebElement is not found.
If the element is found before the given time, WebDriver continues the execution by passing the control to next code statements. This allows the interaction by clicking on the element.
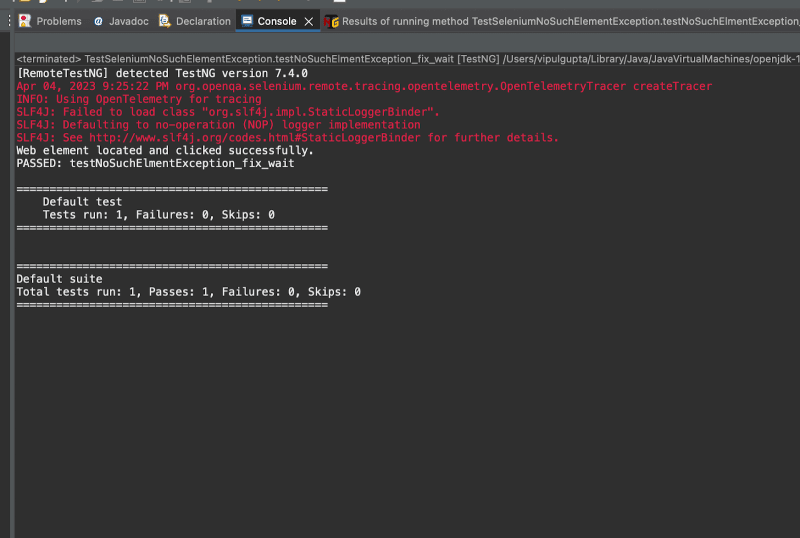
Executing this would provide a successful output as the WebElement is present before we click on it.
These *ExpectedConditions *are used to implement Explicit waits. These are dedicated to a single WebElement and, unlike Implicit waits, are not applied to all the WebElements on the webpage. Thus, these prevent *NoSuchElementException *from happening without adding unnecessary execution times.
Example: NoSuchElementException in Selenium due to iFrames
Another reason for *NoSuchElementException *is that the WebElement is inside an iFrame.
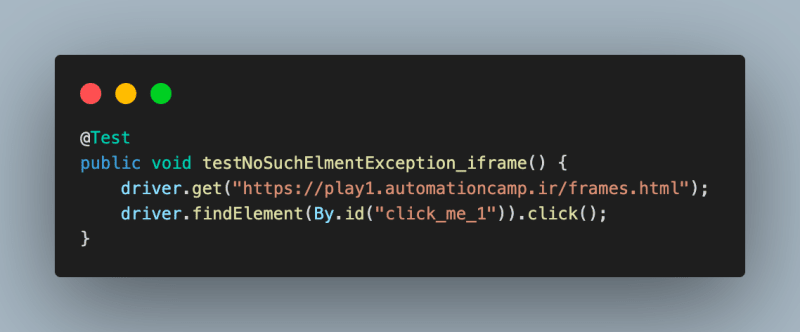
To understand the same, consider the below example.
Looking at this code, it seems quite similar to previous examples. But the difference here is that the WebElement is inside a child frame and not on the main window.
*Get your CSS validated by our CSS Validator and eliminate syntax errors and other issues that could affect your website’s performance. Ensure your CSS code is error-free today! *
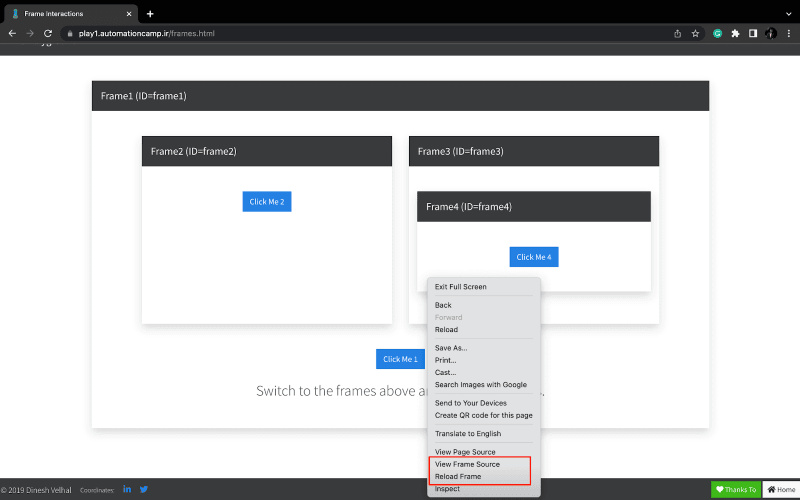
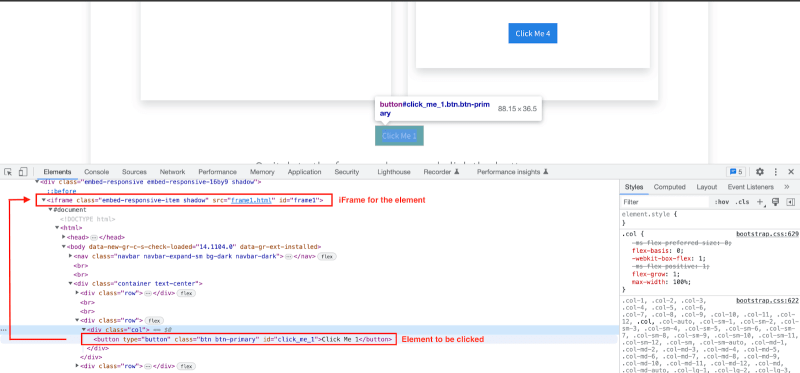
You can check if a WebElement is inside an iFrame or not by going to the Inspect Tools.
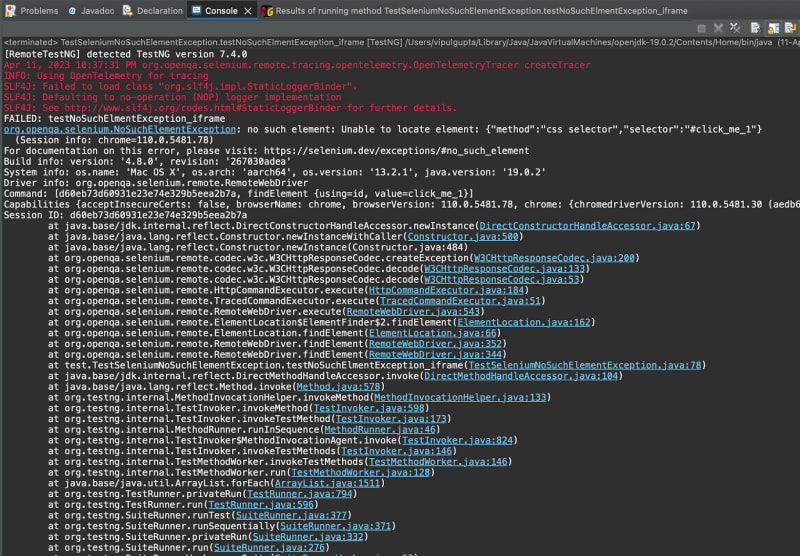
Hence, executing this would result in a *NoSuchElementException *like the one below, as it will not be found by the driver in its focus window, which is the main window.
Fixing NoSuchElementException in Selenium due to iFrames
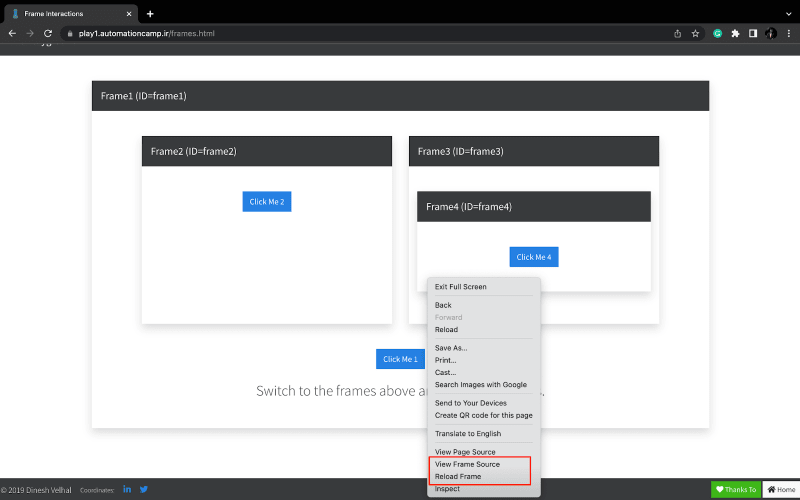
You can identify if you are dealing with an iFrame by right-clicking next to the WebElement. If it has options like View Frame Source or Reload Frame, it is an iFrame or Frame.
Next, to get the frame ID, click on Inspect from the same menu and try to locate the parent < *iframe *> tag for your WebElement.
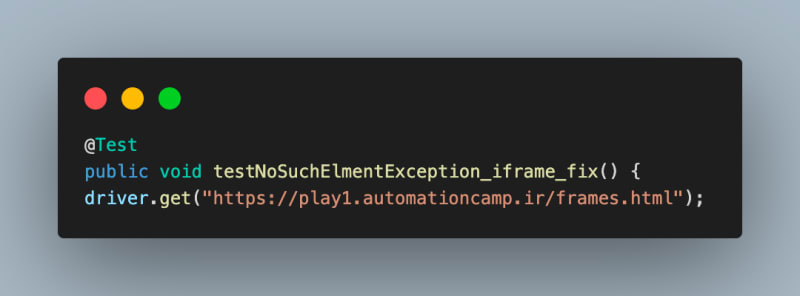
Consider a new test case, testNoSuchElmentException_iframe_fix(), and navigate to the website.
Next, switch to the iFrame by passing its ID to the driver.
After this, click on the element. This time, there will be no NoSuchElementException *as the driver is focused on the current frame window, and the element is inside the same iFrame to which we switched earlier using the *switchTo() method.
Lastly, switch back the driver to focus on the main window as this is from where all interactions are started.
*Protect your XML data with our online free XML Escape tool. Quickly escape your code and be assured from vulnerabilities with just a few clicks! *
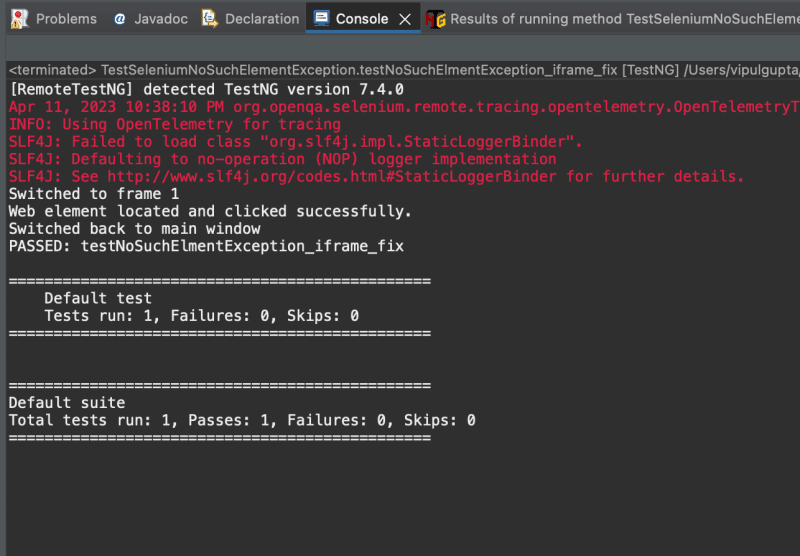
Executing the above test case would give a successful response like the one below.
Bonus: NoSuchElementException in Java
In Java, this exception can be thrown by various methods that can be used for data retrieval to indicate that the element requested does not exist.
For example, if you try to retrieve data from an empty data structure or (n+1)th element from a data structure of n length, then *NoSuchElementException *is thrown.
To fix the NoSuchElementException, it should be ensured that the underlying data structure contains more elements before trying to retrieve the next element or by implementing proper exception handling using try-catch mechanisms.
Fixing NoSuchElementException in Java
Let’s look at the example to fix *NoSuchElementException *in Java. For this, we keep using the same project setup and add another test class to understand this.
Test Scenario:
Create a HashMap.
Add 2 elements to this HashMap.
Create an object of Iterator to fetch keys from HashMap.
Execute the next() function of the iterator 3 times to fetch data.
Now, since we have added only 2 elements, this example should throw a NoSuchElementException.
@Test
   public void testNoSuchElementException()
   {
       HashMap<Integer, Integer> map = new HashMap<>();
       map.put(1, 1);
       map.put(2, 2);

       Iterator itr = map.keySet().iterator();
       System.out.println("first element : " + itr.next());
       System.out.println("second element : " + itr.next());
       System.out.println("third element : " + itr.next());
   }
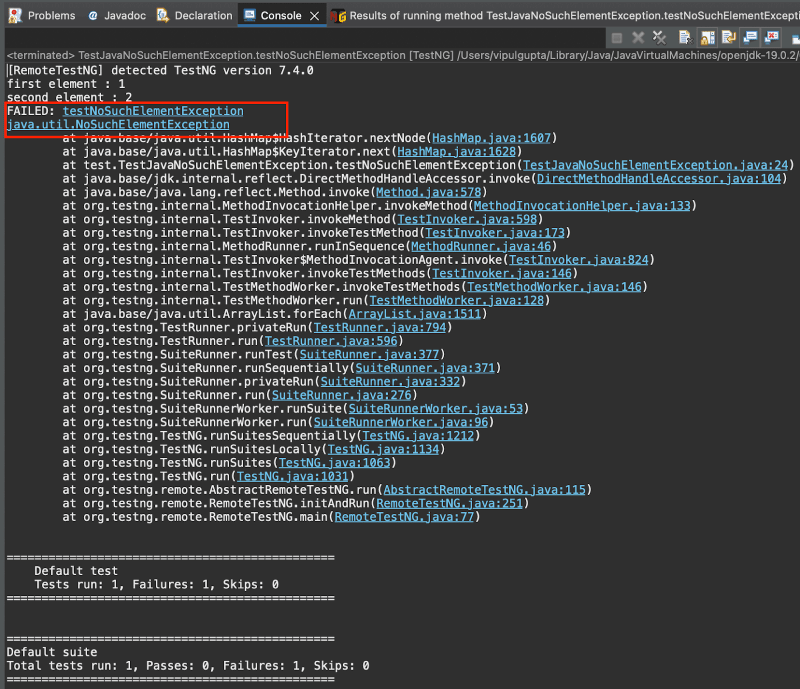
Executing above code you should get an output like below:
From the above screenshot, you can see this test throws *NoSuchElementException *as there is no third element.
To fix this NoSuchElementException, we use the hasNext() function of the Iterator. This function is used to fix this exception, as before trying to fetch and print the element, it helps to check whether an element is present. If it finds more elements, it continues to print. Otherwise, it helps to stop the flow without any exceptions.
@Test
   public void testNoSuchElementExceptionFixed()
   {
       HashMap<Integer, Integer> map = new HashMap<>();

       map.put(1, 1);
       map.put(2, 2);

       Iterator itr = map.keySet().iterator();

       while(itr.hasNext()) {
           System.out.println("Element : "  + itr.next());
       }
   }
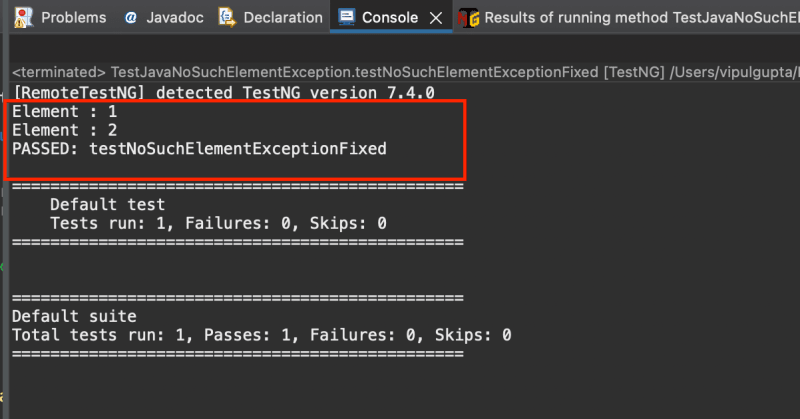
On executing the same test with this fix, you can see that the test passed without NoSuchElementException.
*Don’t let CSV errors slow you down. Validate and lint your CSV data with ease using our free online CSV Validator tool. Get accurate and error-free results in seconds! *
Conclusion
With this, we have come to the end of this blog. In this blog on how to fix *NoSuchElementException *in Selenium, we have learned what a *NoSuchElementException *is and why it could occur while working with Selenium. We also take some example automation scripts and try to understand how it can be fixed and handled more gracefully to prevent abrupt results. So, it’s time to fix all such cases in your automation scripts and get started.















Top comments (0)