Building a Twitter bot is part of the holy pilgrimage to being a hobbyist developer. Let's face it: building bots is fun.
Let's take our first steps into how we can make our first Tweet with NodeJS. We will go through a simple four-step process on how to get up and running with your first bot!
Step One: Get access
As of writing, it is a requirement to apply for access for a developer Twitter account. It is nice and straight-forward and requires a couple of minutes to fill out.
This step is only required if you have no yet done this.
Step Two: Get tokens
Once you have access to the Developer Dashboard, you can create your first app and obtain your Twitter access tokens.
From the dashboard, you will need to head to Projects & Apps > Your Project > Your App and select Keys and tokens on the tabs at the top. This will give you access to copy and save your API Key & Secret. These will only be available for a day or so. Make sure you store them somewhere secure! I always opt for a password manager.
You will also need to generate the Access Token & Secret. This an be done under Authentication Tokens. Do the same by copying these and keeping them safe. We will need all four of the keys we have stored.
Once you have done all that, keep the keys handy and we will build out the bot.
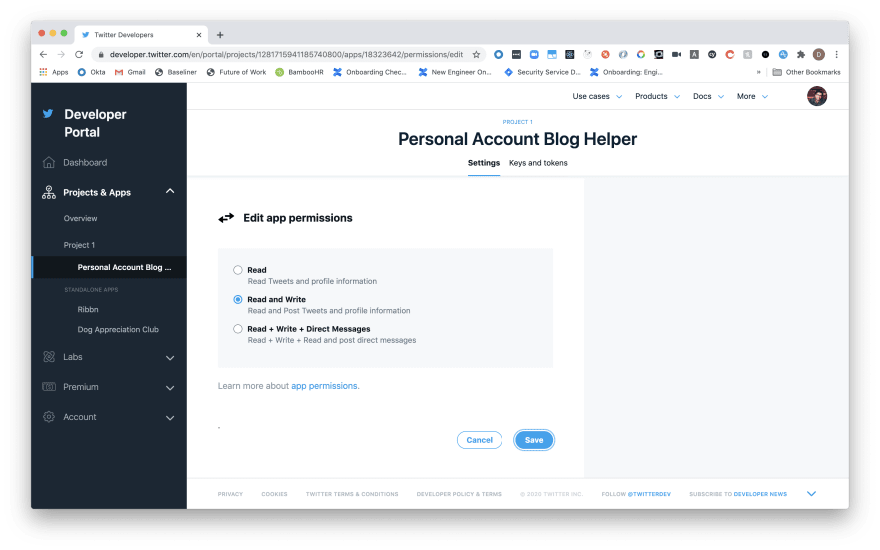
Step Three: Add read + write permissions
In that same dashboard, head to Projects & Apps > Your Project > Your App and make sure you change your App permissions to be Read and Write.
This is important to allow us to Tweet with the credentials from above.
Step Four: Build the application
We will keep things short and simple for now to get our first Tweet out! We are going to use the Twit package to be our medium through which we post and Dotenv to load our environment variables at runtime from our local (so we can safely Git ignore them).
From the root of your new project:
# init with the basics
yarn init -y
yarn add twit
yarn add --dev dotenv
touch index.js .env .gitignore
Inside of .gitignore, let's make sure our secrets are not being stored on our remote repository:
node_modules/
.env
With our access tokens we saved from before, we will need to add them to .env:
TWITTER_CONSUMER_KEY=<your-token>
TWITTER_CONSUMER_SECRET=<your-token>
TWITTER_ACCESS_TOKEN_KEY=<your-token>
TWITTER_ACCESS_TOKEN_SECRET=<your-token>
Finally, let's add our code to index.js:
require("dotenv").config()
const Twit = require("twit")
const client = new Twit({
  consumer_key: process.env.TWITTER_CONSUMER_KEY,
  consumer_secret: process.env.TWITTER_CONSUMER_SECRET,
  access_token: process.env.TWITTER_ACCESS_TOKEN_KEY,
  access_token_secret: process.env.TWITTER_ACCESS_TOKEN_SECRET,
})

/**
 * Post a tweet to account.
 *
 * @example
 * const tweet = await Twitter.post('This is an update', res.media.media_id_string);
 * // returns success/error object
 *
 * @param  {String} tweet  Tweet string
 * @param  {Twitter} client Client instance of Twitter package
 * @return {Promise<ClientResponse>} Return error or success object
 */
const post = tweet => {
  const limit = 136

  // ensure Tweet is correct length, but if not let's truncate
  // and still post.
  const tweetSubstr =
    tweet.length > limit ? `${tweet.substring(0, limit - 3)}...` : tweet

  const data = {
    status: tweetSubstr,
  }

  // use the client to post the message
  return client.post("statuses/update", data)
}

const main = async () => {
  try {
    console.log("Attempting to post")
    await post("First post from the blog helper bot!")
    console.log("Posted!")
  } catch (err) {
    console.error(err)
  }
}

main()
What we are doing in index.js is fairly straight forward, but let's break it down:
- Require and load our env variables from the
.envfile to access during runtime - Require our Twitter library
Twitand initialise it with our environment variables - Declare a
postfunction that simply takes text, checks it is less than the defined limit and then uses the client to post - Declare
mainasynchronous function that will attempt to post the text"First post from the blog helper bot!" - Run the
mainfunction
It is worth noting that
postreturns a promise, hence why we makemainanasyncfunction and useawaitwhen calling to post
That is it! Let's now run node index.js. If successful, you should get the following back:
> node index.js
Attempting to post
Posted!
If you are unsuccessful, there will be an error that is caught and logged out.
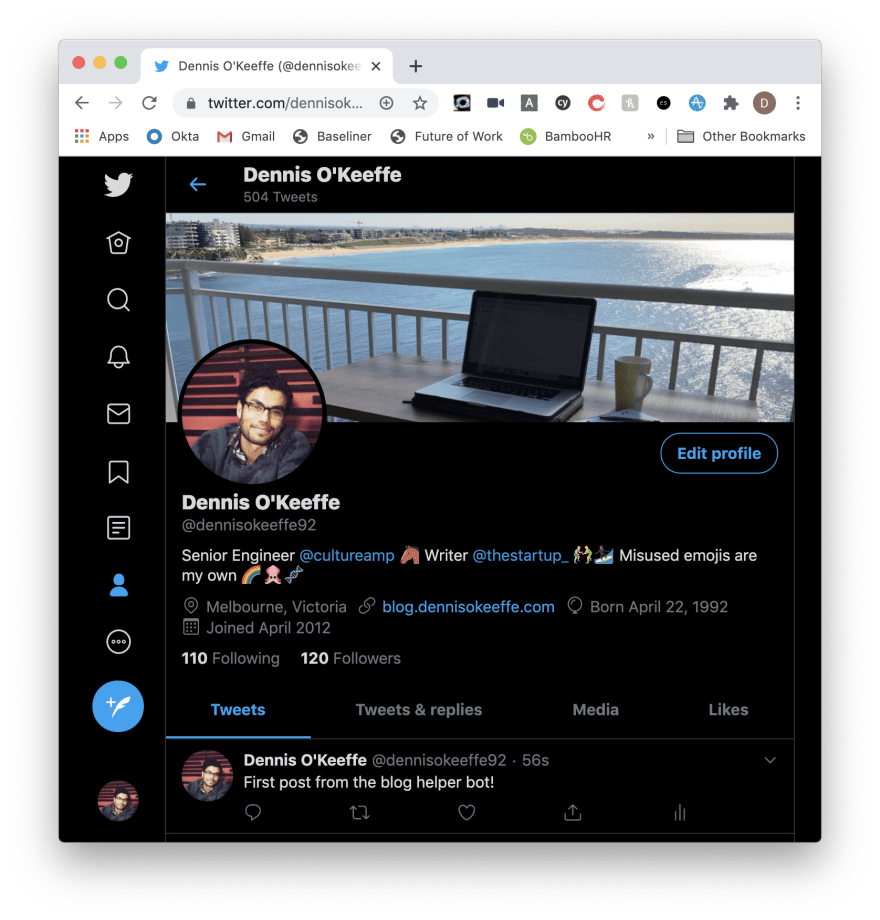
If we now jump onto Twitter, we can see our successes!
Congratulations! You can now post remotely and avoid all the negative vibes that can come across from time to time when perusing the Twitterverse!
Resources and Further Reading
- Apply for access
- Obtaining Twitter access tokens
- Twit
- Dotenv
- Completed project
- Twitter Docs - statuses/update
Image credit: freestocks
Originally posted on my blog. Follow me on Twitter for more hidden gems @dennisokeeffe92.


Top comments (1)
Nice article! I too have made around 4 twitter bots for different purposes, including one for Covid-19 Data updates. I have their code public on my github.
Here's one of them:- github.com/PiyushSuthar/twitter-bot
(Shameless Promotion, sorry 😅)