In this tutorial guide I will show you how to create a documentation for your project using the Sphinx style.
Sphinx is a documentation generator written and used by the Python community and environments.
Sphinx uses the reStrcuturedText markup language by default and can also be tweaked to using markdown.md as a third party package
In this tutorial guide I’ll show you how to
- Install sphinx on your project
- Setup Sphinx on your project
- Run Sphinx with some basic commands
- Install a different theme
- Deploy your documentation on reathedocs
First create a project on GitHub and clone it on your local machine or alternatively clone this blank project
cd into the directory of the repo you just cloned with
cd demo-sphinx-tutorial
Create a virtual environment with
python3 -m venv venv if you’re on a linux server like I am or python -m venv venv on a windows
Activate your virtual environment with
source venv/bin/activate on a linux server venv\Scripts\activate on a windows and open your project in your choice editor.
Install Sphinx
pip install sphinx
Setup Sphinx
sphinx-quickstart docs
Now what this is going to do is to run you through a bunch of questions, whenever you want to accept the default value just go ahead and press enter
Separate source and build directories (y/n) [n]:
press y

The project name will occur in several places in the built documentation.
> Project name: demo-sphinx-tutorial
> Author name(s): Tim Osahenru
> Project release []: 1.0

> Project language [en]:
press enter
Run Sphinx
cd into source folder and make a directory called images with mkdir images where our images will be stored
your file tree should look like this

open the index.rst file this is where the magic takes place, you want to leave this section.

the toctree tells sphinx the hierarchical order of your file, you can either push to the bottom of the page of leave it ontop DO NOT DELETE THIS
next I’m going to copy and paste some dummy data into the index.rst file

now we build our documentation with this commands sphinx-build -b html docs/source/ docs/build/html
To view your built work open the build folder and load index.html on your browser
NB:
whenever you make a change inside the index.rst
file always make sure you build with
sphinx-build -b html docs/source/ docs/build/html
Install theme
To pick a theme visit for this tutorial this theme was used
install the theme with
pip install sphinx-rtd-theme
locate this session in your conf.py file and change html_theme = 'alabaster' to html_theme = 'sphinx_rtd_theme' and build again with sphinx-build -b html docs/source/ docs/build/html
PART II
Deploying to readthedocs
cd into you docs folder and create a requirements file with pip freeze > requirements.txt for readthedocs to know the dependencies used on this project
Perform these git commands to push to GitHub where we will be deploying our project from
git status
git add .
Git commit -m ‘first commit’
git push
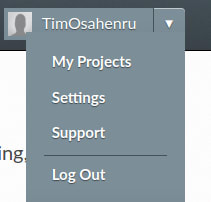
Create an account on readthedocs navigate to your profile image button and click the drop down menu
 click on
 My Projects > Import a Project select the project you wish to deploy and click on Build Project
Once the build is successful you should get an indication and have a project like this.
Congratulations!


Top comments (0)