Git is one of the first things people say you need to learn when you get into coding. Doesn't matter your language preference, or the side you've chosen to code (frontend or backend) Actually Git can help so many people in different professions, even writers or graduate students, just imagine having a single folder with a single file for their thesis project. But no, they always prefer to go this way.

Git could be used by almost anyone who needs to version their work, and whose work involves working on a computer. I'm not going to pretend to create an introductory tutorial on Git here, instead I'm going to assume that you already know the basics of this wonderful tool. Actually, I'm aiming this tutorial/article at anyone who's familiar with Git but hasn't heard of storing their changes, to be more precise.
Have you ever been in the situation where you're working on a new branch, and you've made significant breakthroughs, but those changes are still a mess and have some bugs, when suddenly you get a Slack or Teams notification from your manager saying.
"Hey, I need you to fix this bug I found in production ASAP”.
It's Friday at 13:00, the weekend is so close, so you have no choice but to work on this bugfix. What do you do with the changes you know are in the working directory? You run git status on your terminal and seven files pop up in red. Everything is so disorganized that you haven't refactored and even have some debugger statements on your code. As a responsible developer, you know that you should not commit all that messy code. You can, but you may not.
If only there were a simple way to freeze time and return to your masterpiece after fixing that annoying bug that probably takes two lines of code to fix. If only there were, the world would be a better place. So let me introduce you to the git stash command. What comes next seems a lot like a TV commercial from the 90s. Your life will change and your Git skills will skyrocket, you'll feel like Mr. Robot of Git, I can assure you.
So what or what does this famous git stash command do?
In simple words, it allows you to temporarily save your current changes in a stack, and leave your working directory the same as it was before you made any changes. Which will most likely be the last commit on the branch you're currently on, or wherever your HEAD commit is.
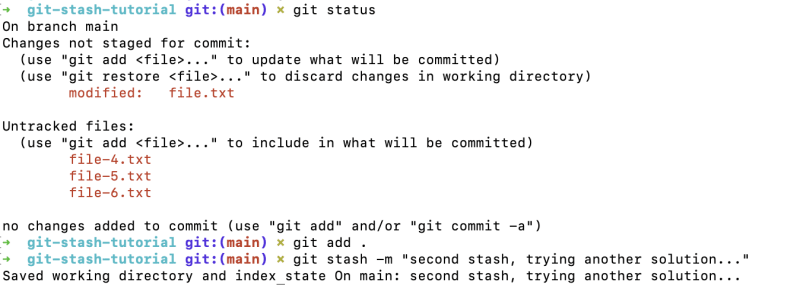
See, in this example we have three unstaged files

If we run git log, we will see that we have a commit to which we are applying the current changes. In our case, HEAD points to the last commit for the main branch.

Once we decide to stash our current changes, everything will be restored as it was on that commit. Now let's do our first stash to save our changes to the stash. But first we need to add the files we want to stash to the staging area, so we run the git add . command.

Once you have your changes in the staging area, we need to save them. To do this, we run git stash push -m "my first stash".
![]()
Then when we run git status you won't see your changes anymore, but they are not lost anymore, when you run git stash list you will see them like this.

Now you're free to go and work on some other unrelated thing without worrying about your last changes; you can switch branches, create new ones, or do whatever you want (just don't remove your repository, please). Now let's make this even more fun. Let's create a new set of files that represent different changes, so to speak, and stash them as we did before.
Now let’s see what happens when we run git stash list again.

As I mentioned before, the stash behaves like a stack in some way, the newer changes are placed on top of the old stashed changes. But do not worry, you can access them at will using the stash@{n} reference (n can be any number shown in the list) if you want to access the first stashed changes. Even though you couldn’t add a message, I encourage you to always add it, so you can easily tell them apart.
Now let's say you finish the changes your manager asked you to make that were on a different branch, when you come back to work on it and want to retrieve the changes you stashed, all you have to do is run git stash pop and voilá! You have your latest changes back in your working directory.
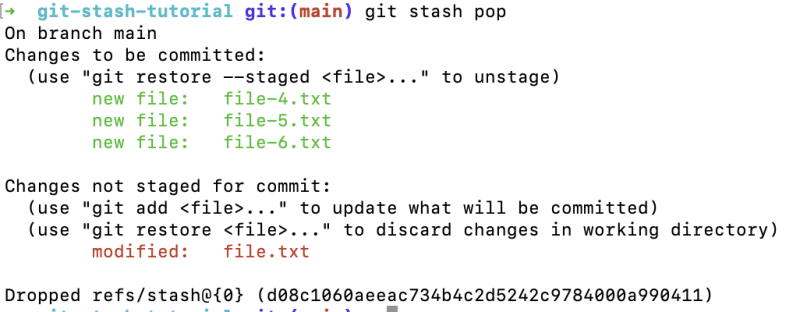
As you can see, this brings up the last changes we stashed, in this case it was stash@{0}. If by any chance the changes you want were the first ones we made at the very beginning, you can specify it like this: git stash pop stash@{1}.
Note that the pop option removes the changes from the stack. If you don't want to remove the changes from the stack, and want to keep them just in case, you can use apply. So it'll look something like this: git stash apply or git stash apply stash@{1}.
As you can see, this is a really simple, yet powerful and useful command that you, as a great developer, need to know.


Top comments (0)