The price of hosting a WordPress site can vary a lot. A lot of hosting platforms charge about 10+ USD for a basic WordPress installation on a shared server.
But there's a cheaper solution. It's even free, if you don't have too much traffic and want to use it for a personal site or your side project.
The trick is to use a cloud provider. Like Google Cloud Platform (GCP) or Amazon Web Services (AWS). The web interface of these Cloud Provider may seem overwhelming, but I will show you a simple and secure way to set it up.
Note: This guide is best suited for hobbyist/professional programmers. This may get more complicated in the long run. So if you are not a technical person, I suggest you should stick to a more expensive and convenient hosting provider.
Google Cloud Platform
When you visit the Google Cloud Platform for the first time, you will see this screen.
Choose your country and agree to continue at this point. Then continue to the marketplace by using the sidebar on the left.
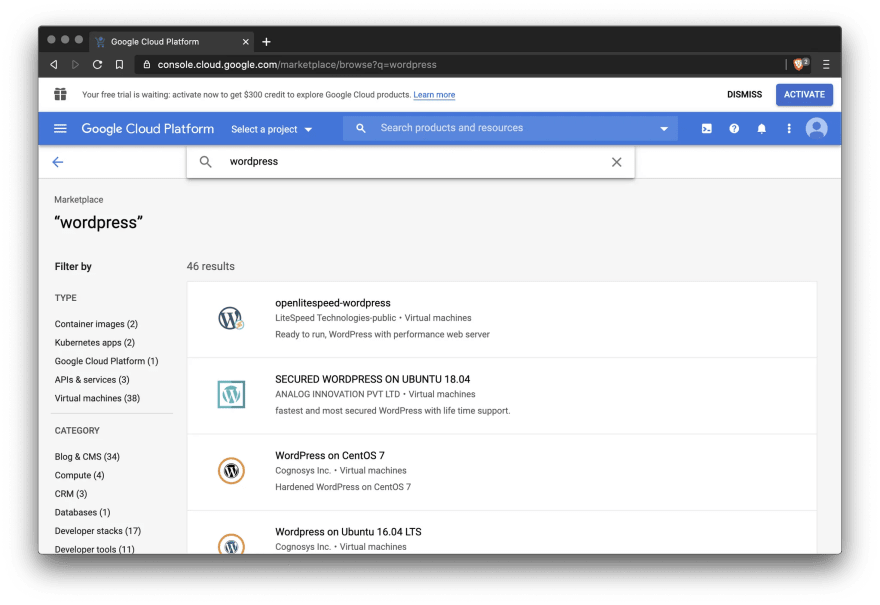
Type in WordPress and you will get about 40 results.
These are all different Virtual Machine (VM) configurations. They are preconfigured to serve all kinds of different use cases. Big international WordPress websites that use extremely powerful VM networks. Enterprise websites with high security. Or extremely efficient ones that you can use for free.
To simplify this process, we will use the standard one provided by Google.
On the details page you will see a cost estimate.
Estimated costs: $13.61/month. 💵
But wait. Didn’t I say it was free? 🤔
Yes! The estimated costs are for a g1-small virtual machine instance. This instance has 1 shared vCPU + 1.7 GB memory.
Well, there is a smaller one. The f1-micro is the lowest VM instance you can get and it is included in the free tier of GCP. So it’s completely free.
Hit the big blue launch button and it will ask you for your details. Enter those details and continue.
Almost done. There are 5 steps on this page.
- Select a zone in the US (Do not use us-east4)
- Select a micro machine
- Enter an E-Mail address
- Scroll to the bottom and hit deploy.
- Wait for the deployment to finish
When the deployment of the VM has finished, you will see all the details for your own server and WordPress Installation.
With the automatically generated passwords you can log in into your WordPress installation and do whatever you want with it.
Conclusion
Setting up your own WordPress VM on a cloud provider is not as hard as you might think. And it’s free. There is almost no reason to not do it.
I personally use it for a free headless WordPress CMS with GatsbyJS for my personal site. The static files are hosted on Vercel.com for free. Doing this gives me a blazing fast website with unlimited traffic, because the WordPress installation never gets direct traffic.
Next steps
Here are a couple things you can do to get comfortable with GCP
- Set up an automatic snapshot backup, so you don’t have to worry about loosing anything.
- Set it to every day and delete after 3 days.
- Create another instance
- Try the openlite-speed VM for WordPress
- Connect via SSH
- Generate a key
- Upload it under Compute Engine > Metadata
- Use ssh @ to connect


Top comments (1)
Is this free option still available in 2023?