Hello AoG Devs!!
In this little tutorial, I’ll show you how to read information from a Cloud Firestore and use it to dynamically generate responses for DialogFlow fulfilment.
I'll recommend you read Part 1 of this post. Click here
Prerequisite:
- Database with the collection and some documents.
- Basic knowledge of Javascript
I'll take the example of "DevFest Mumbai Action" which I've built with the help of Team GDG MAD.
So without wasting the time, Let's get started with the steps!
Step 1:
Create an intent inside the Dialogflow, we'll use this intent to call the function.
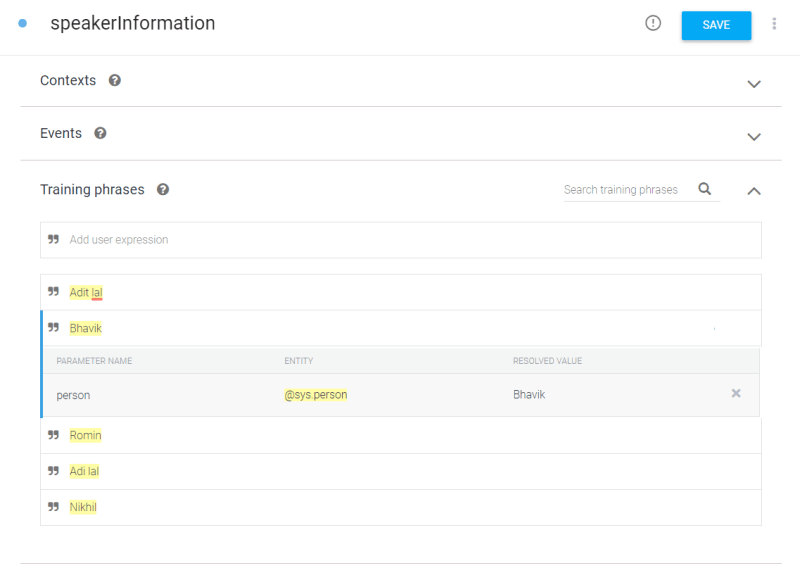
I've created the speakerInformation intent: This intent will read the data for a particular speaker from the database.
Here, the speaker name will be stored in the person parameter.
Don't forget to Enable the webhook for this intent
Step 2:
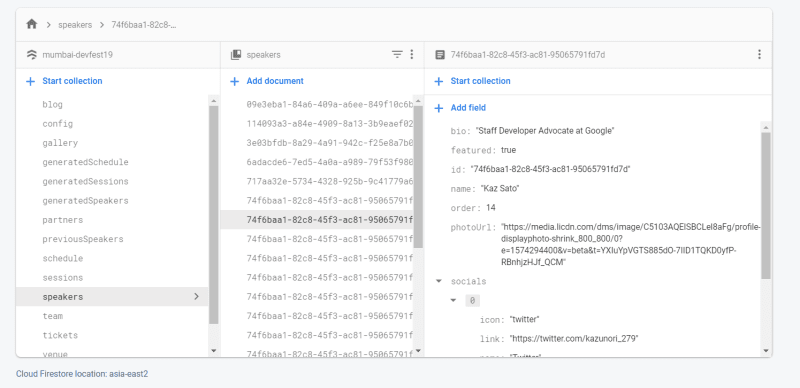
Firestore with the collection and a few documents.
The following image shows the collection of speakers and documents for each speaker.
Step 3:
Let's code!
- I've used ActionsSDK in this action. So We'll import the necessary packages first.
const {
  dialogflow,
  Image,
  BasicCard,
  Button,
} = require('actions-on-google')

const functions = require('firebase-functions')
const { firestore } = require('firebase-admin')
const domain = 'https://mumbai-devfest19.firebaseapp.com'
const app = dialogflow({ debug: false })
- Create a function to handle speakerInformation intent.
app.intent('speakerInformation', async (conv, param, option) => {
.
.
.
}
- Create a variable to store the parameter (User Input)
  const option_intent = conv.contexts.get('actions_intent_option');
  const option_text = option_intent.parameters.text;
  const speakerRef = await firestore().collection('speakers').where('name', '==', option_text).get()
- Loop to visit every document. doc variable will store the document.
speakerRef.forEach((doc) => {
    const data = doc.data() // Document data stored in _data_ variable
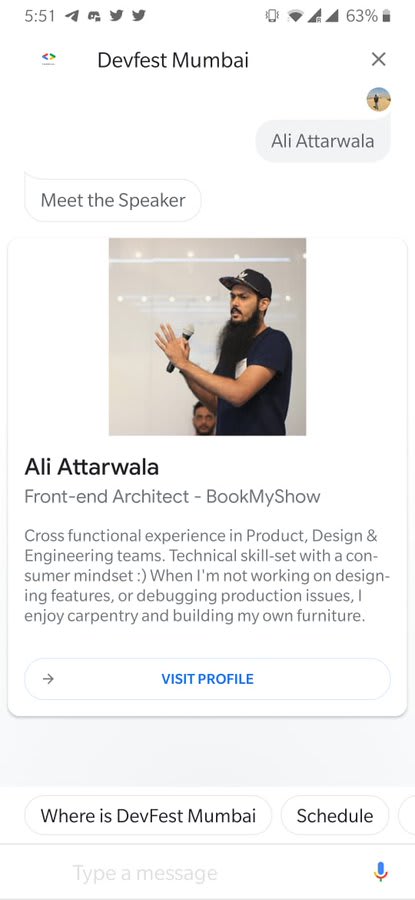
    conv.ask(`Meet the Speaker`);
- Card added to display the data
    conv.ask(new BasicCard({
          text: data.bio,
          subtitle: data.title,
          title: data.name,
          image: new Image({
            url: data.photoUrl,
            alt: `${data.name} photo`,
          }),
          display: 'CROPPED',
          buttons: new Button({
              title: 'Visit Profile',
              url: `${domain}/speakers/${data.id}`,
          }),
    }));
- exports the app
exports.fulfilment = functions.https.onRequest(app)
Complete code: Github
Want to explore Devfest Mumbai action? Just say "Hey Google, Talk to Devfest Mumbai"
This is it! You can now create dynamic responses in the Dialogflow fulfilment.
Learn More: Docs
Share your experience, and doubts in the comments or connect with me on Twitter


Top comments (0)