We all want to be able to focus on writing code, without wasting time when deploying changes to production.
But it's not that simple. There are several operations our code needs to go through going from development to production (I'm referring to a Laravel Application, but it will be similar for most web applications):
- Push our new code to the server.
- Update our Javascript & PHP dependencies.
- Compile our Javascript and CSS.
- Finally, we need to migrate the production database.
Doing all these operations manually before every deployment quickly gets too time consuming. Besides, it's a repetitive task that should be automated...
So for quite a while I researched & tried to find the best way to do this. At first my solution was using GitHub webhooks, but that solution had it's problems.
Last week, I finally found the perfect solution, which lets me deploy the code to production with just 2 keystrokes: gp 😎.
How it works
We're going to use Git (version control software). Git has several hooks that it can call after different stages automatically. We'll use the post-receive hook which is called after your repository has received pushed code.
A Hook is a program you can place in a hooks directory to trigger actions at certain points in git’s execution.
In this script we'll do all the above operations.
1. Login to your remote server
Open your terminal and login to your server using the following command:
ssh <your_user>@<server_ip_address>
Make sure that you have Git installed on the server.
2. Create a folder for your code
The source code for your application needs to be put somewhere. By convention, code goes inside the /var/www directory. Navigate there using:
cd /var/www
Now, create a new folder to put the source code. For this tutorial, it will be called app-folder.
mkdir app-folder
Now let's remember the full path to our app-folder is /var/www/app-folder/.
3. Initialize a git repository in your home folder
We'll create a git repository in our users' home folder. Let's create a repo folder to hold all our future repos:
mkdir -p ~/repo/my-app.git
Now, we'll navigate into our repo folder, and initialize a bare git repo:
cd ~/repo/my-app.git
git init --bare
Congratulations, we now have the git repo ready for use!
4. Create hook
After initializing the git repository, new folders should appear inside ~/repo/my-app.git/. Navigate to the hooks directory, and create a new file called post-receive using your preferred text editor.
cd hooks
vim post-receive
Make sure to spell post-receive right, because I misspelled it - post-recieve, and it took me a while to figure out why it wasn't working 😃...
Now for the serious part: we're going to write the program to deploy our application.
This is what my post-receive script ended up looking like (as mentioned above - this is for a Laravel app):
#!/bin/bash

TARGET="/var/www/app-folder"
GIT_DIR="/home/<username>/repo/my-app.git"
BRANCH="master"

while read oldrev newrev ref
do
        # only checking out the master (or whatever branch you would like to deploy)
        if [ "$ref" = "refs/heads/$BRANCH" ];
        then

                cd $TARGET
                pwd

                echo "activating maintenance mode"
                php artisan down

                echo "Ref $ref received. Deploying ${BRANCH} branch to production..."
                git --work-tree=$TARGET --git-dir=$GIT_DIR checkout -f $BRANCH

                echo "Running NPM build command"
                npm install
                npm run build

                echo "running composer install"
                /usr/local/bin/composer.phar install --no-interaction --no-dev --prefer-dist

                echo "running migrations"
                php artisan migrate --force

                echo "going back live..."
                php artisan up

        else
                echo "Ref $ref received. Doing nothing: only the ${BRANCH} branch may be deployed on this server."
        fi
done
The code is pretty self explanatory, as it is echoing out what it's doing.
Save the file, and make it executable by running this command:
chmod +x post-receive
The work on your server is done.
5. Push local code to the server
Back on our local machine, navigate to your project folder, and initialize a git repo (if it isn't already). Then we need to add our remote server as a remote:
git remote add <name-of-remote> ssh://<username>@<server_ip_address>/<path_to_git_directory>

# For our example:
git remote add azure ssh://<username>@<server_ip_address>/home/<username>/repo/my-app.git
I called my remote azure, as it's an Azure server.
Now, whenever you want to deploy your code, just run:
git push <name-of-remote> <name-of-branch>

# we can omit the branch name - it will default to master
git push azure
One second, this is more than 2 keystrokes!
Oh, you're right... to achieve that make your remote the default upstream, by running:
git push --set-upstream azure
Then you can deploy to production by running:
gp
It works, because gp is an alias to git push (if it isn't, you can add this alias yourself).
If you don't want to set the remote-server as the default upstream (you may want GitHub to be the default), then you can leave the default upstream to be origin (GitHub) and deploy to your server by running gp azure.
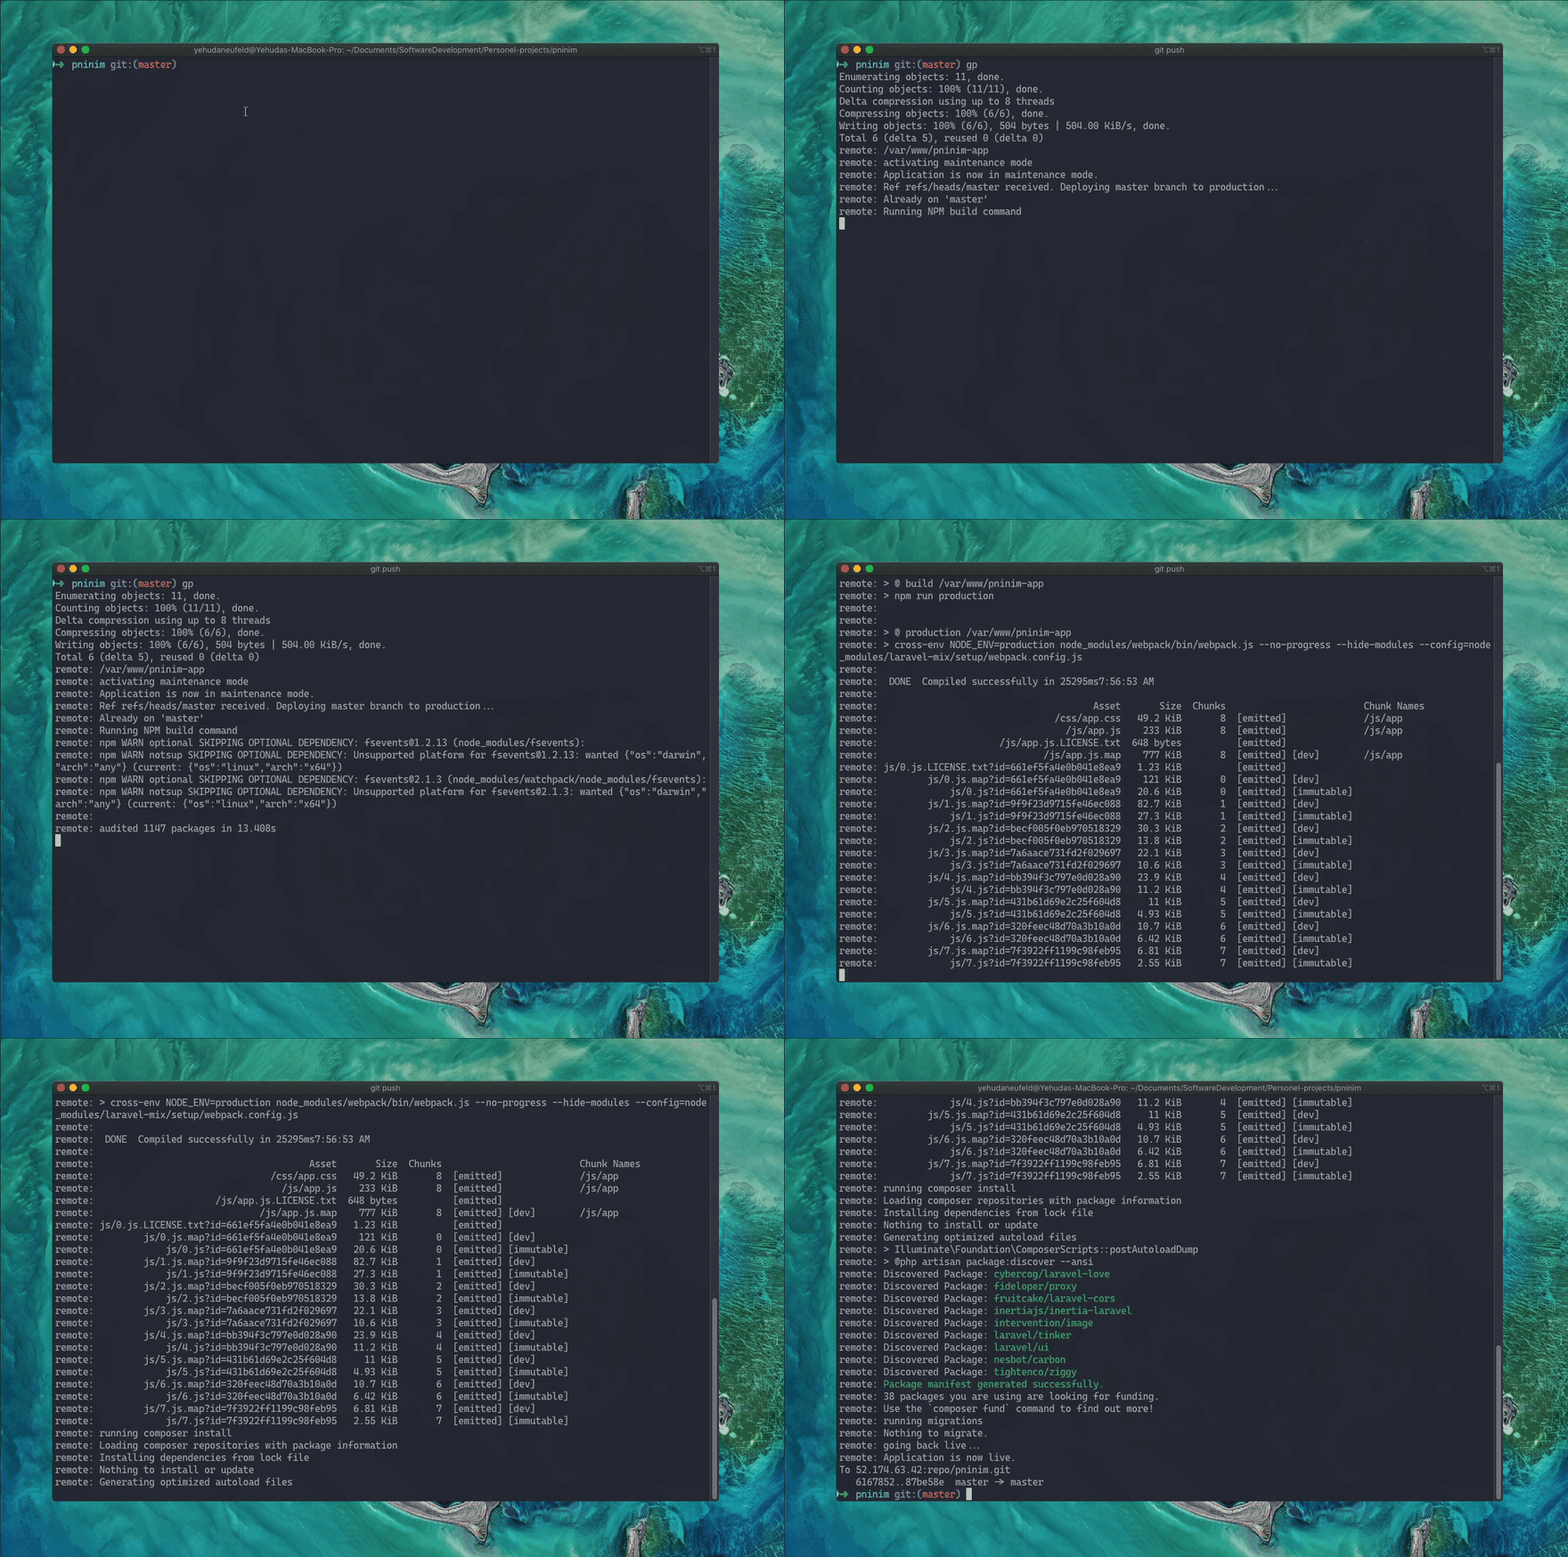
You even get all the output right into your local terminal! Here is the deployment in progress:
Summary
I'm writing this for my future reference, as this is so easy to setup, and makes deploying to production a breeze.
Sidenote
If you get errors relating to permissions, and to avoid having to use sudo in the web directory on your server, here is a solution with security in mind:
Add yourself to the www-data user group, and set the setgid bit on the /var/www directory such that all newly created files inherit this group as well.
# add yourself to the www-data group
sudo gpasswd -a "$USER" www-data

# apply the ownership to the /var/www folder
sudo chown -R "$USER":www-data /var/www

# Correct previously created files (assuming you to be the only user of /var/www):
find /var/www -type f -exec chmod 0660 {} \;
sudo find /var/www -type d -exec chmod 2770 {} \;


Top comments (0)