
前言
代码案例基于Api13。
最新的DevEco Studio,在创建一个新项目的时候,官方已经默认把RelativeContainer组件做为根布局使用了,由此可见,RelativeContainer组件的重要性;相对于其它的容器组件,它的出现,解决了一个实际开发中的重要问题,那就是复杂场景中的元素对齐。
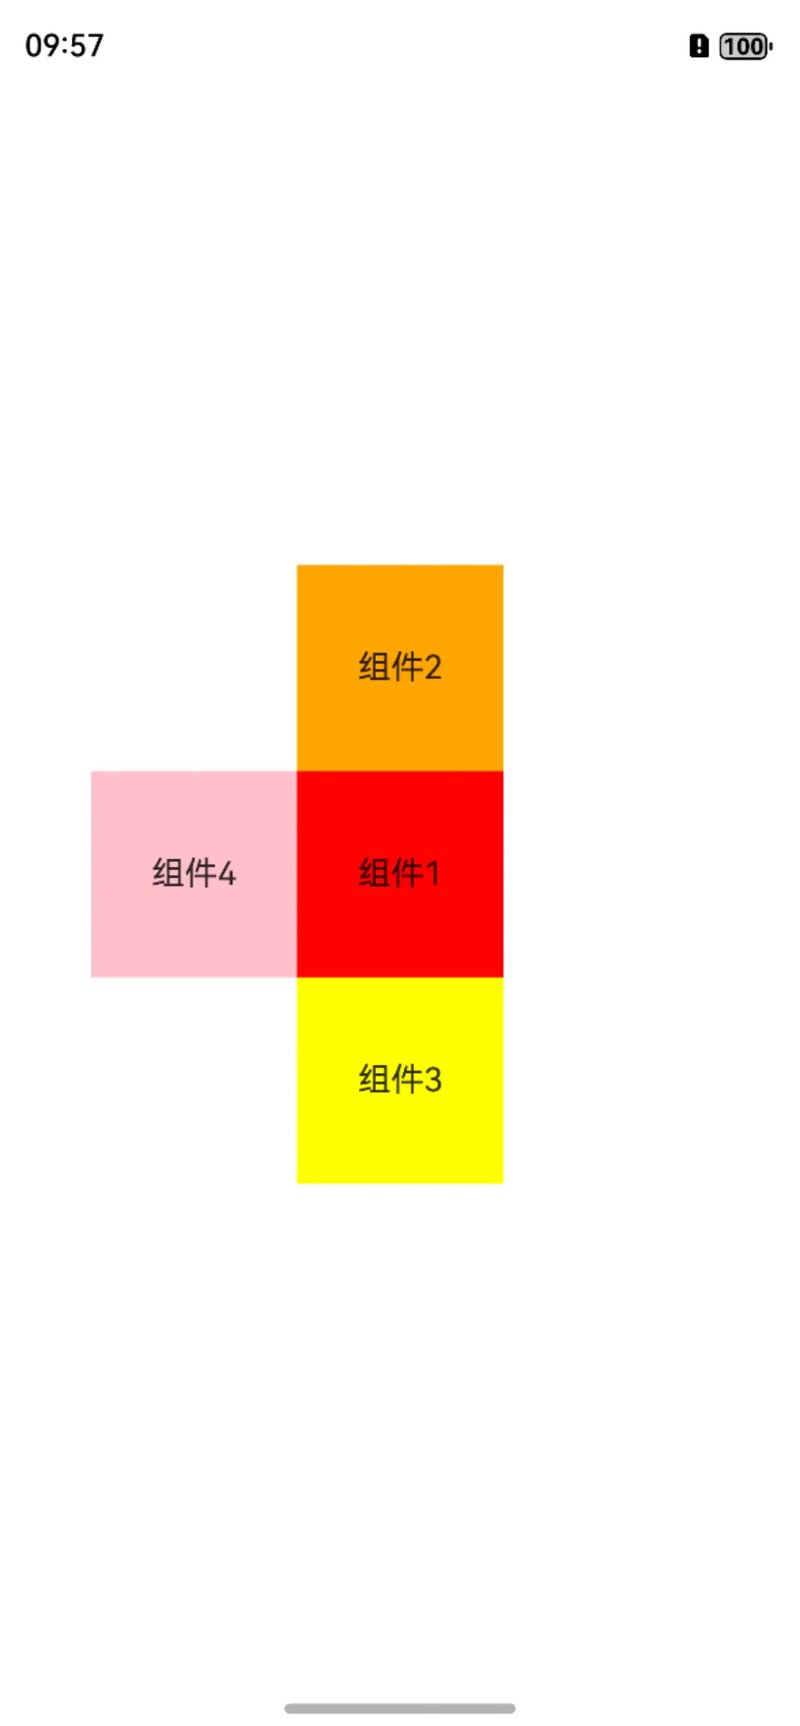
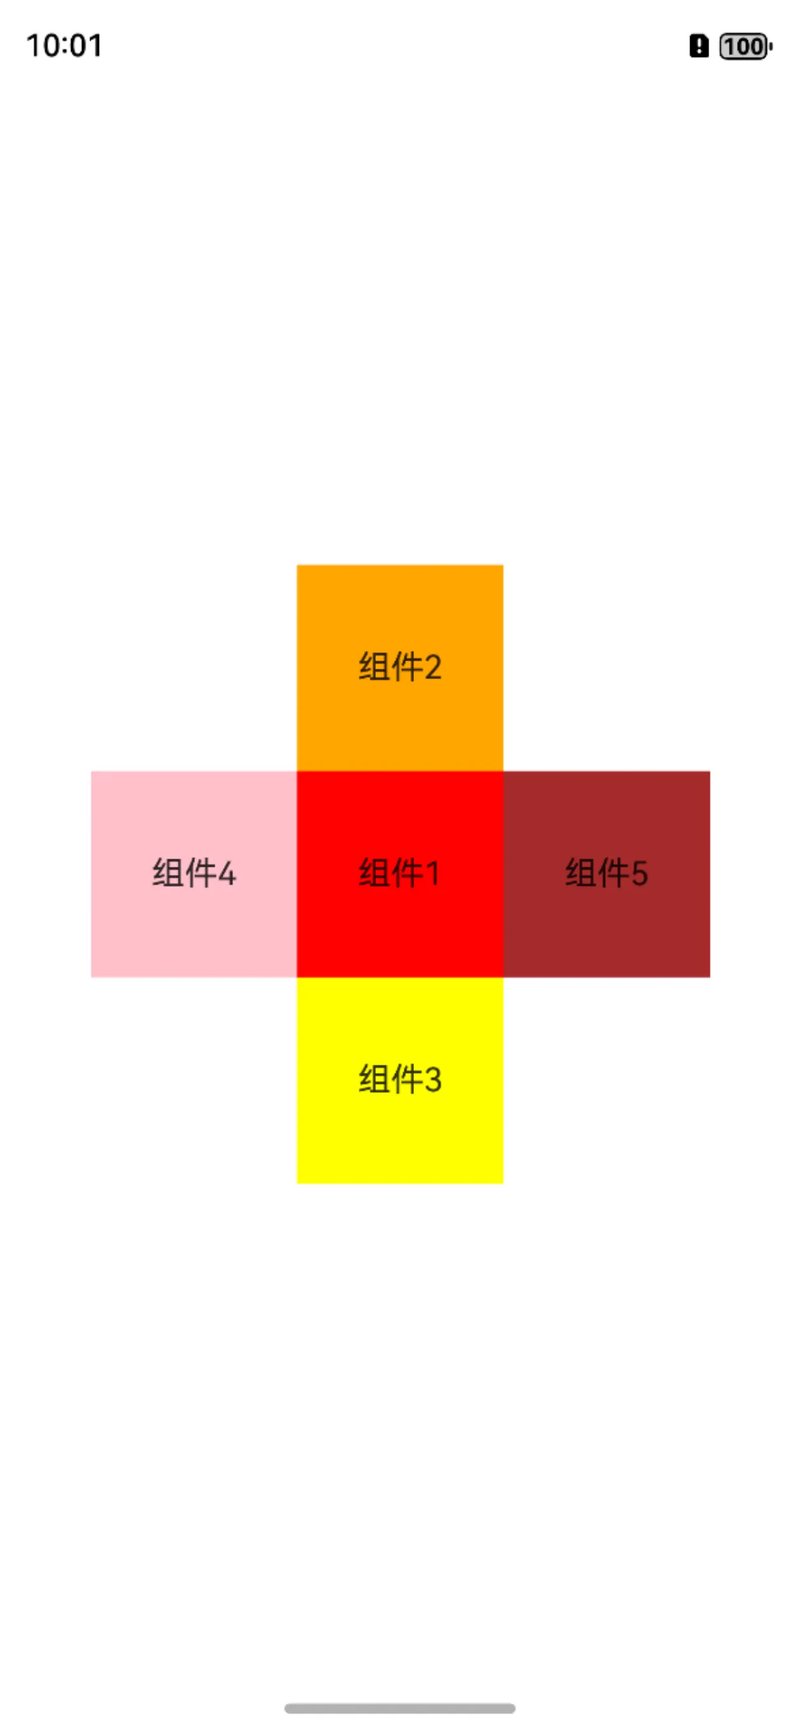
如下的组件之间的布局,如果没有RelativeContainer组件的情况下,我们该如何实现呢?显然需要嵌套很多容器组件,或者进行坐标定位才可以进行实现,有了RelativeContainer组件之后,我们就可以根据相对位置进行摆放就可以了。
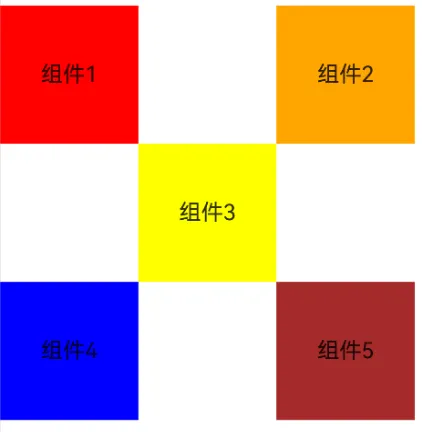
相关代码实现:
RelativeContainer() {
      Text("组件1")
        .width(100)
        .height(100)
        .id("view_1")
        .textAlign(TextAlign.Center)
        .backgroundColor(Color.Red)

      Text("组件2")
        .width(100)
        .height(100)
        .id("view_2")
        .textAlign(TextAlign.Center)
        .backgroundColor(Color.Orange)
        .alignRules({
          top: { anchor: "__container__", align: VerticalAlign.Top },
          right: { anchor: "__container__", align: HorizontalAlign.End }
        })

      Text("组件3")
        .width(100)
        .height(100)
        .id("view_3")
        .textAlign(TextAlign.Center)
        .backgroundColor(Color.Yellow)
        .alignRules({
          top: { anchor: "view_1", align: VerticalAlign.Bottom },
          left: { anchor: "view_1", align: HorizontalAlign.End },
          right: { anchor: "view_2", align: HorizontalAlign.Start }
        })

      Text("组件4")
        .width(100)
        .height(100)
        .id("view_4")
        .textAlign(TextAlign.Center)
        .backgroundColor(Color.Blue)
        .alignRules({
          top: { anchor: "view_3", align: VerticalAlign.Bottom }
        })

      Text("组件5")
        .width(100)
        .height(100)
        .id("view_5")
        .textAlign(TextAlign.Center)
        .backgroundColor(Color.Brown)
        .alignRules({
          top: { anchor: "view_3", align: VerticalAlign.Bottom },
          left: { anchor: "view_2", align: HorizontalAlign.Start }
        })
    }.width(300)
熟练运用RelativeContainer组件,也就是必须要知道相对位置的摆放,也就是相对谁,如何摆放。
使用规则
ID声明
B组件在A组件的右边,B组件如何知道A组件的位置呢?在相对布局中,通过给组件设置唯一标识id,来标记每一个组件,正如茫茫人海中,你的身份证就是你的唯一标识,设置id,非常重要,如果没有这个id,就会缺少对应的锚点组件,在相对布局中就无法实现位置的相对摆放。
Text("组件1")
        .width(100)
        .height(100)
        .id("view_1")
        .textAlign(TextAlign.Center)
        .backgroundColor(Color.Red)
位置摆放
通过id我们确定了锚点组件,但是相对这个锚点组件,我们是在它的左边,右边,还是上边,下边,就需要控制其对应的位置。
通过alignRules属性来控制当前组件的位置,有左上右下,水平居中,垂直居中等属性,每个属性对应着有两个参数,一个是anchor参数,锚点组件,一个是align,也就是位置,代码格式如下:
 .alignRules({
          top: { anchor: "__container__", align: VerticalAlign.Top },
          bottom: { anchor: "__container__", align: VerticalAlign.Bottom },
          left: { anchor: "__container__", align: HorizontalAlign.Start },
          right: { anchor: "__container__", align: HorizontalAlign.End }
        })
anchor设置为__container__,就是对应的是相对父组件,如果是确定的ID,那么就是ID对应的锚点组件。
align分为横向和纵向,水平方向为HorizontalAlign.Start、HorizontalAlign.Center、HorizontalAlign.End,分别代表的是,左中右,垂直方向为VerticalAlign.Top、VerticalAlign.Center、VerticalAlign.Bottom,代表着的是上中下。
居中案例
例举一个很简单的案例,让一个组件居中展示,那么就是相对于父容器设置,代码如下:
@Entry
@Component
struct Index {
  build() {
    RelativeContainer() {

      Text("组件1")
        .width(100)
        .height(100)
        .id("view_1")
        .textAlign(TextAlign.Center)
        .backgroundColor(Color.Red)
        .alignRules({
          top: { anchor: "__container__", align: VerticalAlign.Top },
          bottom: { anchor: "__container__", align: VerticalAlign.Bottom },
          left: { anchor: "__container__", align: HorizontalAlign.Start },
          right: { anchor: "__container__", align: HorizontalAlign.End }
        })

    }
  }
}
效果如下图展示:
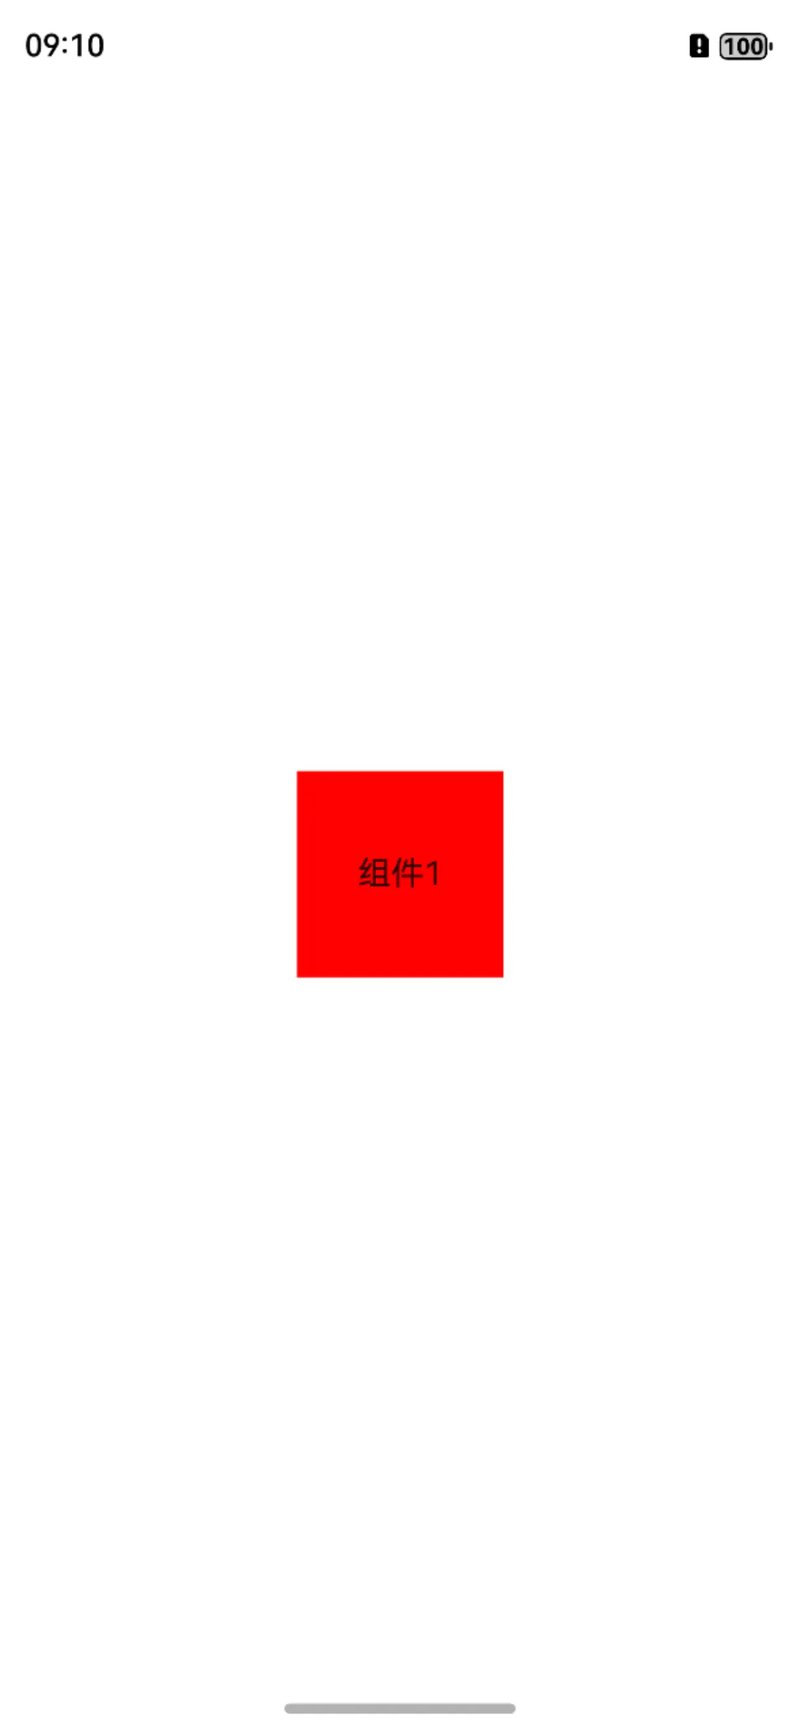
当然了,除了直接左上右下四个属性之外,我们有还可以直接设置水平居中和垂直居中属性,效果是一模一样的。
@Entry
@Component
struct Index {
  build() {
    RelativeContainer() {

      Text("组件1")
        .width(100)
        .height(100)
        .id("view_1")
        .textAlign(TextAlign.Center)
        .backgroundColor(Color.Red)
        .alignRules({
          center: { anchor: "__container__", align: VerticalAlign.Center },
          middle: { anchor: "__container__", align: HorizontalAlign.Center },
        })
    }
  }
}
锚点组件上边
在一个组件的上边,我们需要设置的是bottom属性,也就是底部在锚点组件的上边,然后结合锚点组件,在对应的设置其它属性,比如锚点组件是居中的,这里我们加了相对于父容器水平居中的属性middle。
@Entry
@Component
struct Index {
  build() {
    RelativeContainer() {

      Text("组件1")
        .width(100)
        .height(100)
        .id("view_1")
        .textAlign(TextAlign.Center)
        .backgroundColor(Color.Red)
        .alignRules({
          center: { anchor: "__container__", align: VerticalAlign.Center },
          middle: { anchor: "__container__", align: HorizontalAlign.Center },
        })

      Text("组件2")
        .width(100)
        .height(100)
        .id("view_2")
        .textAlign(TextAlign.Center)
        .backgroundColor(Color.Orange)
        .alignRules({
          bottom: { anchor: "view_1", align: VerticalAlign.Top },
          middle: { anchor: "__container__", align: HorizontalAlign.Center }
        })
    }
  }
}
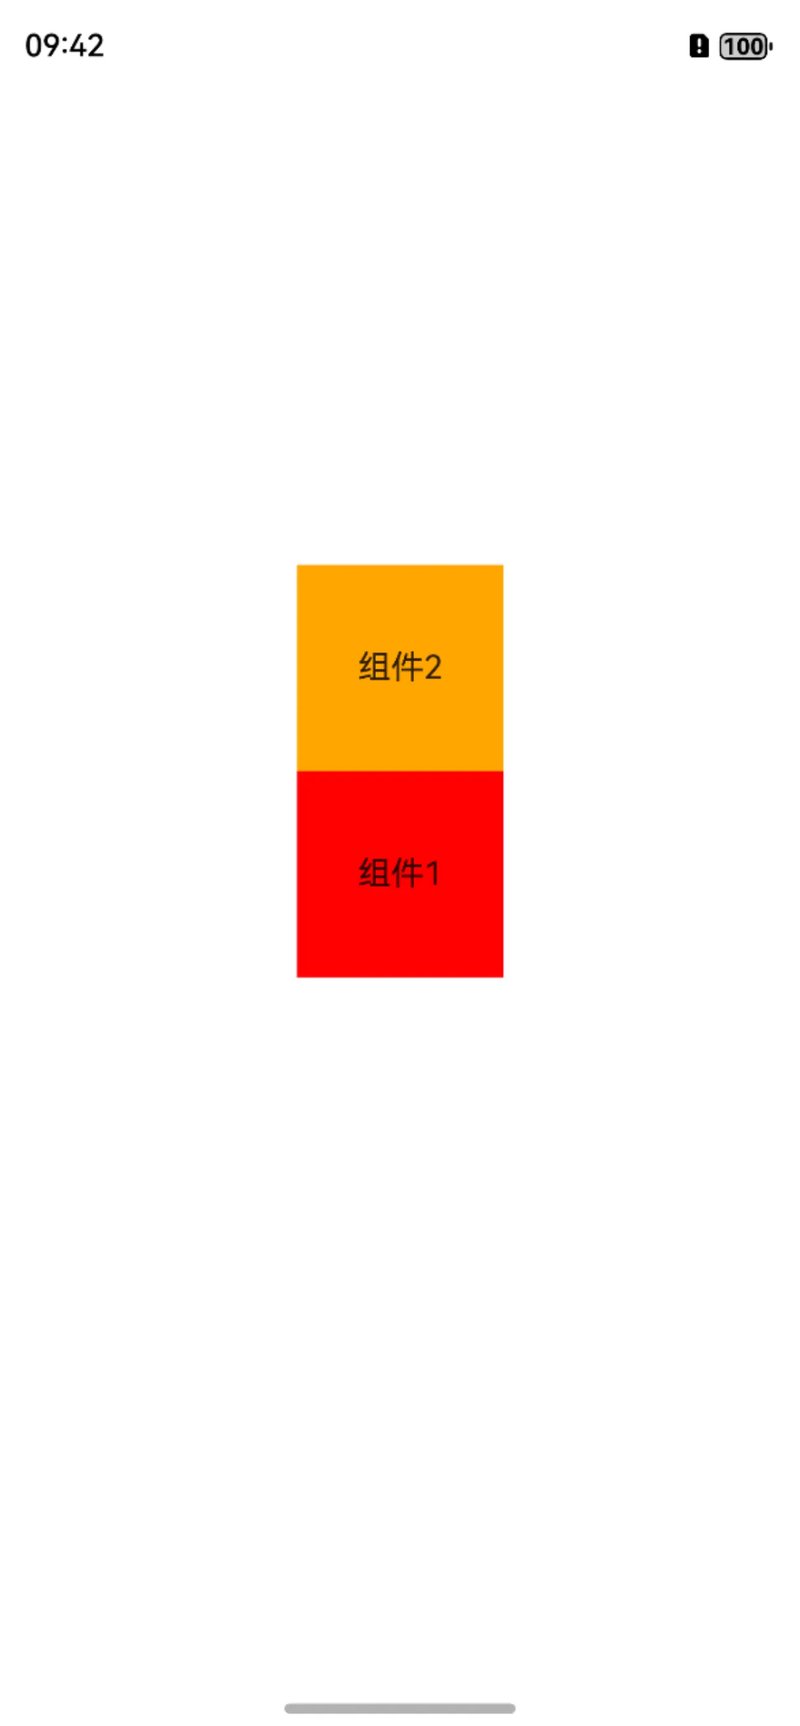
效果如下,可以看到组件2已经设置在了组件1的上边。
锚点组件下边
组件的下边和上边其实是类似的,无非把bottom属性换成top属性,也就是顶部在锚点组件的下面。
@Entry
@Component
struct Index {
  build() {
    RelativeContainer() {

      Text("组件1")
        .width(100)
        .height(100)
        .id("view_1")
        .textAlign(TextAlign.Center)
        .backgroundColor(Color.Red)
        .alignRules({
          center: { anchor: "__container__", align: VerticalAlign.Center },
          middle: { anchor: "__container__", align: HorizontalAlign.Center },
        })

      Text("组件2")
        .width(100)
        .height(100)
        .id("view_2")
        .textAlign(TextAlign.Center)
        .backgroundColor(Color.Orange)
        .alignRules({
          bottom: { anchor: "view_1", align: VerticalAlign.Top },
          middle: { anchor: "__container__", align: HorizontalAlign.Center }
        })

      Text("组件3")
        .width(100)
        .height(100)
        .id("view_3")
        .textAlign(TextAlign.Center)
        .backgroundColor(Color.Yellow)
        .alignRules({
          top: { anchor: "view_1", align: VerticalAlign.Bottom },
          middle: { anchor: "__container__", align: HorizontalAlign.Center }
        })
    }
  }
}
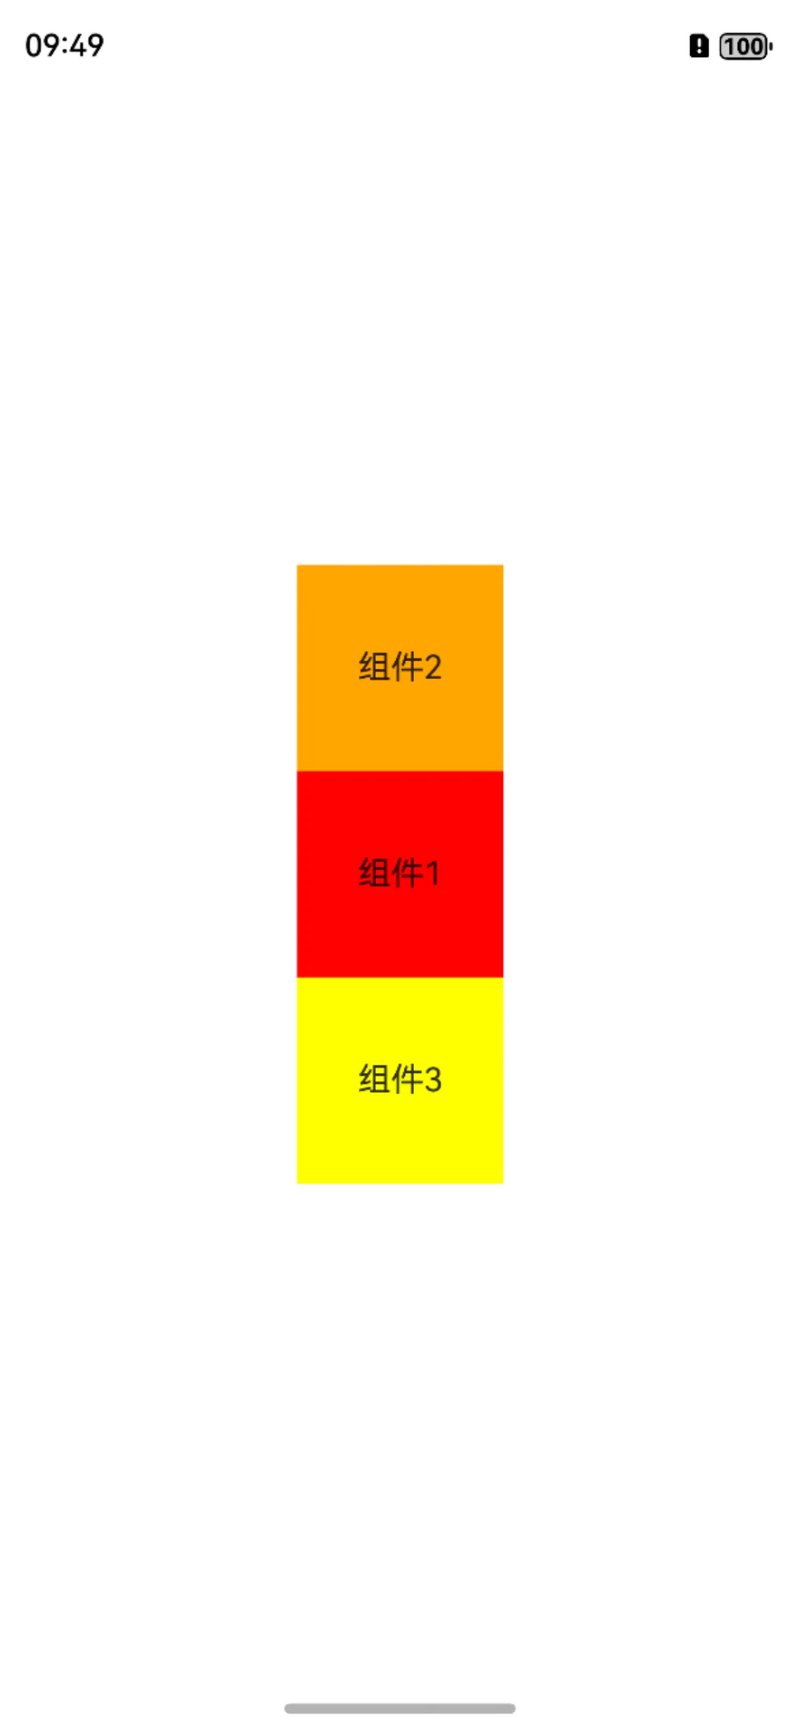
效果如下,可以看到组件3已经在组件1的下边。
锚点组件左边
左边,这里使用的是right属性,也就是锚点组件在右边,相关代码如下:
Text("组件4")
        .width(100)
        .height(100)
        .id("view_4")
        .textAlign(TextAlign.Center)
        .backgroundColor(Color.Pink)
        .alignRules({
          right: { anchor: "view_1", align: HorizontalAlign.Start },
          center: { anchor: "__container__", align: VerticalAlign.Center }
        })
我们看下效果,组件4在锚点组件1的左边。
锚点组件右边
右边,这里使用的是left属性,也就是锚点组件在左边,相关代码如下:
Text("组件5")
        .width(100)
        .height(100)
        .id("view_5")
        .textAlign(TextAlign.Center)
        .backgroundColor(Color.Brown)
        .alignRules({
          left: { anchor: "view_1", align: HorizontalAlign.End },
          center: { anchor: "__container__", align: VerticalAlign.Center }
        })
我们看下效果,组件5在锚点组件1的右边。
对齐位置
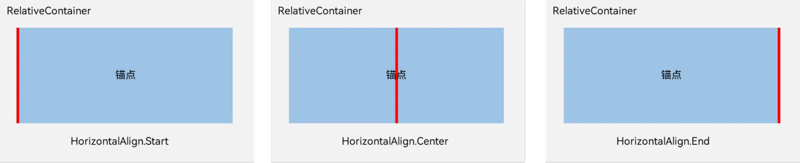
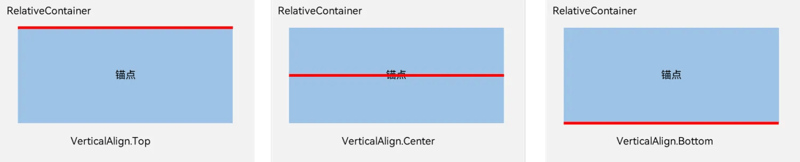
对齐位置,主要是相对于锚点的组件的位置,我们用官方的解释图,如下:
在水平方向上,对齐位置可以设置为HorizontalAlign.Start、HorizontalAlign.Center、HorizontalAlign.End。
在竖直方向上,对齐位置可以设置为VerticalAlign.Top、VerticalAlign.Center、VerticalAlign.Bottom。
相关总结
当然了,RelativeContainer组件还有着其它的属性,但是最重要的也就是位置的摆放,其实也就是相对于锚点组件的摆放;通过上述的案例,我们不难发现,所谓的左上右下,反着来就是对的,比如在锚点上边,我用bottom,在锚点下面,我用top,在实际的开发中,可极大节约我们的开发时间。


Top comments (0)