Welcome to another instalment of the "Build a Markdown Blog with Spring Boot" series. You can find the previous parts right here: Part 1 | Part 2 | Part 3 | Part 4
Recap
Right before this part, we have finished building how the blog works -- we use Markdown files stored in resources/posts directory to populate our database and then fetch the posts on respective requests using our PostController class.
Now, we need to render the posts. For this, we use Thymeleaf and Bootstrap. We already have a Thymeleaf dependency specified in our POM.
Bootstrap WebJar
For Bootstrap, we just need to add its WebJar in the pom.xml file.
Again, load the Maven changes in your POM file. Now we're ready to use Bootstrap in our Thymeleaf templates.
Header for our templates
Inside the resources/templates directory, create a new template: header.html. This will be the header portion of our blog that will be present in every page.
Notice how we specify both href and th:href attributes when linking Bootstrap. This is the reason why Thymeleaf is a natural template engine: Templates written in Thymeleaf can be rendered with or without the server running. When we run the server, Thymeleaf reads the th:href attribute and links Bootstrap using the WebJar resource. When the server isn't running, the browser uses the href attribute to link Bootstrap.
Creating a home page
Next, create a template, posts.html, that will serve as our home page.
Here, for each post retrieved from the database, a card element is created. We also use the #temporals utility provided by Thymeleaf to format our LocalDateTime instance so that we can render the month name, day, and year in the format: July 1, 2021.
You can additionally use a pagination element from Bootstrap to fetch paginated posts. (In this article, we will do it the manual way -- using request queries to specify the size and page.)
The one where we render a post
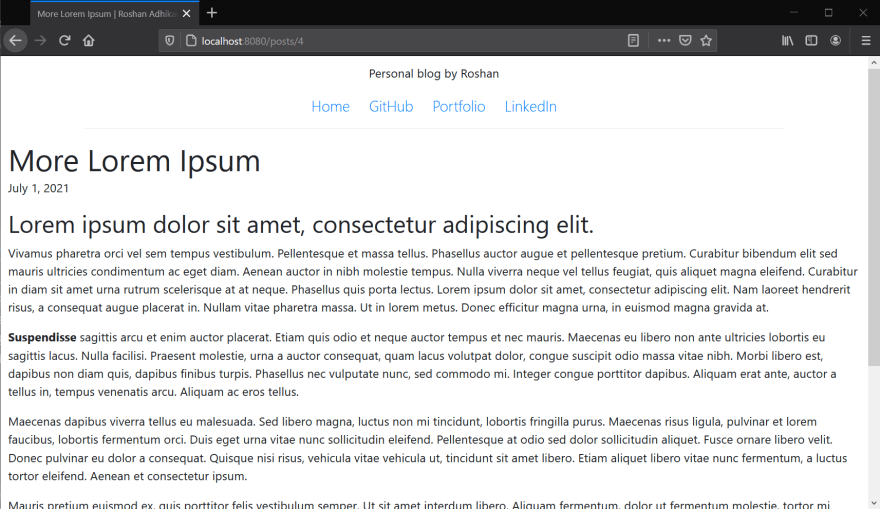
Now onto our post.html template. This will be the page that renders a single blog post in full.
In this template, we employ some error-handling mechanism. Go back to the PostController.getPostById method. Notice how if a post by a given ID doesn't exist, we add an error attribute with no-post value in the model.
In post.html if the model contains the error attribute, we change the title as well as the body to indicate an error. Otherwise, we render the respective blog post.
This is it for the coding portion of this series. To test if the pagination works, add some more Markdown files in the resources/posts directory, and fetch them from the website.
Running the application
Run the Spring Boot application and wait until the JVM starts running.
Visit localhost:8080 to see your most recent blog posts.

To modify the pagination parameters, we can use query strings in our request. For instance, localhost:8080/posts?page=0&size=3 should render the three most recent blog posts.

To render a blog post in full, we can use the ID of that post, or simply click the Read more hyperlink.

Code
We have successfully built the blog application that we set out to build. In the following article, we will see how we can deploy our application to Heroku, host our database on RemoteMySQL, and use Heroku's Automatic Deployment feature to update our blog whenever we add a new blog post.
This session's code has been pushed to the GitHub repository; for previous sessions, check here.


Top comments (0)