🔰 Beginners new to AWS CDK, please do look at my previous articles one by one in this series.
If in case missed my previous article, do find it with the below links.
🔁 Original previous post at 🔗 Dev Post
🔁 Reposted previous post at 🔗 dev to @aravindvcyber
In this article, let us refactor our existing counter construct which is triggering the current synchronous backend processor into an event-driven scalable solution by introducing an event bridge that pushes new messages into the dedicated queue which can be processed by a backend processor which writes the data to dynamodb.
Benefits achieved in this approach 🚣♀️
- This will help us achieve a layer of decoupling between counter and backend processors.
- By not invoking any new compute-intensive synchronous tasks like vertically adding a new lambda backend, so that our counter lambda can complete soon.
- Processing time of the counter lambda, by not waiting for the time our synchronous backend takes for its processing before the parent task is complete.
- Avoid scenarios like, we may end up when running 1000 lambda concurrently running by half, as we remove another lambda dependency and we could optimize our reservation on the lambda concurrency.
- We could also set a predefined number of batched lambda processors for the final backend (here 2 is our batch limit) and reuse our unreserved lambda concurrency limit in our other solutions efficiently.
- Continuous batch processing, keeps our lambda warm most of the time, whereas irregular spikes in lambda concurrency, may at times introduce a cold start more often.
New construct 🚧
We will start by creating a new file under the constructs folder like constructs/event-counter-bus.ts.
So, why do we create a construct, that's because we could reuse this elsewhere in various other cases. Also when I demonstrate a new construct, it will be more generalized and easy to follow with even the limited idea about the actual functional stack, which we have built up in our previous articles.
Counter with Bus construct 🚴♂️
Also, you can simply duplicate our previous construct constructs/event-counter.ts and start overwriting it as per our new requirement.
As like every other construct which we have created previously, let us start by importing the necessary libraries and interfaces for our props as shown below.
import { IEventBus } from 'aws-cdk-lib/aws-events';


export interface BusProperties {
  bus: IEventBus,
  props: {
    DetailType: string,
    EventBusName: string,
    Source: string,
  }
}

export interface EventCounterProps {
  /** the Event bus which we will use to send our messages to queue**/
  downstreamBus: BusProperties,
  //** refer our previous construct
  ////////////////////////
}
Counter-Bus handler specification 🚵♂️
We need to change our handler to event-counter-bus.counter and add some environment variables as shown below.
- DetailType: downstreamBus.props.DetailType,
- EventBusName: downstreamBus.props.EventBusName,
- Source: downstreamBus.props.Source,
const eventCounterFn = new lambda.Function(this, 'EventCounterHandler', {
        runtime: lambda.Runtime.NODEJS_14_X,
        handler: 'event-counter-bus.counter',
        code: lambda.Code.fromAsset('lambda'),
        environment: {
          DetailType: downstreamBus.props.DetailType,
          EventBusName: downstreamBus.props.EventBusName,
          Source: downstreamBus.props.Source,
          EVENT_COUNTER_TABLE_NAME: Counters.tableName
    },
    logRetention: logs.RetentionDays.ONE_MONTH,
});
Counter-Bus supporting lambda 🚴♀️
Now let us write our new lambda function
in the folder lambda as follows:
event-counter-bus.ts
Here as well we will be duplicating event-counter.ts and overwriting it a bit to get our desired effect.
Here will be only replacing the invoke lambda section with the below code to send an event to our event bus which we will create shortly inside our stack.
////// and the rest above in the previous file
  let resp = { Payload: ""};
  let output = { FailedEntryCount: 0}
  let data: PutEventsResultEntry[] | undefined = undefined;

  try {
    const msg: string = JSON.stringify({message});

    const eventData: EventBridge.PutEventsRequest = {
      Entries: [
        {
          Detail: msg,
          DetailType: process.env.DetailType || '',
          EventBusName: process.env.EventBusName || '',
          Source: process.env.Source || '',
        },
      ],
    };
   var proc: PromiseResult<PutEventsResponse, AWSError> = await eventBridge.putEvents(eventData).promise();
   output.FailedEntryCount = Number(proc.FailedEntryCount?.toString());
   resp.Payload = JSON.stringify(proc.Entries)

   data = proc.Entries

  } catch (err) {
    console.log(JSON.stringify(err));
    resp.Payload = JSON.stringify(err);
    ////// and the rest
Before this code block, we to have import the below modules to facilitate this and removed the unwanted modules in this lambda so that we have better memory usage.
import { PutEventsResponse, PutEventsResultEntry } from "@aws-sdk/client-eventbridge";
import { AWSError, EventBridge } from "aws-sdk";
import { PromiseResult } from "aws-sdk/lib/request";

const eventBridge = new EventBridge({ region: "ap-south-1" });
And the final return statement updated as shown below.
return {
      statusCode: 200,
      headers: { "Content-Type": "text/json" },
      body: JSON.stringify({data})
};
Asynchronous Processor lambda 🦙
Now let us create a simple processor lambda which will be invoked in a batch of 2 from the queue which we will define shortly.
In our case, we are reading the message from the queue and then we are extracting some information and writing this into dynamodb and thus we complete the simple processing step, which is more or less straightforward.
import { PutItemInput } from "aws-sdk/clients/dynamodb";

const { DynamoDB } = require("aws-sdk");

exports.processor = async function (event: any) {
  const dynamo = new DynamoDB();
  let result: any | undefined = undefined;
  await Promise.all(event.Records.map(async (msg: any) => {
    console.log("Received message:", JSON.stringify(msg, undefined, 2));
    const content = JSON.parse(msg.body);
    const putData: PutItemInput = {
      TableName: process.env.MESSAGES_TABLE_NAME || "",
      Item: {
        messageId: { S: content.id },
        createdAt: { N: msg.attributes.ApproximateFirstReceiveTimestamp },
        event: { S: msg.body },
      },
      ReturnConsumedCapacity: "TOTAL",
    };
    try {
      result = await dynamo.putItem(putData).promise()
    } catch (err) {
      console.log(err)
    }
  }));

  return {
    statusCode: 200,
    headers: { "Content-Type": "text/json" },
    body: {
      ProcessorResult: `Message Processed : ${JSON.stringify({ result })}\n`,
    },
  };
};
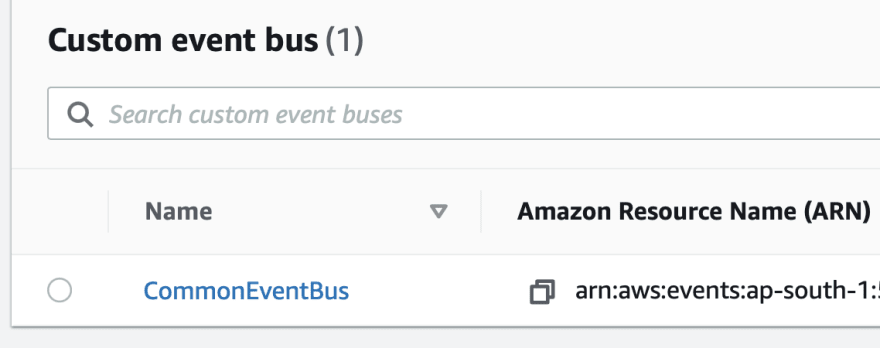
EventBridge setup - Common Event Bus 🐻
Now let us edit our common-event-stack.ts which we have created earlier in this series.
Let us define a new event bridge as follow.
const commonBus = new EventBus(this, "CommonEventBus", {
      eventBusName: "CommonEventBus",
});

commonBus.applyRemovalPolicy(RemovalPolicy.DESTROY);
Let us import the new construct which we have defined as follows with a bunch of other modules which we may require to define and configure the event bridge.
import { EventBus, Rule } from "aws-cdk-lib/aws-events";
import * as eventTargets from "aws-cdk-lib/aws-events-targets";
import { DeadLetterQueue, Queue } from "aws-cdk-lib/aws-sqs";
import { SqsEventSource } from "aws-cdk-lib/aws-lambda-event-sources";
import * as dynamodb from "aws-cdk-lib/aws-dynamodb";
import { EventCounterBus } from "../constructs/event-counter-bus";
Initialise the construct 🐰
Now let us initialize the event-counter-bus construct and most importantly don't forget to grant privileges for PutEvents to the event bus created above.
const eventCounterBus = new EventCounterBus(this, "eventEntryCounterBus", {
      downstreamBus: {
        bus: commonBus,
        props: {
          DetailType: "CommonEvent",
          EventBusName: "CommonEventBus",
          Source: "com.devpost.commonevent",
        },
      },
      tableName: "Event Counters",
      partitionKeyName: "Counter Name",
    });
commonBus.grantPutEventsTo(eventCounterBus.handler);
Queuing 🪶
A Queue helps to decouple and scale microservices, distributed systems, and serverless applications. SQS eliminates the complexity and overhead associated with managing and operating message-oriented middleware, and empowers developers to focus on differentiating work.
- Standard queues offer maximum throughput, best-effort ordering, and at-least-once delivery.
- SQS FIFO queues are designed to guarantee that messages are processed exactly once, in the exact order that they are sent.
Dead letter Queue 🦩
Before we define the various queue, we will be using in this article let us understand a DLQ, which can come very useful when we have some issues with our solution. The dead queue is supposed to grab these errored or failed messages, which could not be processed further in our pipeline. This can be later inspected to identify the issue. Normally creating this before creating an actual queue, makes good sense, as we did in this article.
Event Target DLQ 🦉
This will be used to buffer messages while we encounter issues in filtering via the event rule.
const commonEventTargetDLQ: DeadLetterQueue = {
      queue: new Queue(this, "commonEventTarget-DLQ", {
        retentionPeriod: Duration.days(14),
        removalPolicy: RemovalPolicy.DESTROY,
        queueName: "commonEventTarget-DLQ",
      }),
      maxReceiveCount: 100,
};
Event Processor DLQ 🦢
DLQ will be used to store failed messages, while we encounter issues when the processor fails to successfully process the message from the standard queue after a certain retry limit is met. This is sort of a secondary storage area for quick inspection
const commonEventProcessorQueueDLQ: DeadLetterQueue = {
      queue: new Queue(this, "commonEventProcessorQueueDLQ", {
        retentionPeriod: Duration.days(14),
        removalPolicy: RemovalPolicy.DESTROY,
        queueName: "commonEventProcessorQueueDLQ",
      }),
      maxReceiveCount: 100,
};
Queue for our lambda processor 🦆
This queue will be used to poll from and process the messages in a batch by the processor lambda as follows.
const commonEventProcessorQueue = new Queue(
      this,
      "commonEventProcessorQueue",
      {
        retentionPeriod: Duration.days(5),
        removalPolicy: RemovalPolicy.DESTROY,
        deliveryDelay: Duration.seconds(3),
        queueName: "commonEventProcessorQueue",
        visibilityTimeout: Duration.minutes(1),
        deadLetterQueue: commonEventProcessorQueueDLQ,
      }
);
Event Rule Target 🐘
We will define a new Target for our rules, we will define later in this article. This queue is a standard buffer area where our messages can reside for a period with an optional dead letter queue defined above commonEventProcessorQueueDLQ
const commonEventQueueTarget = new eventTargets.SqsQueue(
      commonEventProcessorQueue,
      {
        retryAttempts: 3,
        deadLetterQueue: commonEventProcessorQueueDLQ.queue,
      }
);
Event Bridge Rule 🐤
Now it is time to create an event-bridge rule which will be used for filtering the specific messages based on eventPattern we specify, here in this case we only use source but there are lots more including the DetailType, by which we could leverage to push messages to the specific target.
We have chosen the Queue which we defined as above us our target commonEventQueueTarget, but there are more connections which we do here, including invoking a new lambda, but to make it more scalable we brought in a queue which will be further vertically integrated with a lambda.
const eventRule = new Rule(this, `CommonEventProcessorRule`, {
      eventBus: commonBus,
      eventPattern: { source: [`com.devpost.commonevent`] },
      //targets: [commonEventTarget],
      targets: [commonEventQueueTarget],
      ruleName: "CommonEventProcessorRule",
});

eventRule.applyRemovalPolicy(RemovalPolicy.DESTROY);
Event bridge rule definition 🦫
initializing Processor lambda 🐻❄️
Here, we could also add the event-processor.ts lambda which we have scripted earlier in this article.
const eventProcessor = new lambda.Function(this, "EventProcessorHandler", {
      runtime: lambda.Runtime.NODEJS_14_X,
      code: lambda.Code.fromAsset("lambda"),
      handler: "event-processor.processor",
      logRetention: logs.RetentionDays.ONE_MONTH,
      environment: {
        MESSAGES_TABLE_NAME: envParams.messages.tableName || "",
      },
});

eventProcessor.applyRemovalPolicy(RemovalPolicy.DESTROY);
Linking Processor Queue to Processor lambda 🦏
Now link the new queue created to the above lambda processor by using the addEventSource function as follows.
eventProcessor.addEventSource(
      new SqsEventSource(commonEventProcessorQueue, {
        batchSize: 2,
})
);
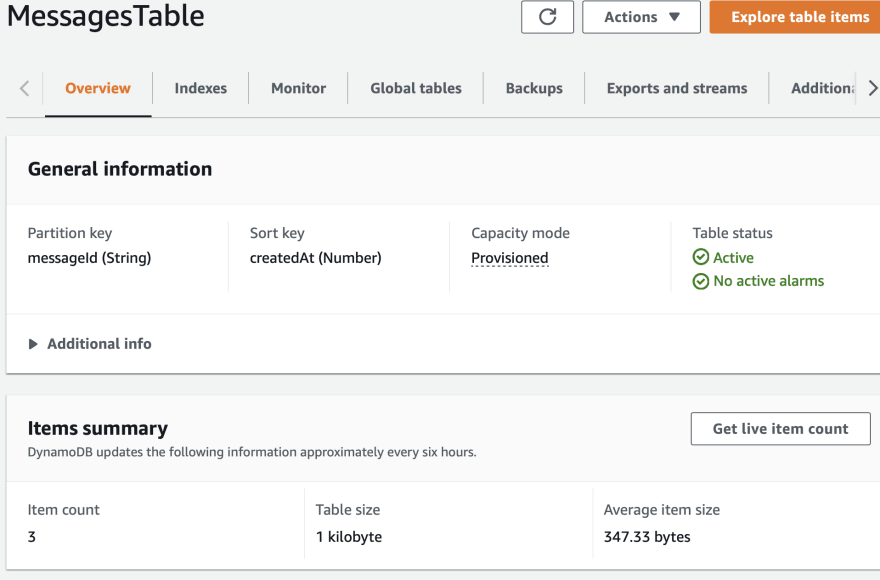
New Dynamodb table 🦤
Now let us add a new dynamodb table which we have earlier mentioned inside the event-processor.ts file.
const messages = new dynamodb.Table(this, "MessagesTable", {
      tableName: process.env.messagesTable,
      sortKey: { name: "createdAt", type: dynamodb.AttributeType.NUMBER },
      partitionKey: { name: "messageId", type: dynamodb.AttributeType.STRING },
      encryption: dynamodb.TableEncryption.AWS_MANAGED,
      readCapacity: 5,
      writeCapacity: 5,
});

messages.grantReadWriteData(eventProcessor);
Dynamodb table view on aws console 🐸
Postman testing of the solution 🦃
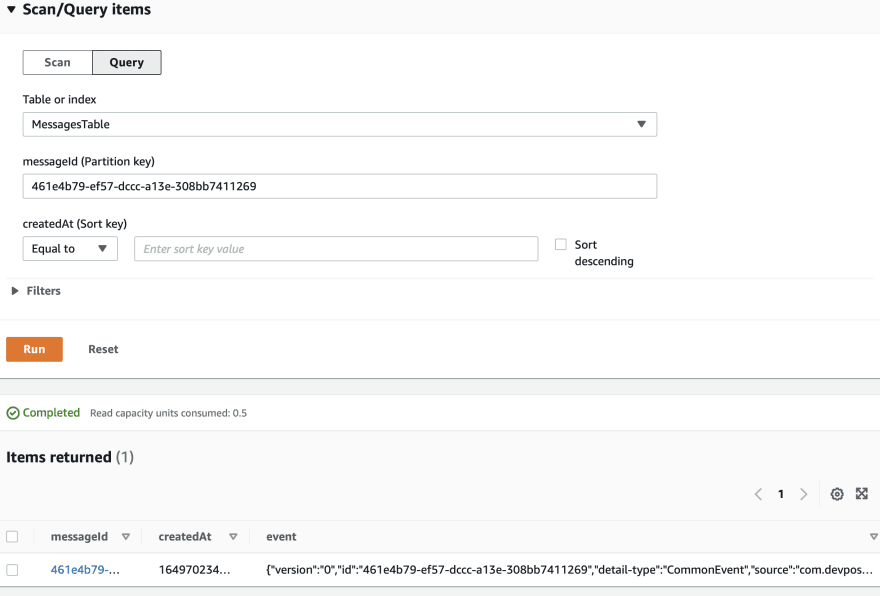
Lookup inside dynamodb using a query on the partitionkey 🦉
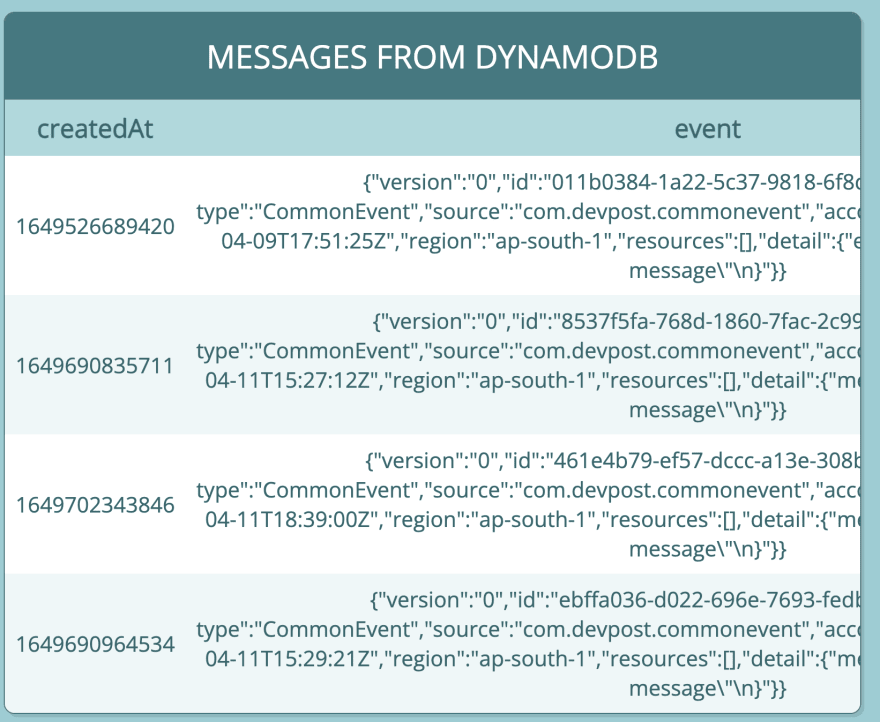
Simple full table view with sort 🦘
Refer to our previous articles on using cdk-dynamodb-table-viewer
const tblViewer2 = new TableViewer(this, "Messages-", {
      title: "Messages from Dynamodb",
      table: messages,
      sortBy: "-createdAt"
});
We will be adding more connections to our stack and making it more usable in the upcoming articles by creating new constructs, so do consider following and subscribing to my newsletter.
⏭ We have our next article in serverless, do check out
🎉 Thanks for supporting! 🙏
Would be great if you like to ☕ Buy Me a Coffee, to help boost my efforts.
🔁 Original post at 🔗 Dev Post
🔁 Reposted at 🔗 dev to @aravindvcyber
💖 AWS CDK 101 - 🏌️♀️ Scalable event-driven processing using Eventbridge and SQS#serverless #aws #dynamodb #awscdk #messagequeuehttps://t.co/cRb8hpHkxG
— Aravind V (@Aravind_V7) April 11, 2022


Top comments (0)